Table of Contents
Authentication is an important part of functionality across software applications and infrastructures. It allows you to restrict access to users the system recognizes via tokens, username and password pairs, certificates, and other authentication mechanisms.
You probably use several applications in your day-to-day activities, with most requiring you to sign in or sign up if you are using the application for the first time or returning after a long period. Remembering multiple passwords, as well as a host of email and password combinations to authenticate different systems can be annoying.
Single sign-on (SSO) takes care of this issue, allowing users to authenticate into multiple systems with a single identification, such as your email and password combination. This means you don’t have to remember multiple authentication credentials, and there are one or two fewer steps when registering on a new system.
SSO can also be used to streamline the process of adding developers to your Kubernetes cluster. Typically, developers use the kubectl client to communicate with a Kubernetes cluster. The kubectl has a configuration file that contains authentication certificates stored in your local computer. It uses these certificates to verify your identity whenever you want to communicate with a cluster.
As a cluster administrator, adding multiple developers can become a tedious process; you’re forced to create multiple certificates, which you must then share securely with each developer you want to add. Then, after the developers receive them, they must each update their kubectl config file. Adding developers to your cluster in this way is inefficient, and this is where SSO with Kubernetes can introduce significant improvements.
In this article, you’ll learn about SSO for Kubernetes, its use cases, and how to implement LDAP SSO for Kubernetes using Loft.
#What Is SSO for Kubernetes?
SSO for Kubernetes is an authentication pattern that allows developers to use their identities from other authentication systems to access a Kubernetes cluster. For instance, many organizations use Active Directory, a system that contains details of their employees. As a Kubernetes administrator, rather than creating separate identity credentials such as usernames and passwords, certificates, etc. for developers to access the cluster, SSO allows you to integrate the Active Directory with the Kubernetes cluster. Developers can then use the same Active Directory credentials to authenticate themselves into your Kubernetes cluster. There are several other use cases of SSO for Kubernetes, for example:
#Self-Service for Developers
As mentioned, you typically need to create new certificates and share them securely with each developer you want to add to your cluster. With SSO, that is no longer the case. Once SSO is integrated into your Kubernetes cluster, authorized developers can now log in via the SSO user interface and command-line terminal, which automatically creates a certificate and stores it in their Kubernetes configuration file. This eliminates the chore of generating authentication credentials for each developer, allowing them to do it themselves.
#Ease of Account Provisioning and Management
Managing developers' access can be tedious if you rely on static tokens and certificates you have generated for developers connecting to the cluster. Account management tasks, such as revoking developers’ access and removing or adding developers to the cluster, can also be painfully inefficient without SSO. With SSO successfully integrated into your cluster, the burden is removed, and it becomes much easier to provision new developers into the cluster and carry out other related authentication management.
#Implementing LDAP SSO for Kubernetes using Loft
There are several protocols you can use for implementing SSO in your Kubernetes cluster. Examples include Lightweight Directory Access Protocol (LDAP), OpenID Connect (OIDC), Kerberos, Open Authorization (OAuth2), and Security Assertion Markup Language (SAML).
In this section, you will learn how to implement LDAP SSO using an LDAP directory, Dex and Loft. Dex acts as the link to access and authenticate user information from your LDAP directory. Once Dex authenticates the user, it redirects to the Loft service, which prompts the user to fill in their preferred name on your cluster or use the default from the LDAP directory. The user is now recognized by Loft, allowing you to grant the user access to any cluster you have linked to your Loft account.
#Prerequisites
Before embarking on the tutorial, it’s important to have a Kubernetes cluster set up and running. You won’t be using Minikube for this tutorial, but for testing purposes, you can use any of the managed Kubernetes service providers such as AWS EKS, AKS, or GKE, all of which provide sign-up credits for first-time users.
It’s also important that you have an LDAP directory set up with more than one user. You can create a directory using Microsoft AD, OpenLDAP, etc. Additionally, you can check out this tutorial on how to add users to Microsoft AD.
#Setting up Loft in Your Cluster
Loft is the entry point for your users to get the cluster credentials they will use to communicate with the cluster from their local machine.
#Installing Loft CLI
The first requirement is to install the loft-cli in your local machine. Run the following command based on your local machine operating system:
# Mac or Linux bash
curl -s -L "https://github.com/loft-sh/loft/releases/latest" | sed -nE 's!.*"([^"]*loft-darwin-amd64)".*!https://github.com\1!p' | xargs -n 1 curl -L -o loft && chmod +x loft;
sudo mv loft /usr/local/bin;
# Windows Powershell
md -Force "$Env:APPDATA\loft"; [System.Net.ServicePointManager]::SecurityProtocol = [System.Net.SecurityProtocolType]'Tls,Tls11,Tls12';
Invoke-WebRequest -UseBasicParsing ((Invoke-WebRequest -URI "https://github.com/loft-sh/loft/releases/latest" -UseBasicParsing).Content -replace "(?ms).*`"([^`"]*loft-windows-amd64.exe)`".*","https://github.com/`$1") -o $Env:APPDATA\loft\loft.exe;
$env:Path += ";" + $Env:APPDATA + "\loft";
[Environment]::SetEnvironmentVariable("Path", $env:Path, [System.EnvironmentVariableTarget]::User);
For Windows users, it’s important you add the folder %APPDATA%\loft to your PATH environment variable after installing Loft CLI via Powershell. Reboot run the following command to confirm that you have successfully installed Loft CLI:
loft --version
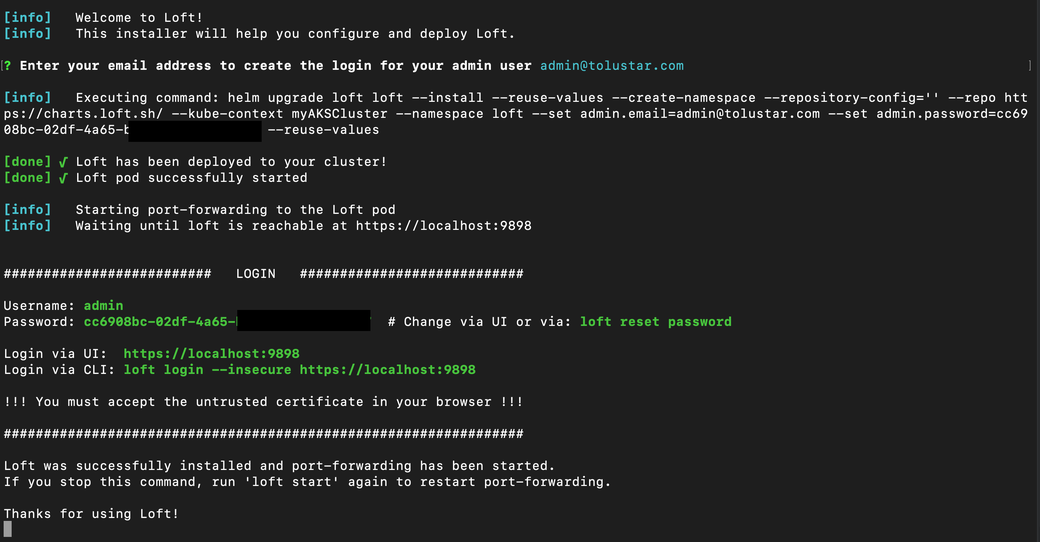
After installing the Loft CLI, run the following command to set up your Loft Admin account and install Loft in your cluster:
loft start
Your outcome should look something like this:
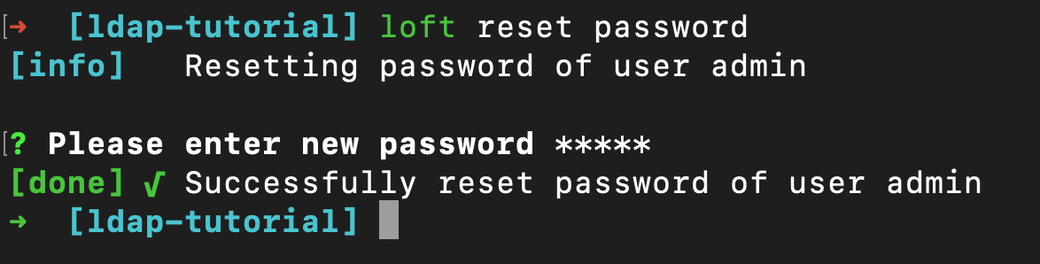
You can reset your password to something you can easily remember by running the command below:
loft reset password
#Ingress Controller and Domain Set Up
You also need to have an ingress controller installed in your cluster. If you already have one, you can skip the installation steps. If you don’t, here’s the command to install Nginx Ingress Controller:
helm upgrade --install ingress-nginx ingress-nginx --repository-config='' \
  -n ingress-nginx --create-namespace \
  --repo https://kubernetes.github.io/ingress-nginx \
  --set-string controller.config.hsts=false \
  --wait
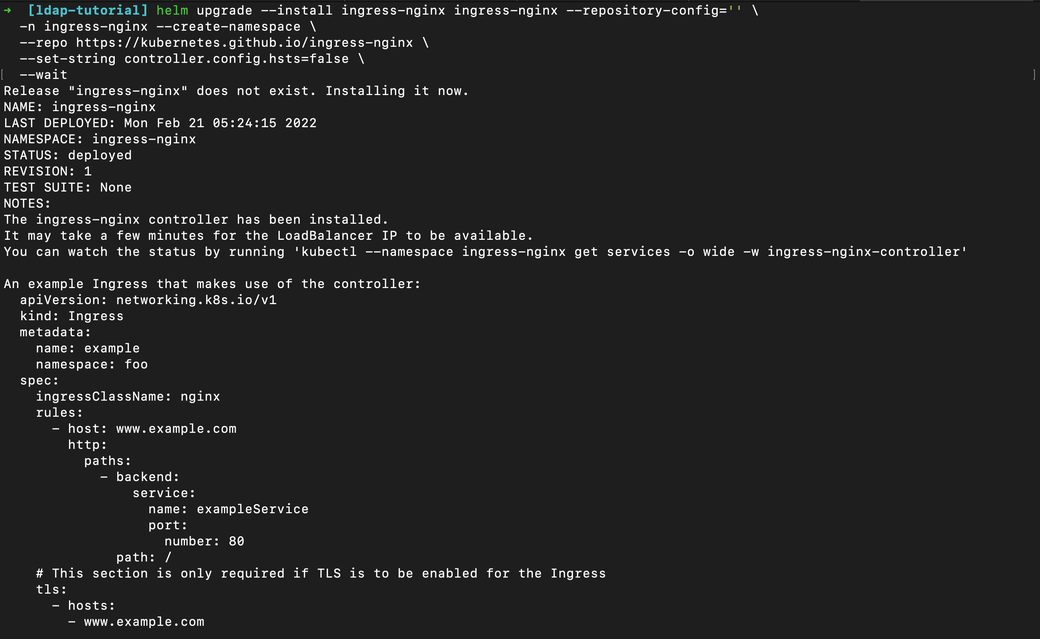
You should now have Nginx Ingress Controller successfully installed in your cluster with a result similar to the image above.
Retrieve your external IP address by running:
kubectl get services ingress-nginx-controller -n ingress-nginx
Configure a domain such as loft.YOUR_COMPANY.tld that points to the external IP address by setting up an “A” DNS record via your domain services provider.
#Configuring TLS for your Domain
Next, you will configure your domain to be accessible via HTTPS. Start by running the command below:
helm upgrade --install  cert-manager cert-manager  --repository-config=''\
  --namespace cert-manager  --create-namespace \
  --repo https://charts.jetstack.io \
  --set installCRDs=true \
  --wait
Once you’ve installed the cert-manager, create a file name loft.yaml and paste the following:
ingress:
  enabled: true
  host: "loft.YOUR_COMPANY.tld" # replace loft.YOUR_COMPANY.tld to the subdomain you configured in your DNS record
  ingressClass: "nginx"
  annotations:
    cert-manager.io/cluster-issuer: lets-encrypt-http-issuer
  tls:
    enabled: true
    secret: tls-loft

certIssuer:
  create: true                                      # Change this if you already have your own cert-issuer
  name: lets-encrypt-http-issuer
  email: "YOUR_EMAIL"                               # REQUIRED
  secretName: loft-letsencrypt-credentials
  httpResolver:
    enabled: true
    ingressClass: nginx
  resolvers: []
  server: https://acme-v02.api.letsencrypt.org/directory
Then set the $VERSION variable to the Loft version you want to upgrade to or set it to the current version using the command below:
CHART=$(kubectl get service loft -n loft -o jsonpath={.metadata.labels.chart})
VERSION=${CHART:5}
Then, run the following command to allow your Loft dashboard to be accessible on the domain address you have configured:
loft start --upgrade --version=$VERSION --values=loft.yaml
Voilà! Your Loft dashboard is now accessible via your domain name https://loft.YOUR_COMPANY.tld
#Configuring Dex ldap for Loft
As mentioned in the Prerequisites section, it’s important you already have an LDAP server up and running.
Once again, configure a domain for Dex such as dex.YOUR_COMPANY.tld that points to the same external IP address you used to configure loft.YOUR_COMPANY.tld via your domain services provider.
Next, you have to configure SSL for the domain. Create a dex-tls.yaml file and paste in the following:
apiVersion: cert-manager.io/v1
kind: Issuer
metadata:
  name: dex-issuer
  namespace: dex
spec:
  acme:
    # Staging API
    server: https://acme-v02.api.letsencrypt.org/directory
    email: YOUR_EMAIL
    privateKeySecretRef:
      name: letsencrypt-key
    solvers:
    - http01:
       ingress:
         class: nginx

---

apiVersion: cert-manager.io/v1
kind: Certificate
metadata:
  name: dex-certificate
  namespace: dex
spec:
  secretName: dex-tls
  issuerRef:
    name: dex-issuer
  dnsNames:
  - dex.YOUR_COMPANY.com
Then, run the following command to create a dex namespace and apply the manifest file:
kubectl create namespace dex
kubectl apply -f dex-tls.yaml
Next, create a dex-config.yaml file and paste the following into it:
ingress:
  enabled: true
  annotations:
    kubernetes.io/ingress.class: nginx
  hosts:
  - host: dex.YOUR_COMPANY.tld                             # Use $DEX_HOSTNAME
    paths:
      - path: /
        pathType: ImplementationSpecific
  tls:
     - secretName: dex-tls
       hosts:
         - dex.YOUR_COMPANY.tld
config:
  issuer: https://dex.YOUR_COMPANY.tld                     # "https://" + $DEX_HOSTNAME
  connectors:
  - type: ldap
    id: ldap
    name: LDAP
    config:
      host: ldap.YOUR_COMPANY.tld:636                        # Your LDAP server hostname:port
      # insecureNoSSL: true                               # Change to false if your LDAP server uses ssl for a secured connection
      # insecureSkipVerify: true                          # If your LDAP server uses a certificate that can not be verified such as self-signed certificates leave it as true, otherwise, change to false
      # rootCAData: ( base64 encoded PEM file )
      # startTLS: true                                    # Use ldap:// instead of ldaps:// protocol

      # The DN and password for an application service account. The connector uses
      # these credentials to search for users and groups. Not required if the LDAP
      # server provides access for anonymous auth.
      # Please note that if the bind password contains a `$`, it has to be saved in an
      # environment variable which should be given as the value to `bindPW`.
      bindDN: uid=serviceaccount,cn=users,dc=example,dc=com
      bindPW: password

      # User search maps a username and password entered by a user to a LDAP entry.
      userSearch:
        # BaseDN to start the search from. It will translate to the query
        # "(&(objectClass=person)(uid=<username>))".
        baseDN: cn=users,dc=example,dc=com
        # Optional filter to apply when searching the directory.
        filter: "(objectClass=person)"
        # username attribute used for comparing user entries. This will be translated
        # and combined with the other filter as "(<attr>=<username>)".
        username: uid
        # The following three fields are direct mappings of attributes on the user entry.
        # String representation of the user.
        idAttr: uid
        # Required. Attribute to map to Email.
        emailAttr: mail
        # Maps to display name of users. No default value.
        nameAttr: name

      # Group search queries for groups given a user entry.
      groupSearch:
        # BaseDN to start the search from. It will translate to the query
        # "(&(objectClass=group)(member=<user uid>))".
        baseDN: cn=groups,dc=freeipa,dc=example,dc=com
        # Optional filter to apply when searching the directory.
        filter: "(objectClass=group)"
        # Represents group name.
        nameAttr: name
        # Following list contains field pairs that are used to match a user to a group. It adds an additional
        # requirement to the filter that an attribute in the group must match the user's
        # attribute value.
        userMatchers:
        - userAttr: uid
          groupAttr: member
  staticClients:
  - name: Loft
    id: loft                                              # Define a preferred $DEX_CLIENT_ID
    secret: XXXXXXXXXXXXXX                                # Define a preferred $DEX_CLIENT_SECRET (can be any secret key)
    redirectURIs:
    - 'https://loft.YOUR_COMPANY.tld/auth/oidc/callback'     # Loft URL + /auth/oidc/callback
  oauth2:
    skipApprovalScreen: true
  web:
    http: 0.0.0.0:5556
  storage:
    type: kubernetes
    config:
      inCluster: true
Then run the following command to deploy Dex:
helm install dex dex --repo https://charts.dexidp.io \
  --create-namespace --namespace dex \
  -f dex-config.yaml \
  --wait
Log in to your Loft dashboard at https://loft.YOUR_COMPANY.tld, complete your profile, and then navigate to Admin > Config and adjust your Loft configuration as seen below:
audit:
  enabled: true
  oidc:
    issuerUrl: https://dex.YOUR_COMPANY.tld  # use $DEX_HOSTMANE as configured in your `dex-config.yaml` file
    clientId: "loft"  # use the preferred $DEX_CLIENT_ID you configured in your `dex-config.yaml` file
    clientSecret: "loft" # use the preferred $DEX_CLIENT_SECRET you configured in your `dex-config.yaml` file
    redirectURI: https://loftcluster.tolustar.com/auth/oidc/callback # use the `redirectURI` configured in your `dex-config.yaml` file
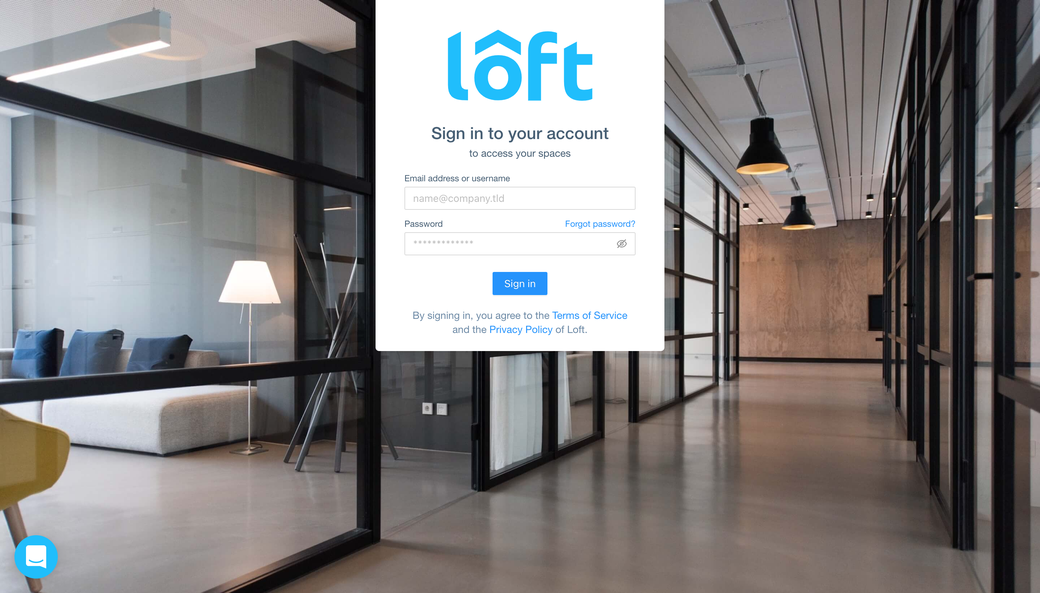
Open an incognito browser window, and access your Loft domain (https://loft.YOUR_COMPANY.tld). You should see a page similar to the image below.
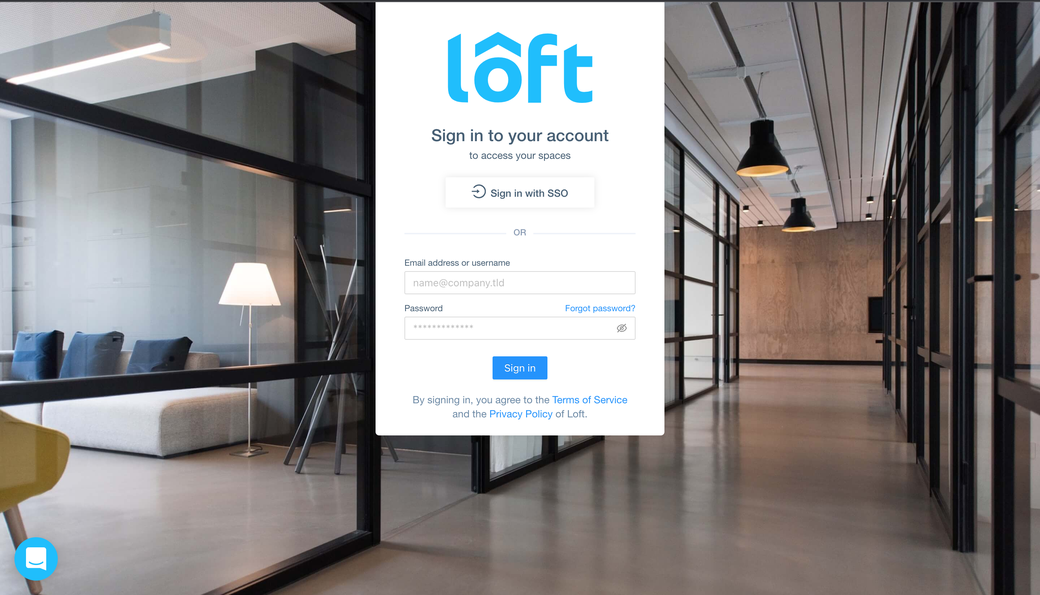
As you’ll notice, you have a new button titled Sign in with SSO. Clicking the button will redirect you to https://dex.YOUR_COMPANY.tld with a page similar to the image below.
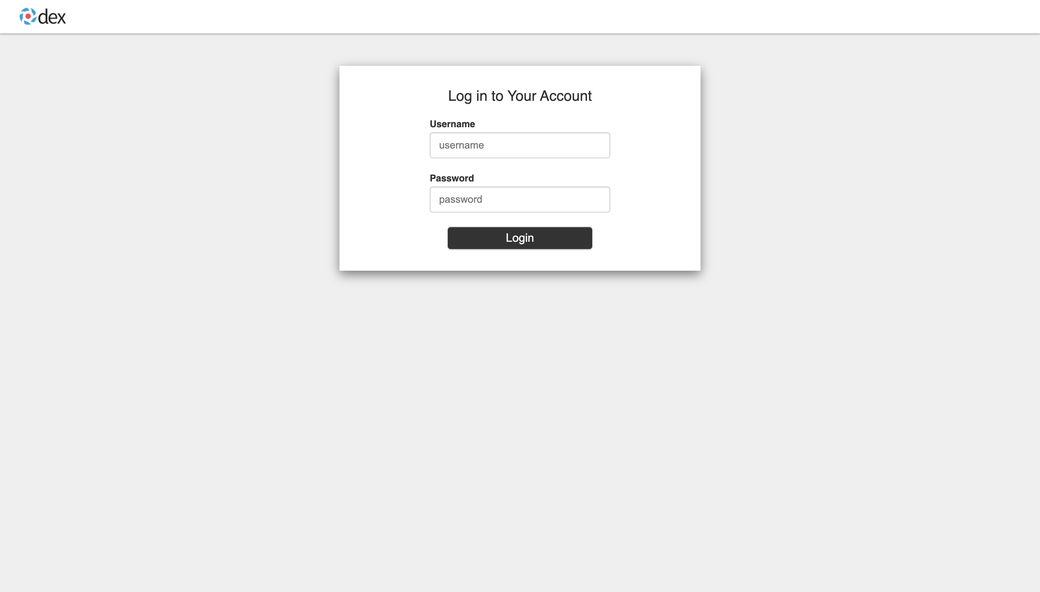
Input the username and password of any of the users in your LDAP directory and complete the developer’s profile. Your Loft account will recognize the developer. It’s important to note that any user or group in your LDAP directory matching the filter configured in your dex-config.yaml can visit https://loft.YOUR_COMPANY.tld to authenticate and complete their profile.
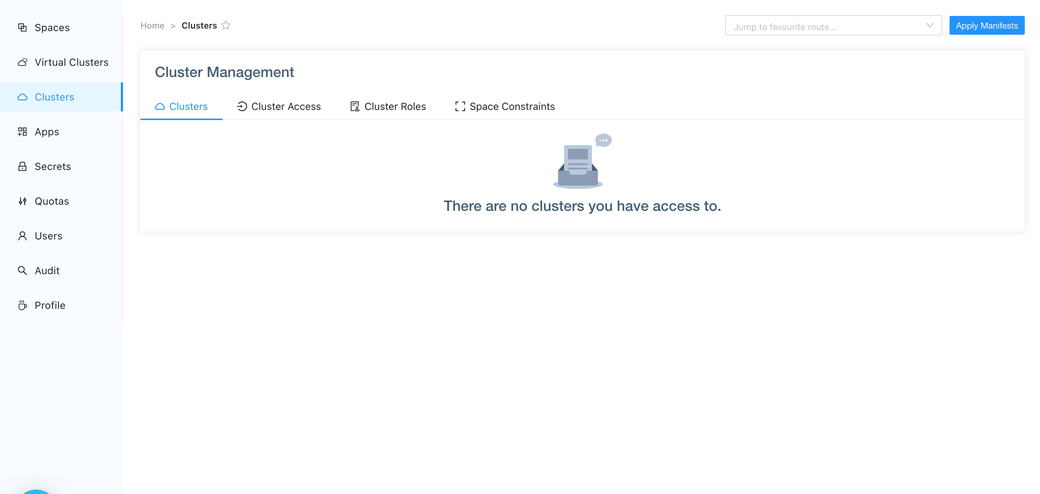
However, if you visit the clusters page, the developer won’t have access to any cluster yet.
#Granting Developers Access to a Cluster
Log in to your Loft dashboard using your admin credentials. Go to the Users page, and you should see a page similar to the image below.
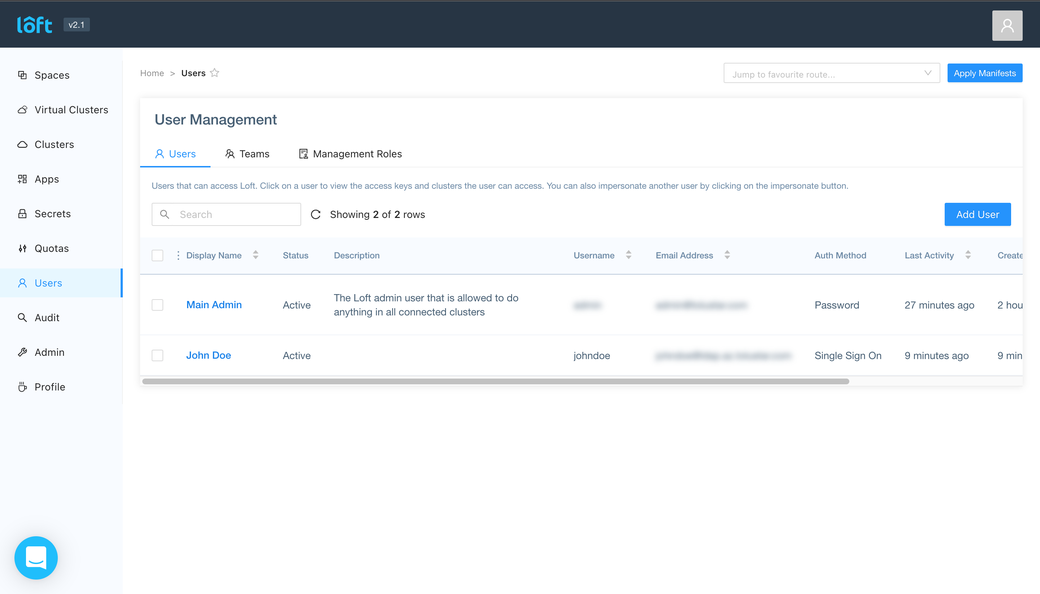
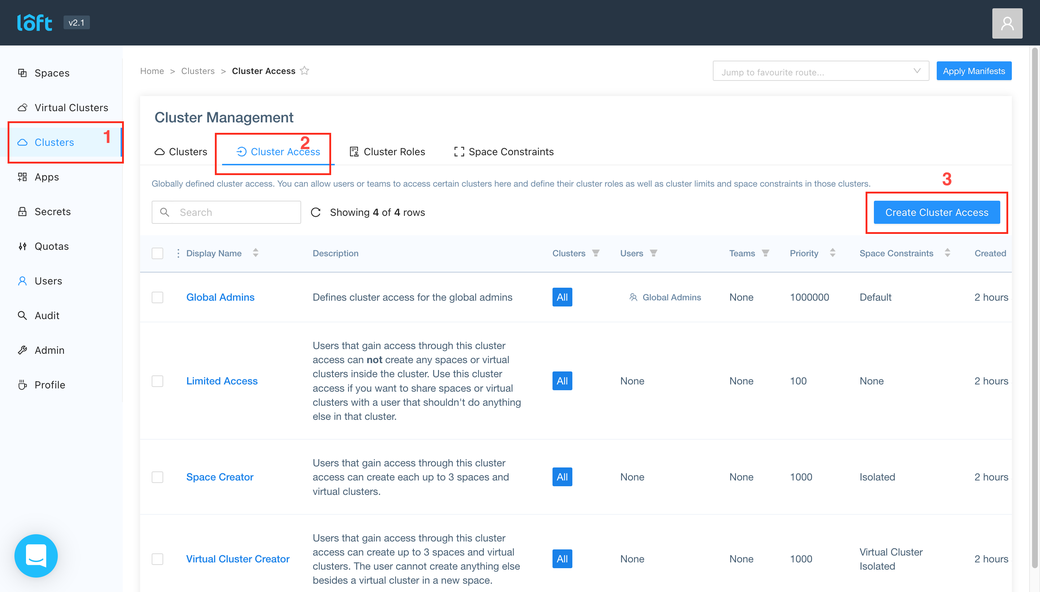
The developer you authenticated via SSO should appear on the Users page. Now, click Clusters on the left menu, then Cluster Access, and, finally, the Create Cluster Access button.
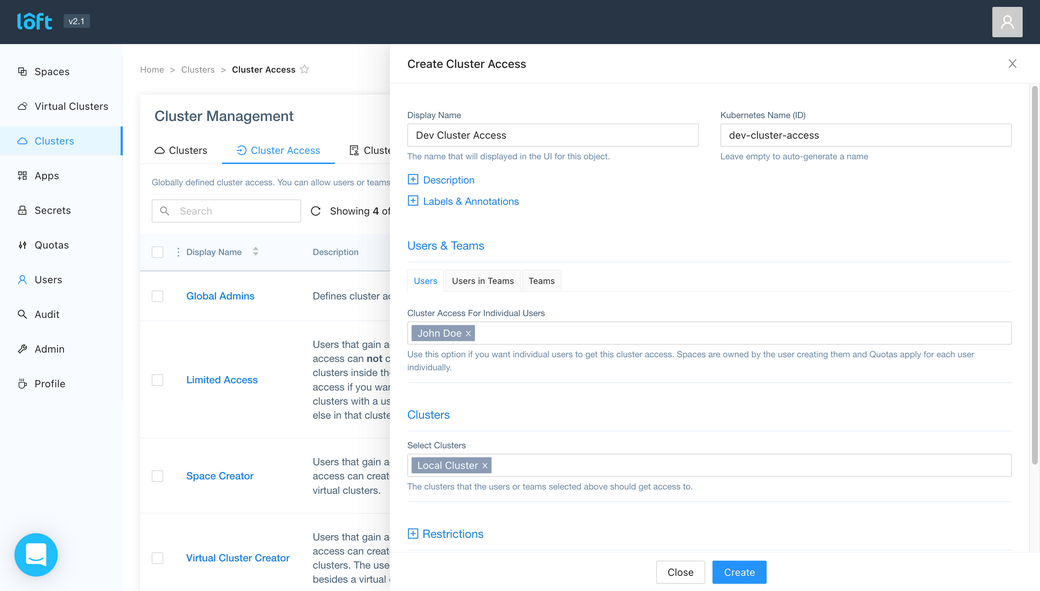
Fill in the necessary details and click Create.
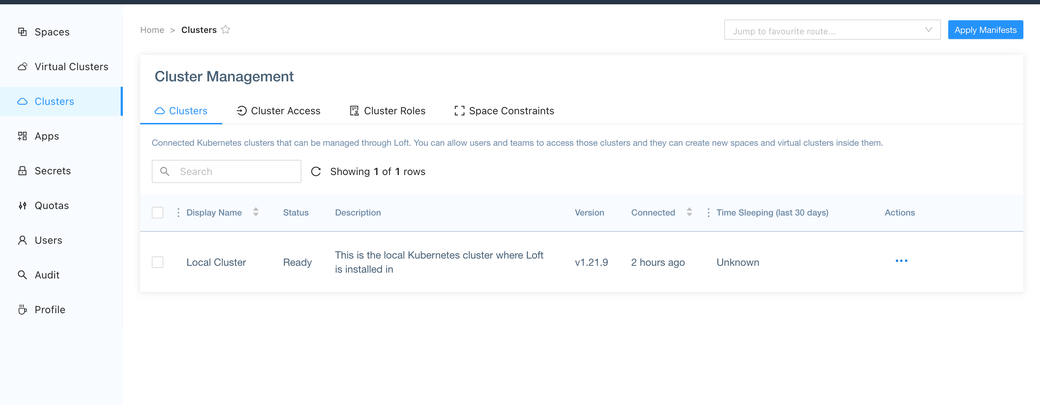
Return to the Clusters page in the incognito browser window, and you should see the developer now has access to the cluster.
The developer should run the following command whenever they want to use any of the clusters accessible to them:
loft use cluster [NAME_OF_CLUSTER]
The developer can view how to connect to a cluster by visiting the Clusters page in their Loft Dashboard, hovering their mouse on the cluster they want to use, and clicking connect as seen below:
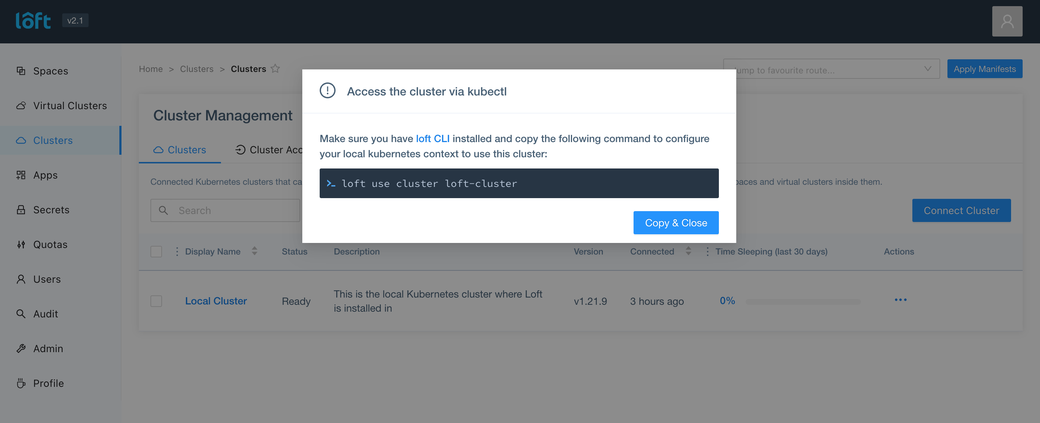
The developer’s Kube config will be automatically updated, allowing the developer to access the cluster via kubectl.
#Conclusion
Integrating SSO into your Kubernetes cluster makes it easier to invite new developers into your cluster in a secure manner. Furthermore, it removes the burden of provisioning a new set of credentials for developers on your cluster as you can use the same credentials from an identity provider or active directory service to authenticate developers.
You also learned how to integrate an LDAP Directory Service with your Kubernetes cluster, which allows developers in your directory service to authenticate to your cluster with their existing credentials from the directory.
Loft is a platform that supercharges your Kubernetes cluster management with enterprise-grade access control and cost monitoring, and empowers your team through self-service environment provisioning, such as virtual clusters and preconfigured namespaces. For more information visit Loft.
Photo by Tim Foster on Unsplash