Table of Contents
#Using JetBrains Fleet with DevPod
In case you missed it, we added two new IDEs with the latest release of DevPod. Today we are going to walk through how to get started with JetBrains Fleet. If you haven’t heard of Fleet, it is a competitor to some of the multi-language IDEs, such as VScode. It is a lightweight IDE that supports multiple languages but also provides some tooling you may not find in Open Source IDEs.
We are going to install DevPod and JetBrains Fleet in this guide. If you already have both installed, then skip ahead to Create a Provider for Docker.
#Get Started with DevPod
We will start out by installing DevPod. We’re going to provide a link to the getting started guide instead of listing out all of the steps here. Head over to the docs and install DevPod then we’ll move on to the next section.
https://devpod.sh/docs/getting-started/install
#Install JetBrains Fleet
Next, we need an IDE. Follow the getting started guide from JetBrains to get Fleet installed.
https://www.jetbrains.com/help/fleet/getting-started.html
#Create a Provider for Docker
At this point, we will assume that Docker has already been installed on your machine. If not, go ahead and follow the guide on getting Docker Desktop installed or if you are using another provider in DevPod, such as Kubernetes, go ahead and create a provider.
Docker Desktop: https://www.docker.com/products/docker-desktop/
Provider Documentation: https://devpod.sh/docs/managing-providers/add-provider
Within DevPod select the Providers option and then select the “+ Add” option. In the popup, select Docker and then “Add Provider.” There are other options within the provider that you can configure, however for the guide we will leave everything default and it should work out of the box if you have Docker running locally.
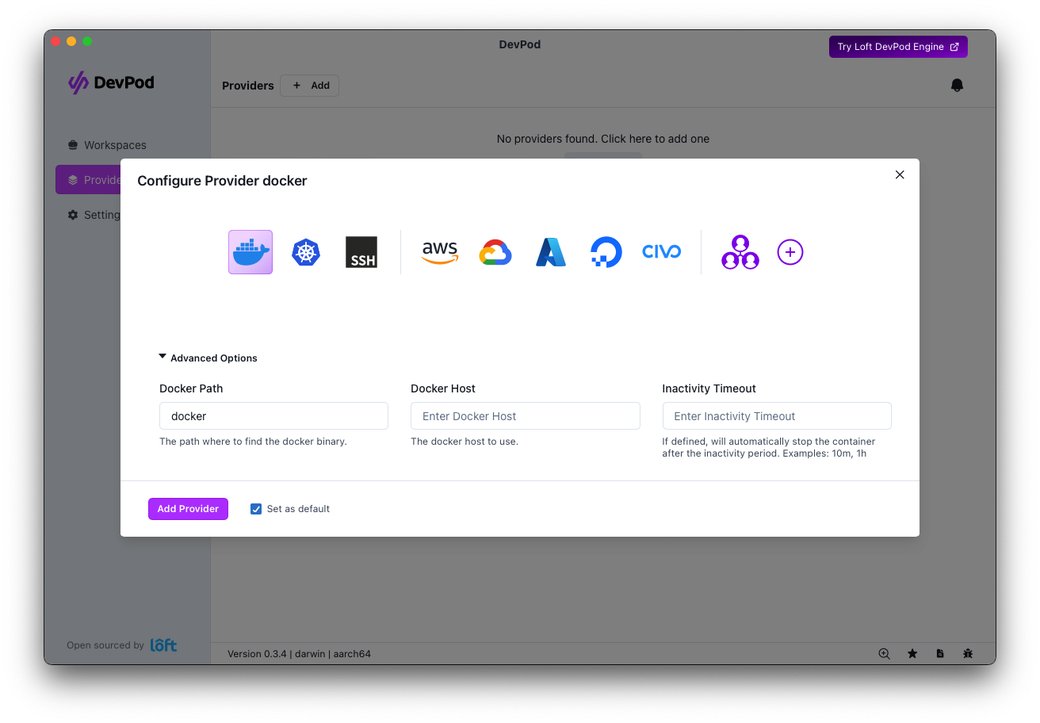
Anything we launch using the Docker provider will bring up a new container within Docker on our local machine. This is great when you want to work locally on something and may not have a need for the resources a provider like Kubernetes or a VM would provide.
Now that we have a target for our workspace, we can move on to the next section.
#Create a Workspace with Fleet as the IDE
Now that we have the basics out of the way, we can move on to creating a workspace. There are a few example repositories that can be used if you just want to walk through how things work, however when you are ready to start working on your own projects you will need to add a devcontainer definition to the repository.
https://containers.dev/implementors/json_reference/
Here is an example of the devcontainer in the DevPod repository, which is what we are using in this walkthrough.
{
  "name": "Go",
  "build": {
    "dockerfile": "Dockerfile"
  },
  "features": {
    "ghcr.io/devcontainers/features/docker-in-docker:2": {
      "version": "latest"
    }
  },
  "mounts": [
    {
      "type": "volume",
      "source": "devpod",
      "target": "/home/vscode"
    }
  ]
}
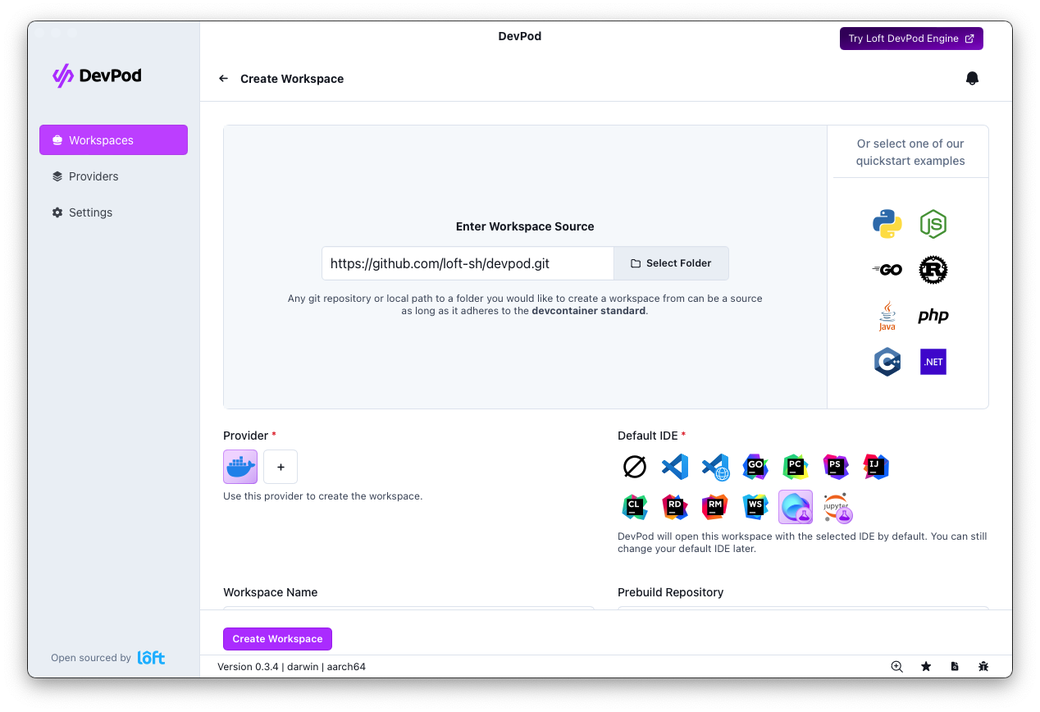
Here is an image showing the Workspace Wizard. We will need a GitHub repository with a devcontainer, a provider, and our IDE. We are going to use the DevPod repository hosted on GitHub but you could also use a local folder. The provider is going to be Docker, however, if you have another provider added, then you could use it. Next, we will specify the IDE, which will be JetBrains Fleet.
After filling out the options in the Wizard we will select “Create Workspace.”
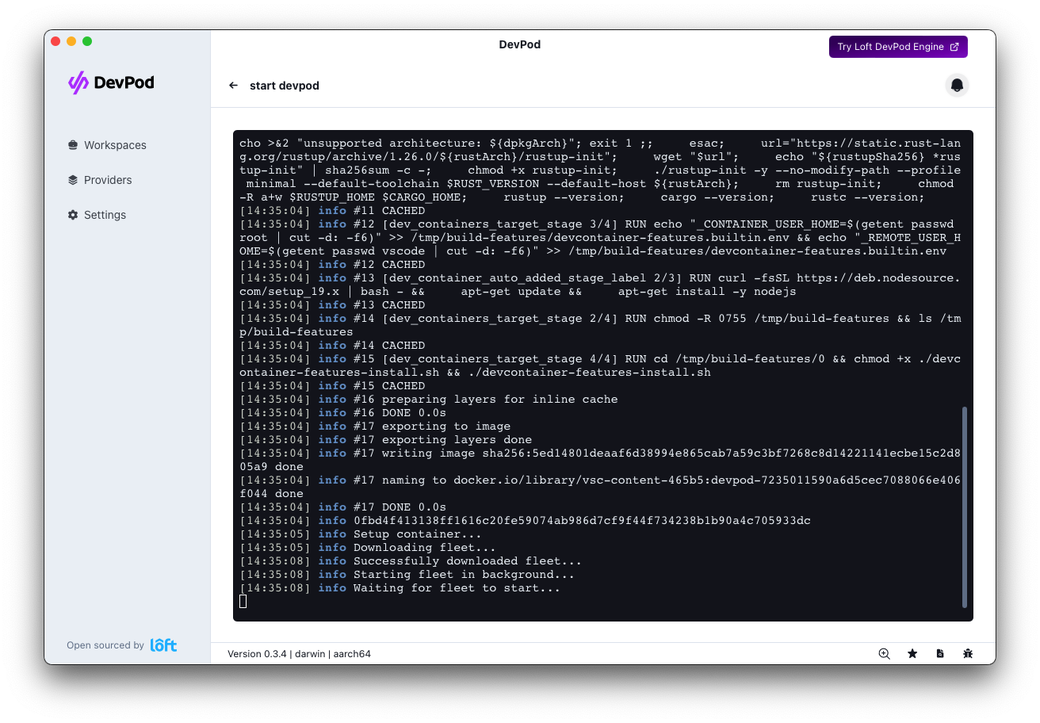
This next image shows what happens when we create the Workspace. The container will build with the settings defined in the devcontainer. As soon as it is finished it should launch a browser which will launch Fleet.
If there are any issues, such as Docker not running, you will see them here. Most of the time when I am creating a new Workspace, Docker isn’t running because I haven’t started it up after my last reboot, so it is pretty common. If you run into any issues building the Workspace then you could rebuild in the Workspace section, or turn on Debug in the Settings section for more verbose logs. It’s also helpful to provide this information if you run into issues and need help in our community Slack (slack.loft.sh).
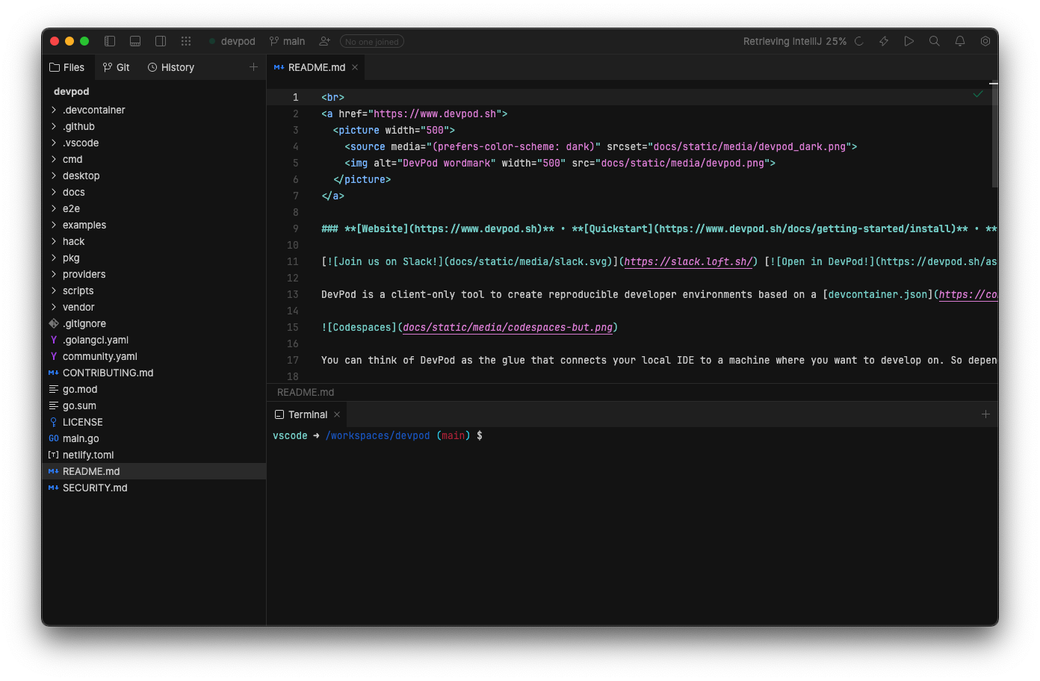
Fleet launches with a URL such as: fleet.jetbrains.com/?version=ID&workspaceId=ID&session=ID - which means you may need to specify what to open the URL with when the browser launches. Once Fleet launches it will connect directly to the container running in Docker. Now you can actually start coding!
Fleet makes it easy to share your session. We have a video showing a pair programming demo using VScode and Fleet.
#Need More Power?
Let’s say you have a bunch of developers and are sharing a dev Kubernetes cluster. How would you create a self-service platform where multiple teams of developers can launch their own clusters without having to actually pay, or wait, for an entire cluster? Our answer to this is Loft, which simplifies vcluster (virtual clusters) through self-service, quotas, automatic sleep to save resources, and many other features. We have a short video showing off how you can use both together to create a platform for your Dev team.
#Conclusion
If you are looking for a way to simplify remote development environments, then DevPod may be the answer. We are focused on making the development process as easy as possible and will continue to add more features. We are excited about the JetBrains Fleet addition and hope that the IDEs provided will allow developers to write code with whatever is most comfortable for them.