

Table of Contents
Cursor has taken the dev community by storm. Over the past couple of months, it has become one of developers' favourite tools! Guess what? DevPod's latest release, v5.20, comes with Cursor's experimental integration enabled by default.
If you haven’t heard about Cursor yet, it's a new IDE that promises to supercharge your developer workflow with AI by indexing the code and serving as your assistant.
In this post, learn how to use devcontainers and Cursor with a simple Hello World application!
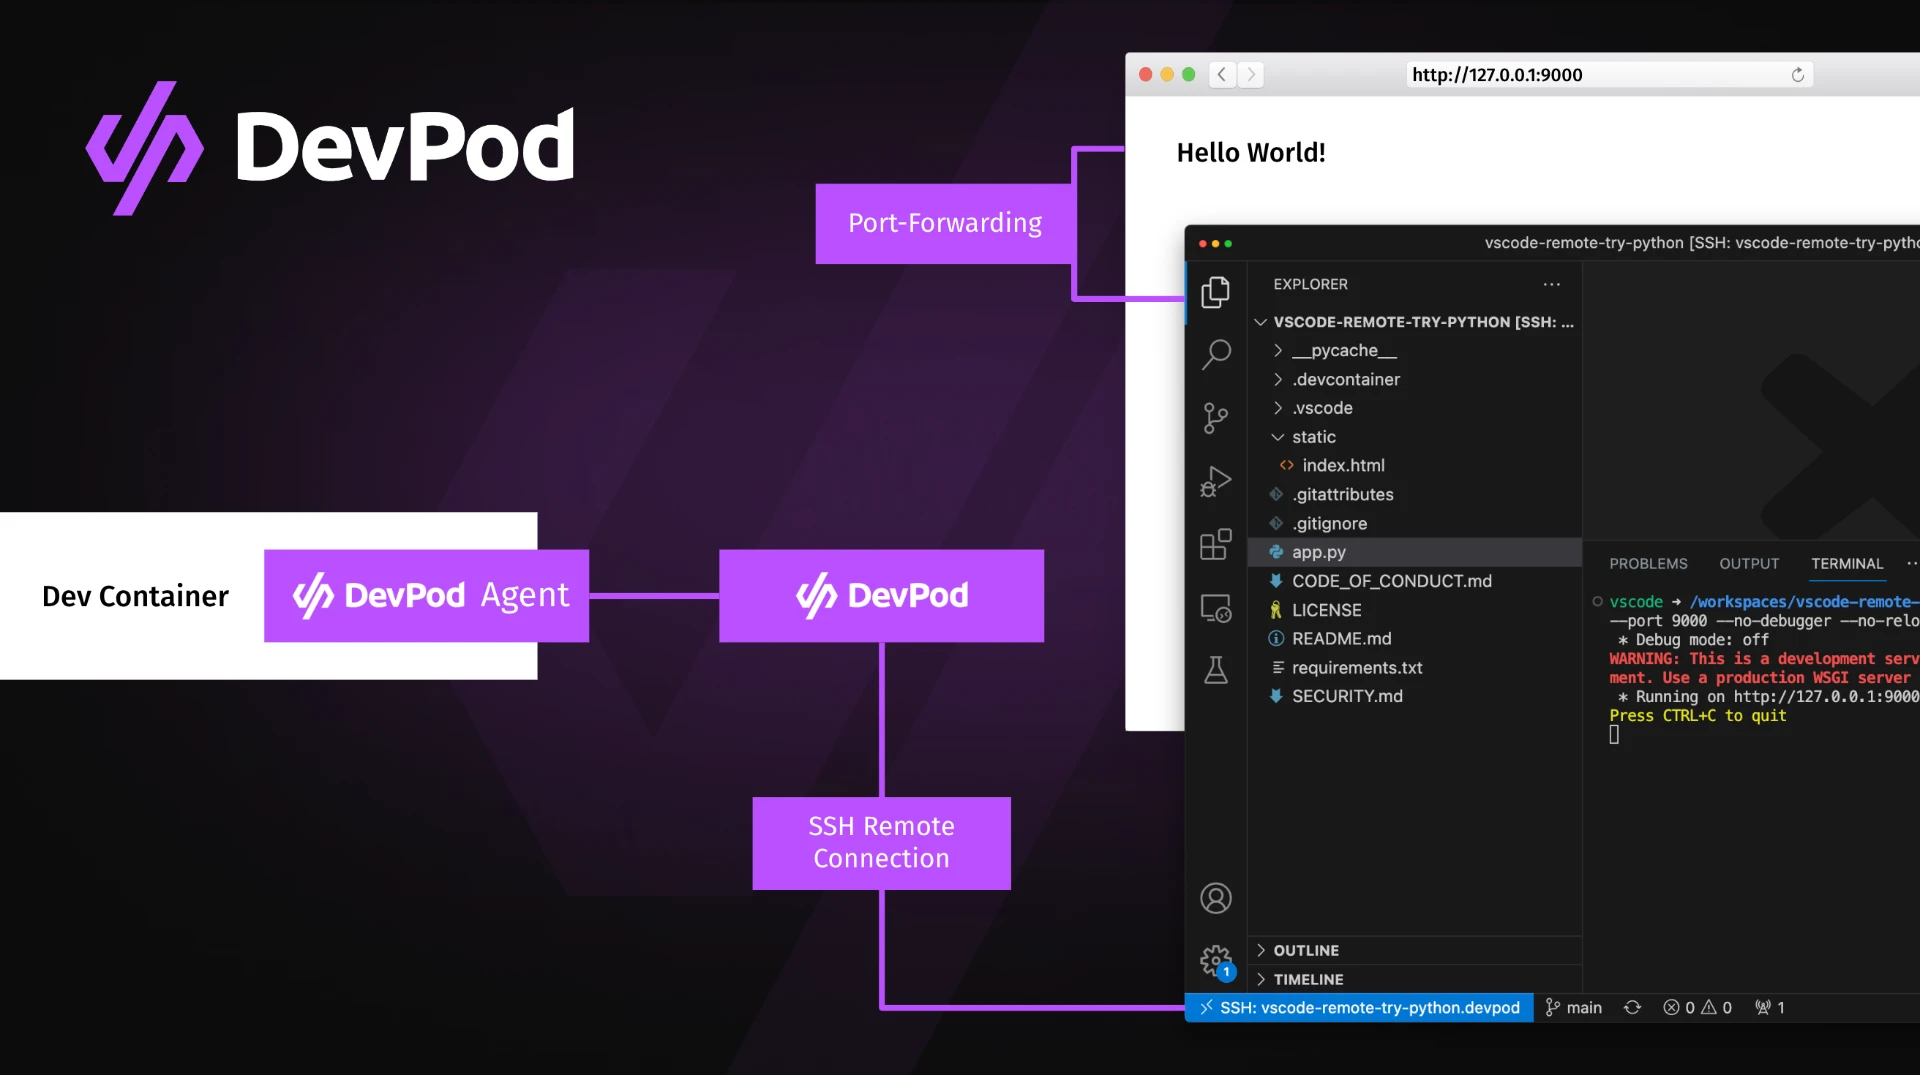
DevPod with Cursor
DevPod pioneers the future of cloud development environments with customizability. As soon as your workspace starts, you can define every aspect of your workspace, from where your code is running to what extensions or steps you need.
This empowers developers to work efficiently in a reproducible development environment without the hassle of provisioning a complicated codebase with extensive documentation, which can be time consuming. With Cursor, you can now enable developers to fast-track knowledge transfer for new codebases, as the AI assistant helps answer specific queries and provides greater clarity.
By combining DevPod and Cursor, developers can easily create and understand development environments, whether locally or in the cloud, leveraging more powerful hardware like GPUs when needed.
Getting Started with DevPod
DevPod is a client-side tool available as both a CLI and a desktop application. Its primary function is to streamline your developer experience by ensuring your workspace runs with your preferred IDE, whether locally, in the cloud, or on Kubernetes.
It also ensures your credentials are synced and your configurations are applied consistently across both the infrastructure and development environments.The configuration for your infrastructure is determined by your providers, which define the backend where everything runs.
On the other hand, your development environment is configured via the devcontainer.json file. In this demo, we will use Docker as the simplest backend. Once configured, your workspace will run in an isolated environment, separate from other dependencies. You can read more about devcontainers here.
Before we proceed, you'll need to install DevPod on your local machine. You can do this by following the instructions on the getting started page.
https://devpod.sh/docs/getting-started/install
Once the installation is done, assuming you already have Docker installed on your machine the next steps are simple. From DevPod, go through Providers and click the "+ Add" button within that option.
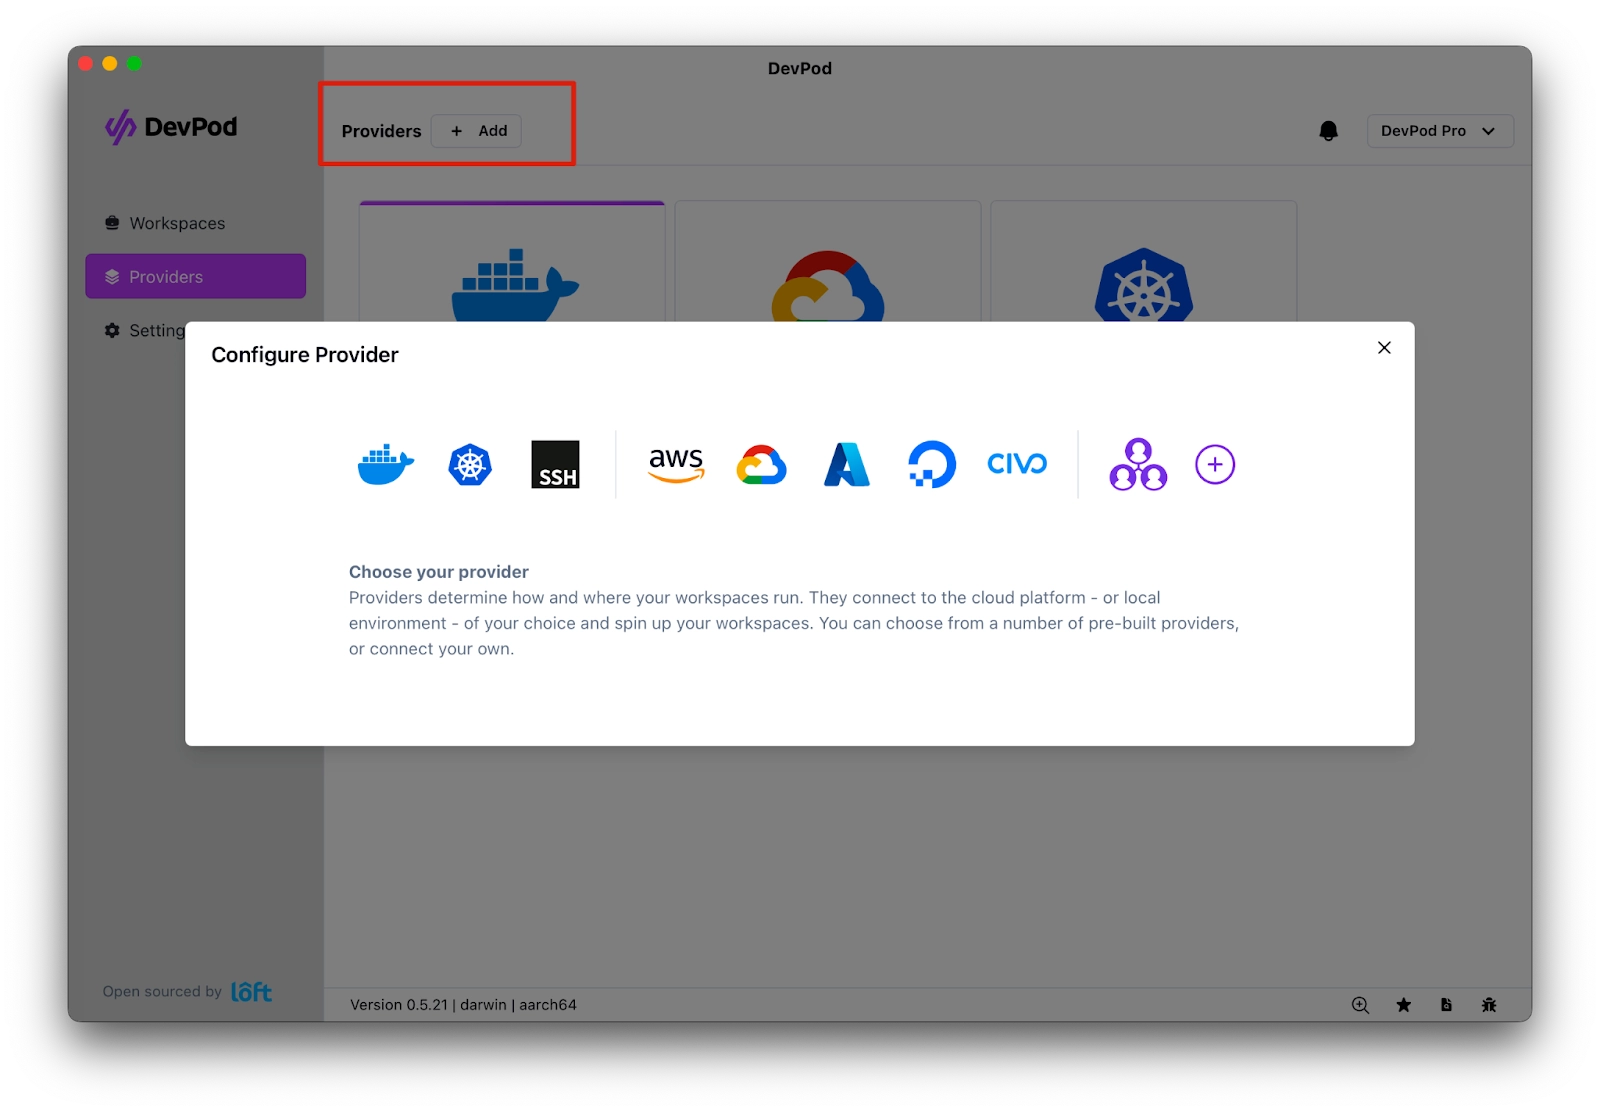
On the pop-up, you will have an option for Docker, followed by "Add Provider"
You can configure the available options but for simplicity leave everything on the default setting.
Configuring Cursor with your Workspace
Once the backend is configured for launching your development environment, also known as the workspace, and DevPod is installed, the next steps are quite straightforward. You just need to decide what should be your workspace source (a Git Repository, Local Folder or a container Image):
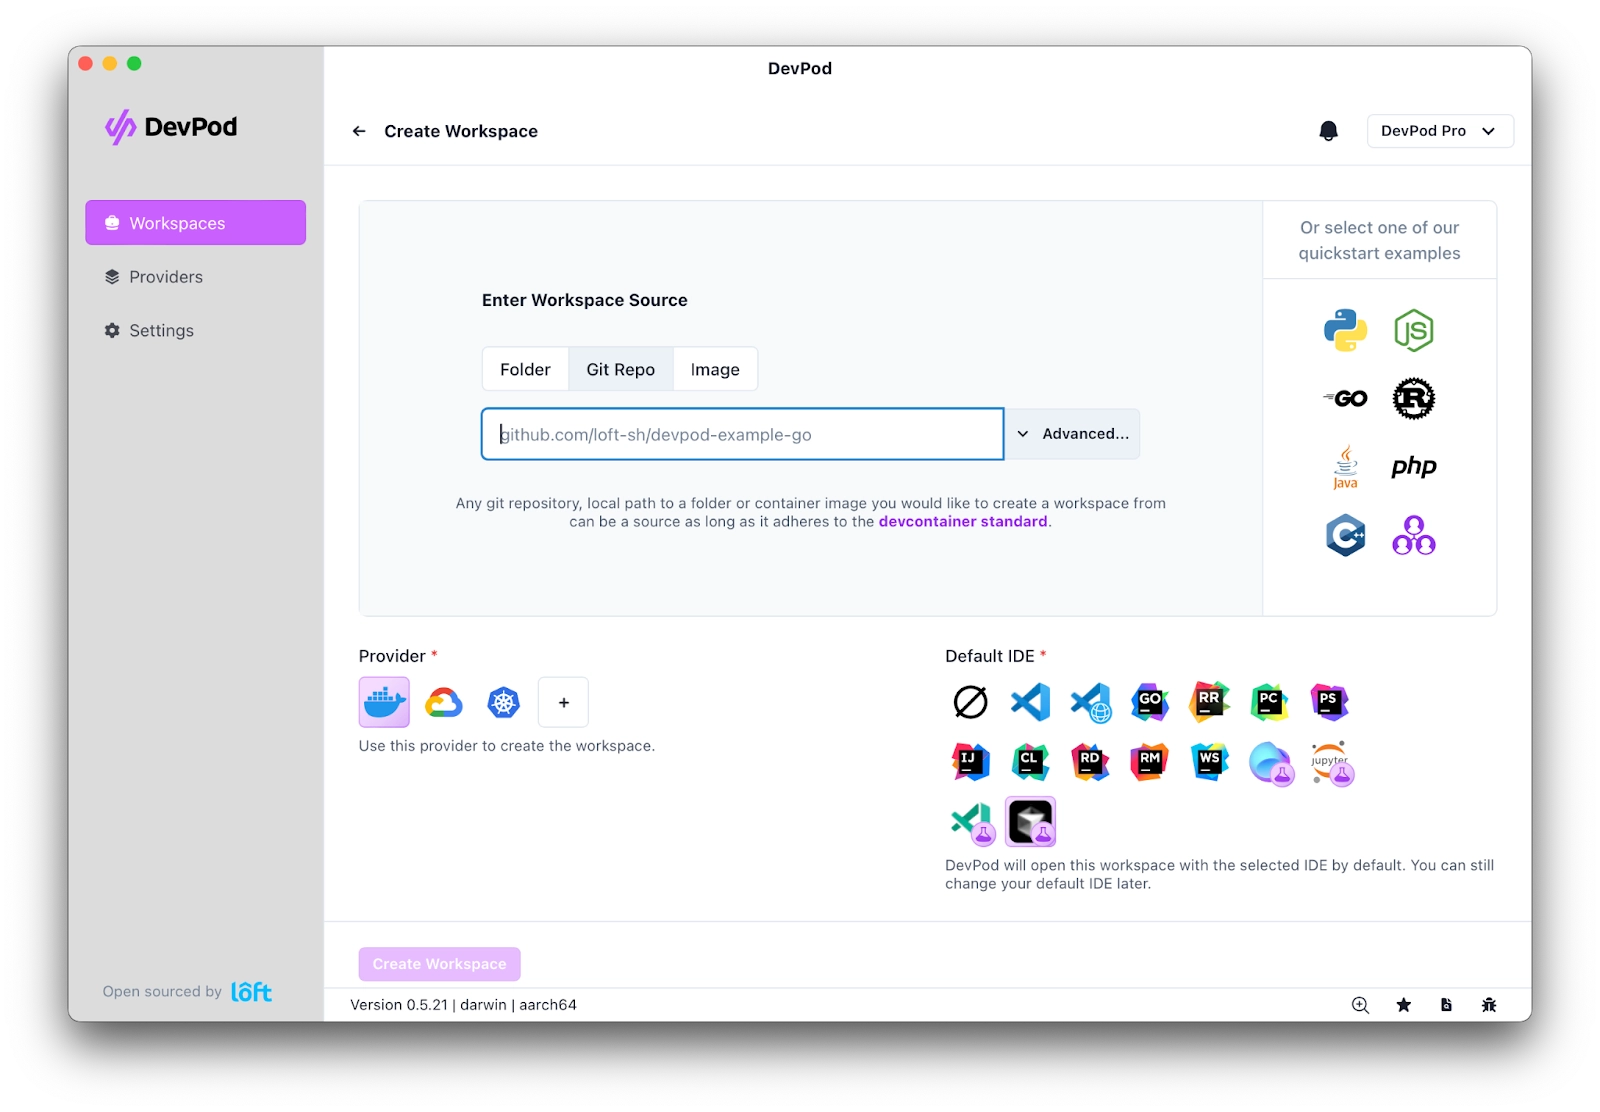
A few quickstart samples are located on the right, which you can use or click on Open with DevPod as shown below:

Then Select Cursor (assuming you already have the IDE installed) as your preferred IDE and click Create Workspace.
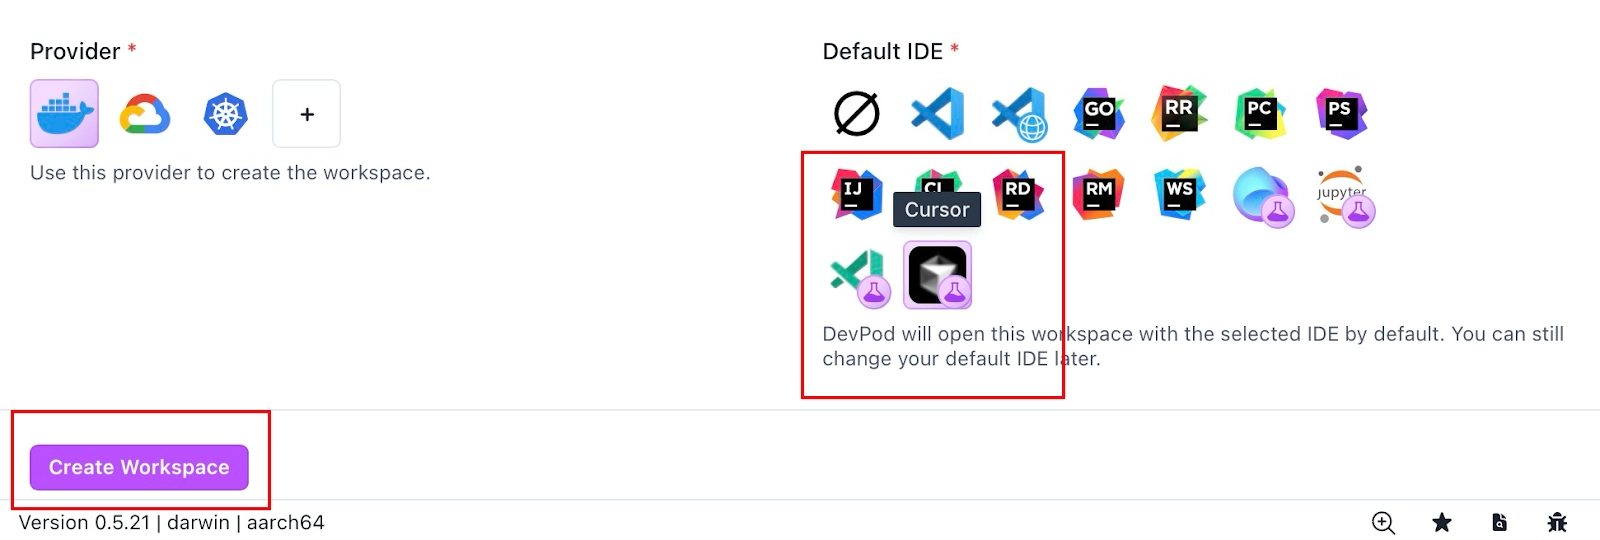
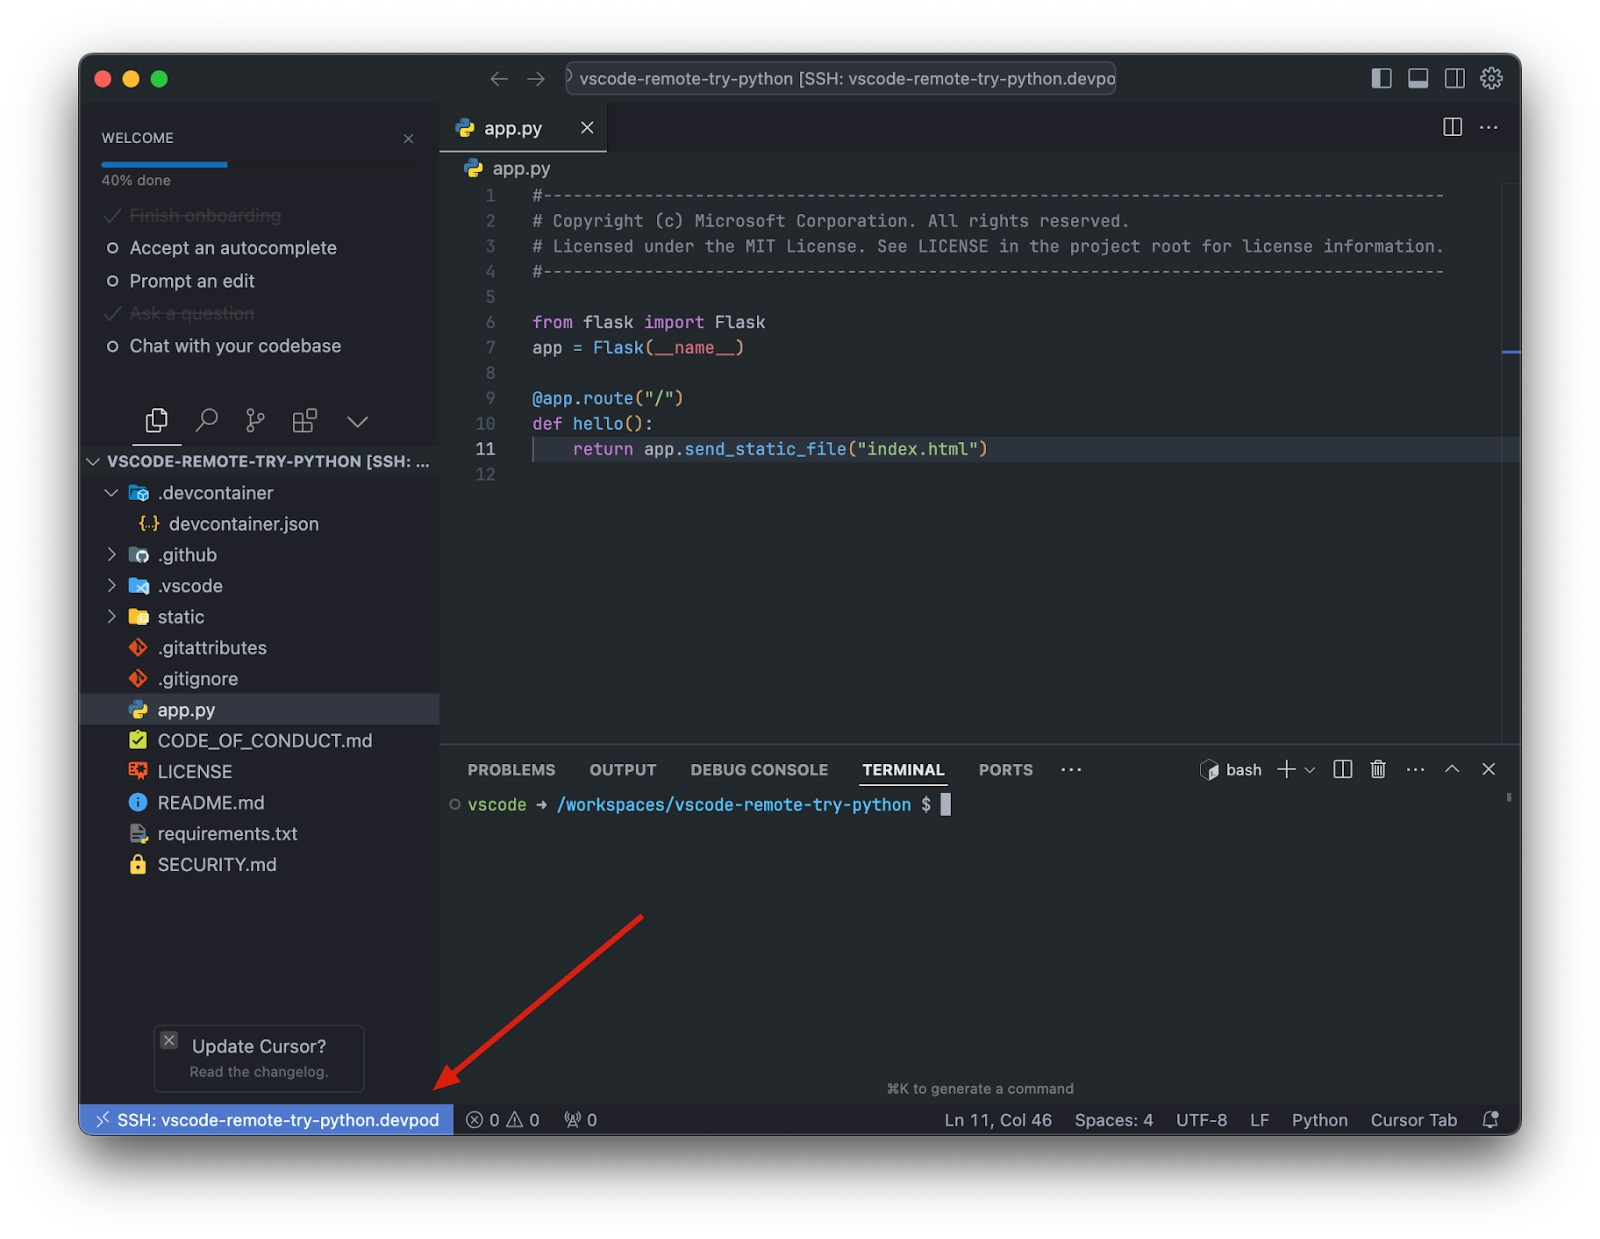
Once done, you will have a workspace running, and you will have your dev environment connected to Cursor IDE like below:
Supercharge your experience by asking the AI assistant questions and get answers from the index code base quickly. In this instance, we asked “What’s the code doing?” to get a detailed answer:
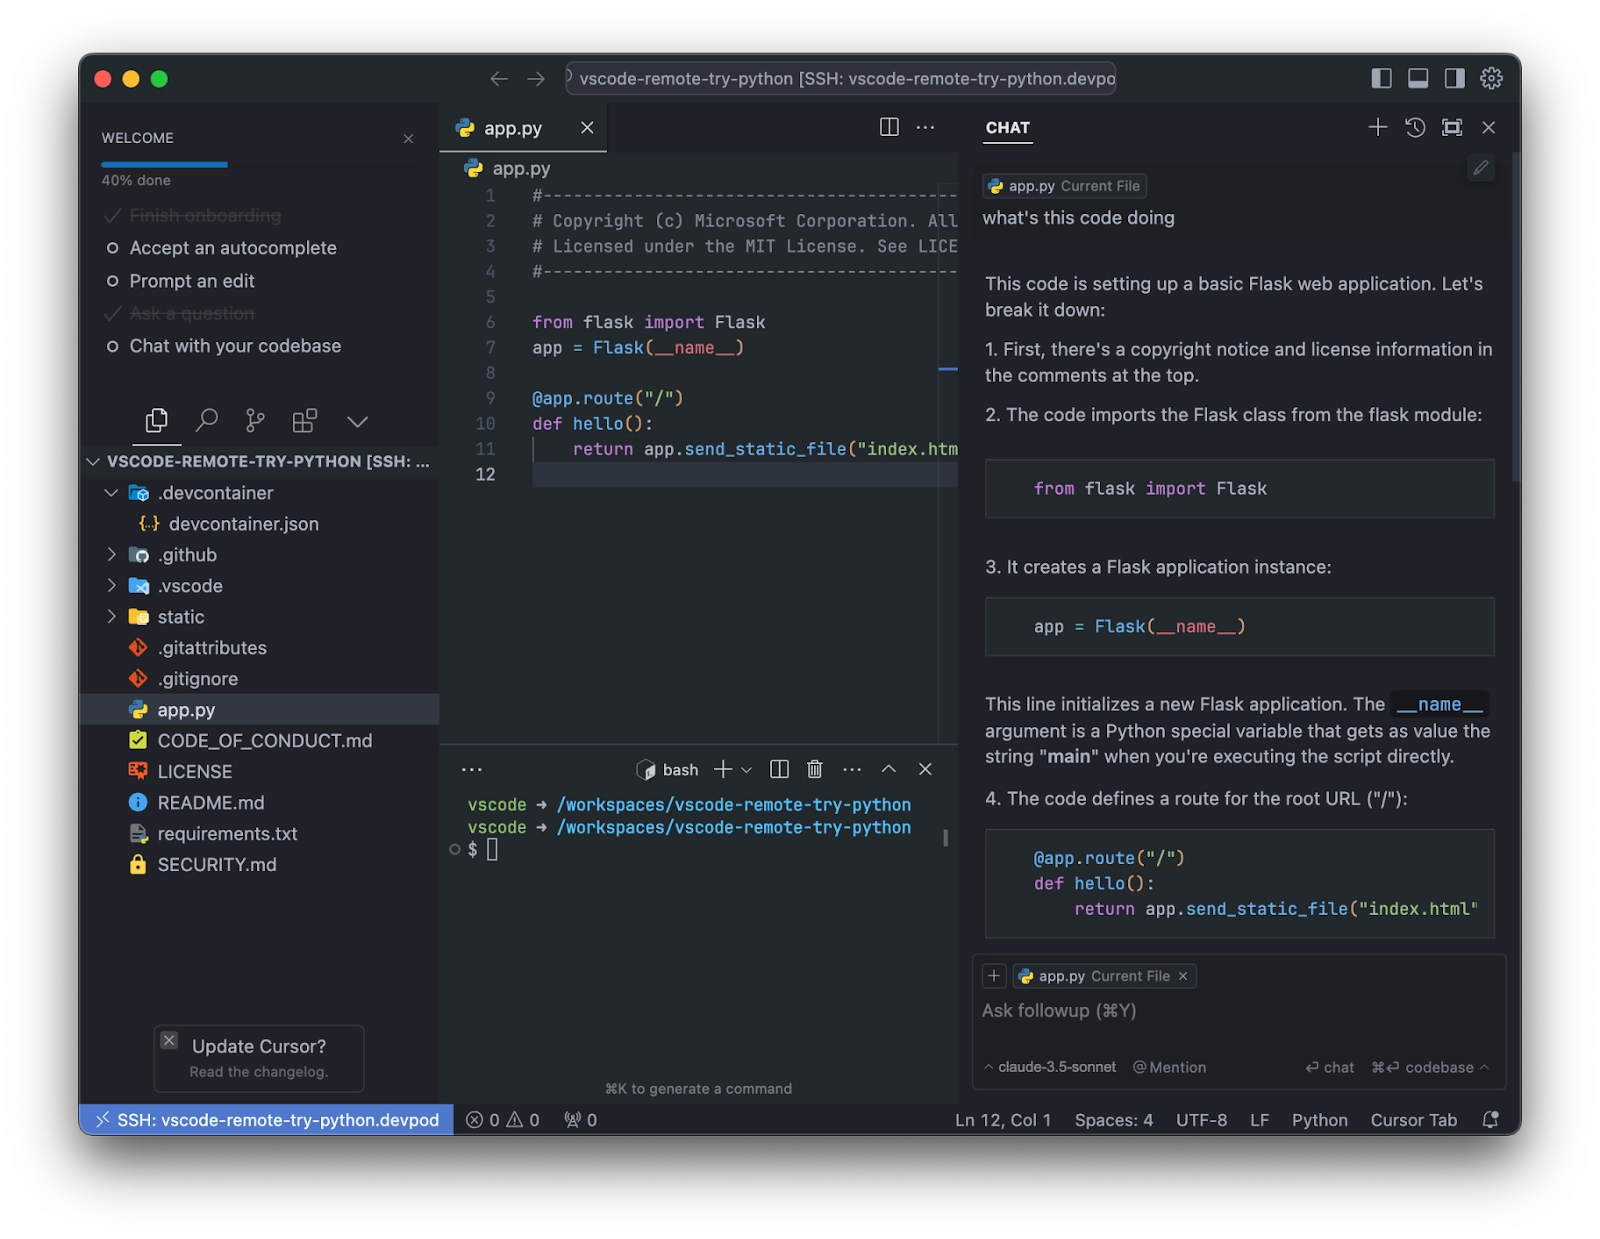
When you have more complicated questions and a codebase, this will come in handy for your developers to fast-track their workflow.
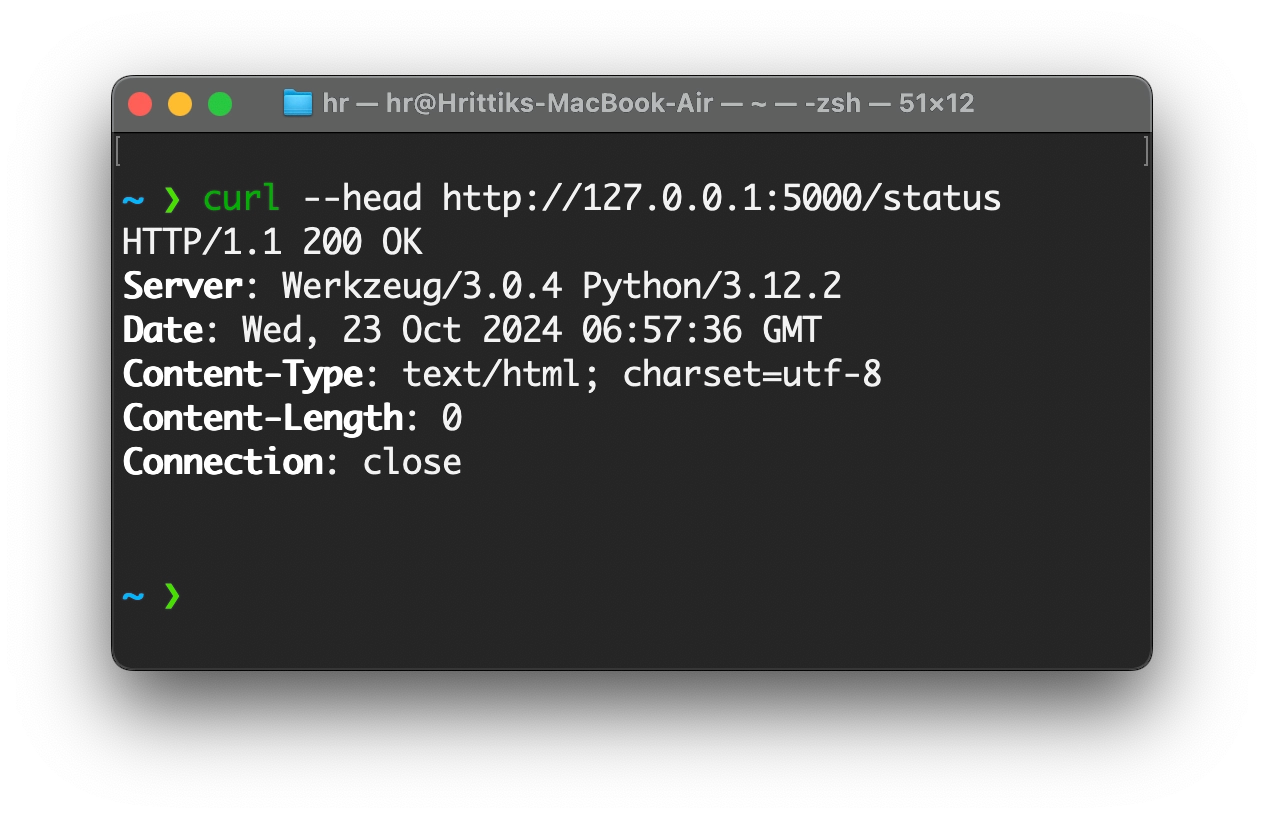
One more excellent example is code generation. Imagine you need a quick way to understand the context and create an endpoint with specific requirements. For simplicity, let’s create a status endpoint using the IDE.
You simply specify what you need, and it generates a sample code for you. This also gives you an opportunity to revise the code, as shown in the screenshot below:
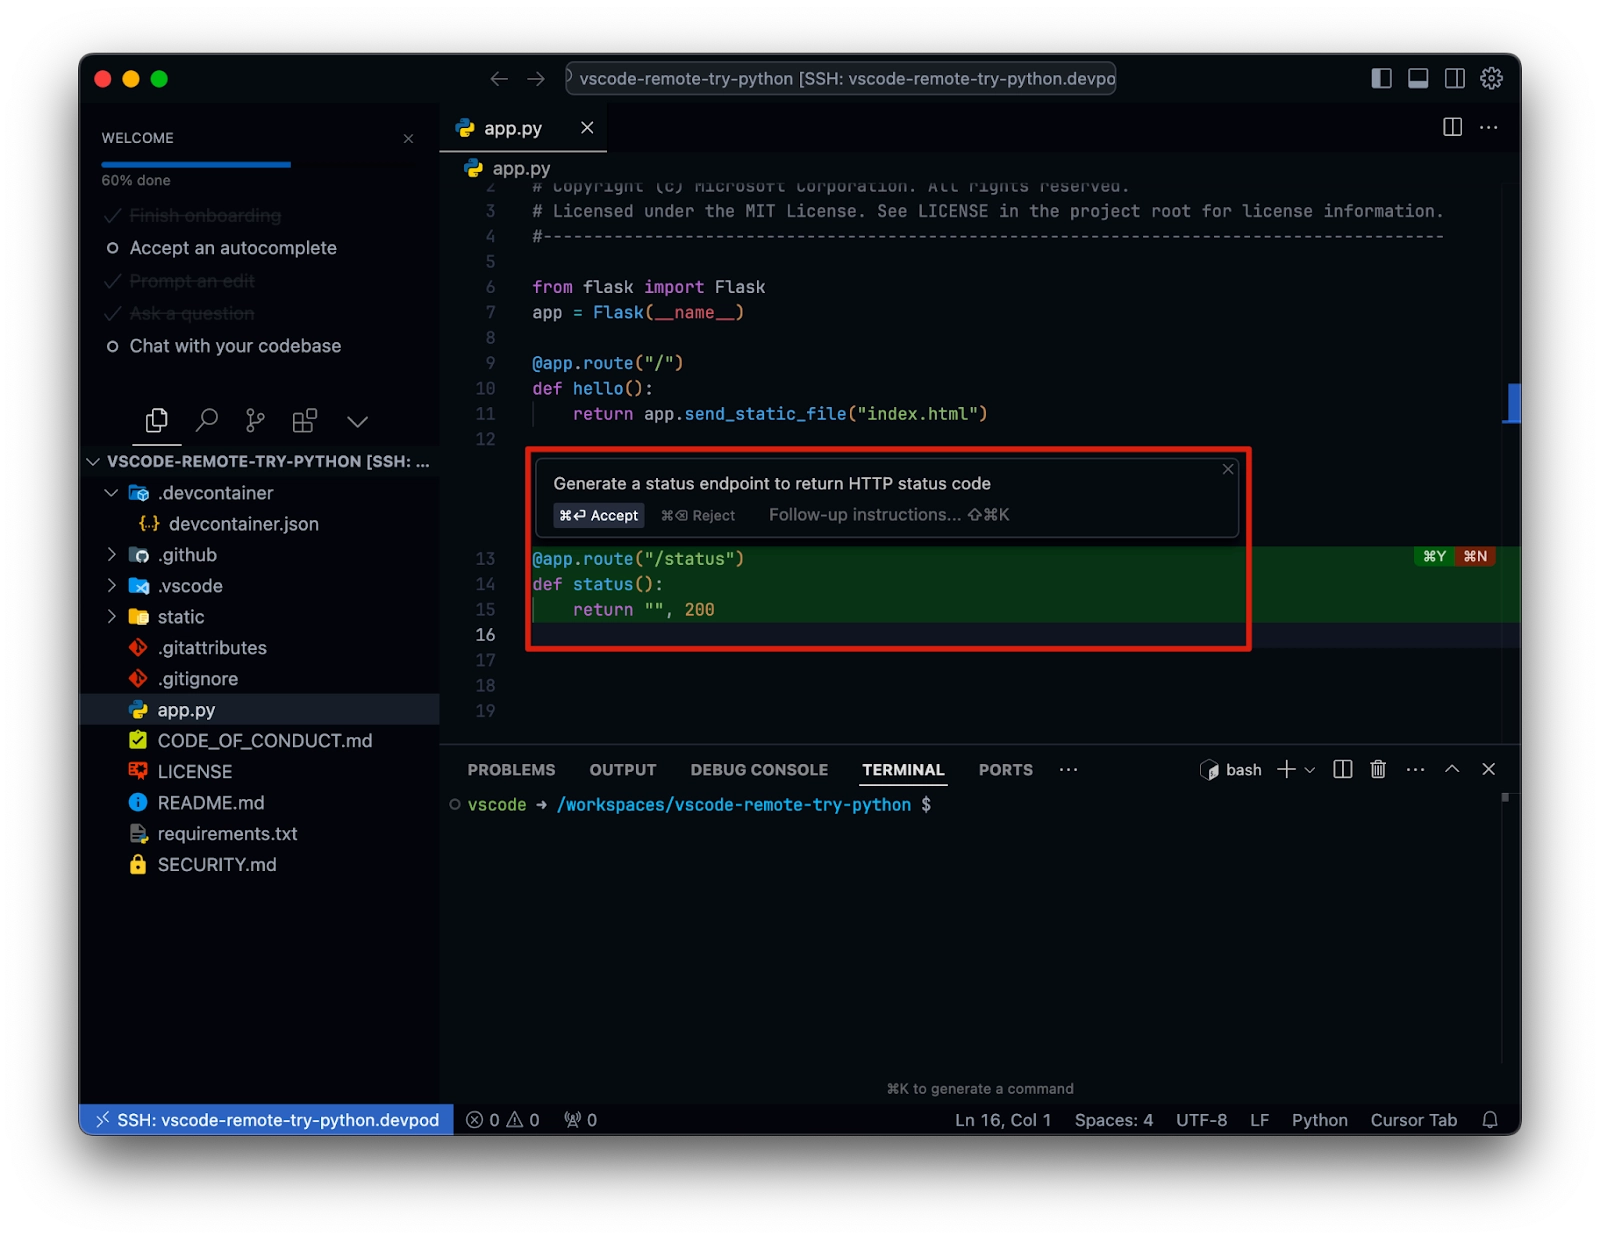
The output shows a 200 Status as expected:
With all that in mind, Cursor on DevPod aims to help you create simple dev environments with a contextual overview of the entire codebase. Generally, with LLM interfaces like ChatGPT, you only get code results with a small context window.
You can’t contextualize your whole codebase. Solutions like Cursor are trying to change this by being closer to your development environments and the associated codebase.
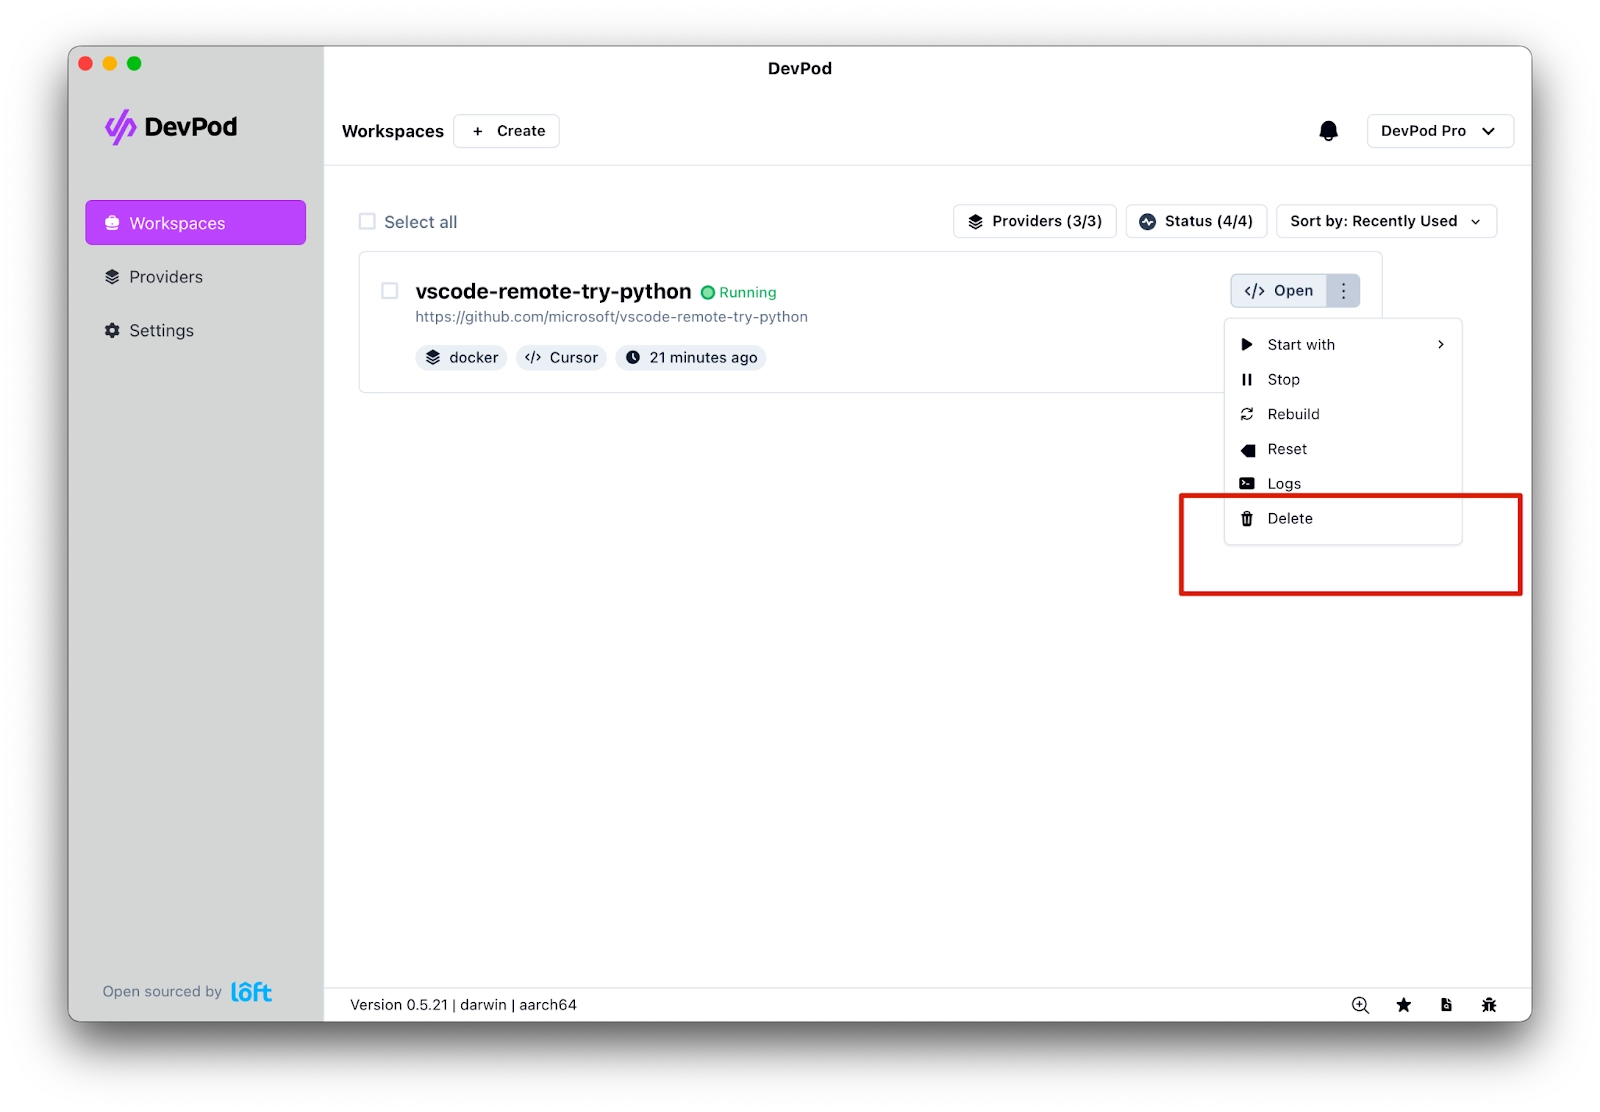
Workspace Cleanup
Once, done with your work you can remove the workspace and associated resources by simply using the dashboard and using the `Delete` button.
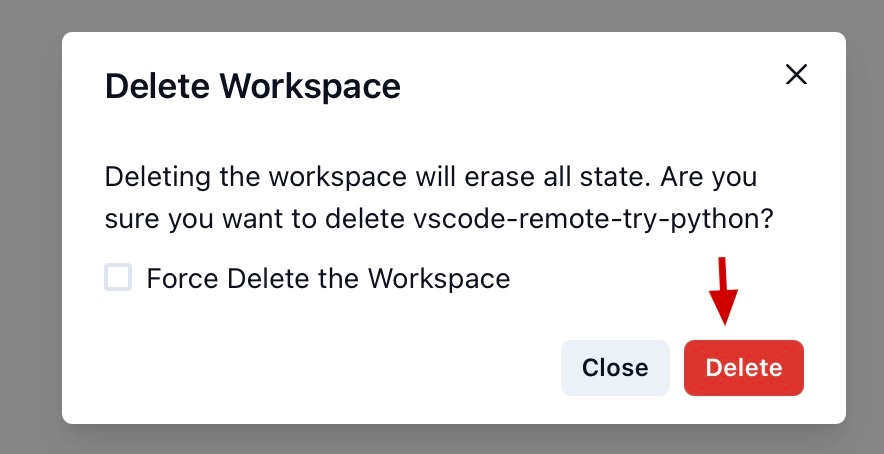
You will be prompted if you’re sure. If you click on `Delete` your entire workspace with its resources will be deleted once you have done so.
Do you prefer video version of this blog? We got you covered ⬇️
Final Thoughts
As you saw, DevPod supports many providers with many configuration options, so you always have the best dev tools, like Cursor, at your disposal. The aim is to improve the dev experience so developers can focus on building instead of managing complicated setups. The next step can be configuring a Kubernetes or cloud provider for more GPU power and using it with your codebase.
If you want to stay up to date on all the exciting things we're doing, don't miss out on our newsletter. For more:
- Join our Slack Community to keep up-to-date with the latest developments.
- Learn more from our YouTube channel
- Connect with us on Twitter and LinkedIn for more news
- Read through the DevPod Documentation
.png)

