


Table of Contents
How to Back Up and Restore Kubernetes Clusters
Better than anyone, platform engineers understand the critical role of data protection in Kubernetes environments. The ability to perform a seamless backup and restore operation is not just a necessity; it's an art. And mastering this art is essential in order to ensure your cluster's resilience and business continuity.
In this tutorial, you'll learn the step-by-step process of backing up and restoring Kubernetes clusters and apps. You'll also explore some of the best practices to ensure your data remains safe and recoverable so that you'll be better equipped to safeguard your Kubernetes clusters against unforeseen circumstances.
Kubernetes Backup 101: Defining a Backup Strategy and Tooling
Kubernetes comes equipped with a resource object called VolumeSnapshot, which enables users and administrators to create volume snapshots of persistent volume claims. In theory, you could take advantage of VolumeSnapshot to back up your cluster resources, but performing this process manually is cumbersome and inefficient. This is where popular backup tools like Velero, Stash, or Kasten K10 can help you define and implement a backup strategy consistent with your organization's requirements.
To that end, you can determine which Kubernetes cluster and application resources you need to back up and then use any of these tools to set a schedule for automatic snapshots. Furthermore, these tools also make it easier to perform the restore process and even enforce better backup practices.
This tutorial will use K10, as it's simple to install, features an intuitive GUI, and checks all the boxes when it comes to Kubernetes backup and restore processes.
Getting Ready
To complete this tutorial, you'll need the following:
git on macOS and Linux using the Homebrew command brew install git. Once installed, clone the tutorial repository (git clone https://github.com/Damaso-DD/k10-tutorial.git), as it will save you time with the rest of the prerequisites.jq on macOS and Linux using the command brew install jq.install-helm.sh Bash script.kubectl on Linux by running the provided install-kubectl.sh script.Setting Up a Kubernetes Cluster
You'll need to prepare your Kubernetes cluster with a demo app that you can backup and restore using K10.
For this tutorial, you'll deploy the WordPress blogging platform to the Kubernetes cluster. A WordPress application uses resources such as services, pods, and persistent volume claims, as well as a MySQL database to store website data, making it ideal for testing K10's capabilities.
For your convenience, you can use the kustomization.yaml file included in the tutorial repository to deploy WordPress in the demo-app namespace. To do this, navigate to the repository and run the following command:
kubectl apply -k ./
Next, check the services in the namespace demo-app by running the command kubectl get svc -n demo-app. The output should be similar to the following:
NAME              TYPE           CLUSTER-IP      EXTERNAL-IP     PORT(S)        AGE
wordpress         LoadBalancer   10.245.91.247   138.197.52.34   80:31084/TCP   2m33s
wordpress-mysql   ClusterIP      None            <none>          3306/TCP       2m33s
Since the tutorial uses a managed Kubernetes cluster, the load balancer is automatically provisioned with an external IP that can be used to access WordPress. If you need to learn how to manually set up a service to expose your app, you can check out the official tutorial.
Now that WordPress is running, you can open your favorite browser and navigate to the external IP address provided by the load balancer. On the WordPress configuration screen, you must provide a username and password for the administrator to access the application dashboard. For more information, read Get started with WordPress.
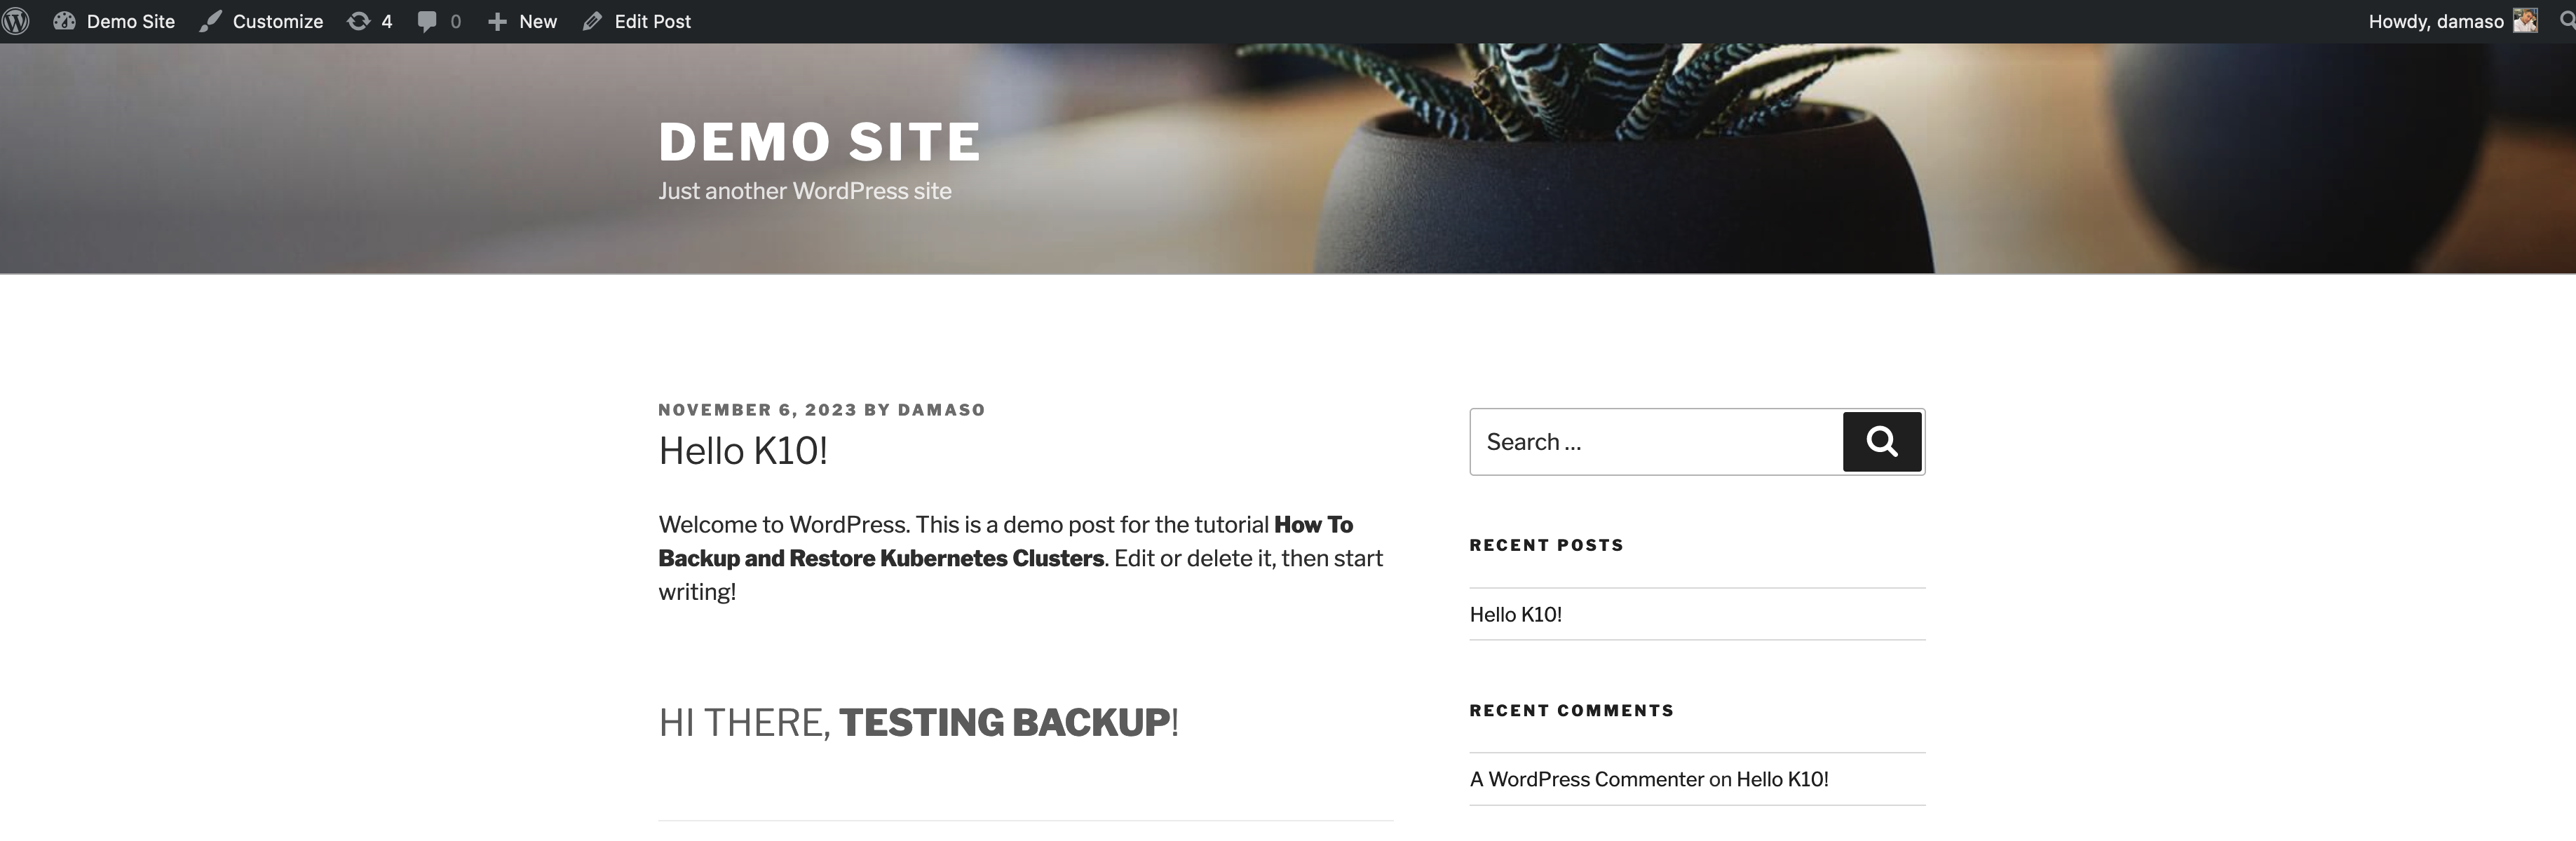
Once logged in to WordPress, you can create or edit a post. This is an optional step, as WordPress already includes an example post titled "Hello World." For the tutorial, the "Hello World" post was edited to look like this:

This was simply done to verify the backups later.
Installing K10
Installing Kasten K10 is straightforward. First, add the Kasten Helm repository and create the kasten-io namespace, which is used by the Helm chart by default:
helm repo add kasten https://charts.kasten.io/
kubectl create namespace kasten-io
Next, install K10 in the namespace kasten-io:
helm install k10 kasten/k10 --namespace=kasten-io
This can take a couple of minutes to complete. The command sets up several components required by K10's frontend and backend. You can check these components by running kubectl get all -n kasten-io. In particular, the Helm chart configures a Kubernetes VolumeSnapshotClass, which can manage volume snapshots (Kubernetes backup and restore operations discussed earlier) via the Container Storage Interface (CSI).
You need to annotate VolumeSnapshotClass objects to ensure proper operation when taking volume snapshots:
kubectl annotate volumesnapshotclass do-block-storage k10.kasten.io/is-snapshot-class=true
To verify that all components will work as expected, you can run the preflight check script provided by K10:
curl https://docs.kasten.io/tools/k10_primer.sh | bash
The output should be similar to the following:
================================================================
Kubernetes Version Check:
  Valid kubernetes version (v1.26.9)  -  OK

RBAC Check:
  Kubernetes RBAC is enabled  -  OK

Aggregated Layer Check:
  The Kubernetes Aggregated Layer is enabled  -  OK

CSI Capabilities Check:
  Using CSI GroupVersion snapshot.storage.k8s.io/v1  -  OK

Validating Provisioners:
dobs.csi.digitalocean.com:
  Is a CSI Provisioner  -  OK
  Storage Classes:
    do-block-storage
      Valid Storage Class  -  OK
    do-block-storage-retain
      Valid Storage Class  -  OK
    do-block-storage-xfs
      Valid Storage Class  -  OK
    do-block-storage-xfs-retain
      Valid Storage Class  -  OK
  Volume Snapshot Classes:
    do-block-storage
      Has k10.kasten.io/is-snapshot-class annotation set to true  -  OK
      Has deletionPolicy 'Delete'  -  OK

Validate Generic Volume Snapshot:
  Pod created successfully  -  OK
  GVS Backup command executed successfully  -  OK
  Pod deleted successfully  -  OK
================================================================
serviceaccount "k10-primer" deleted
clusterrolebinding.rbac.authorization.k8s.io "k10-primer" deleted
job.batch "k10primer" deleted
As you can see, the script performs a thorough check. If no problems are found, you can start using K10. To do it, you must access the dashboard, either by exposing it to the internet or using kubectl port-forward. For this tutorial, you will use the latter:
kubectl --namespace kasten-io port-forward service/gateway 8080:8000
Navigate to http://127.0.0.1:8080/k10/#/ from your local machine, and if everything is working, you'll see a screen like the following:
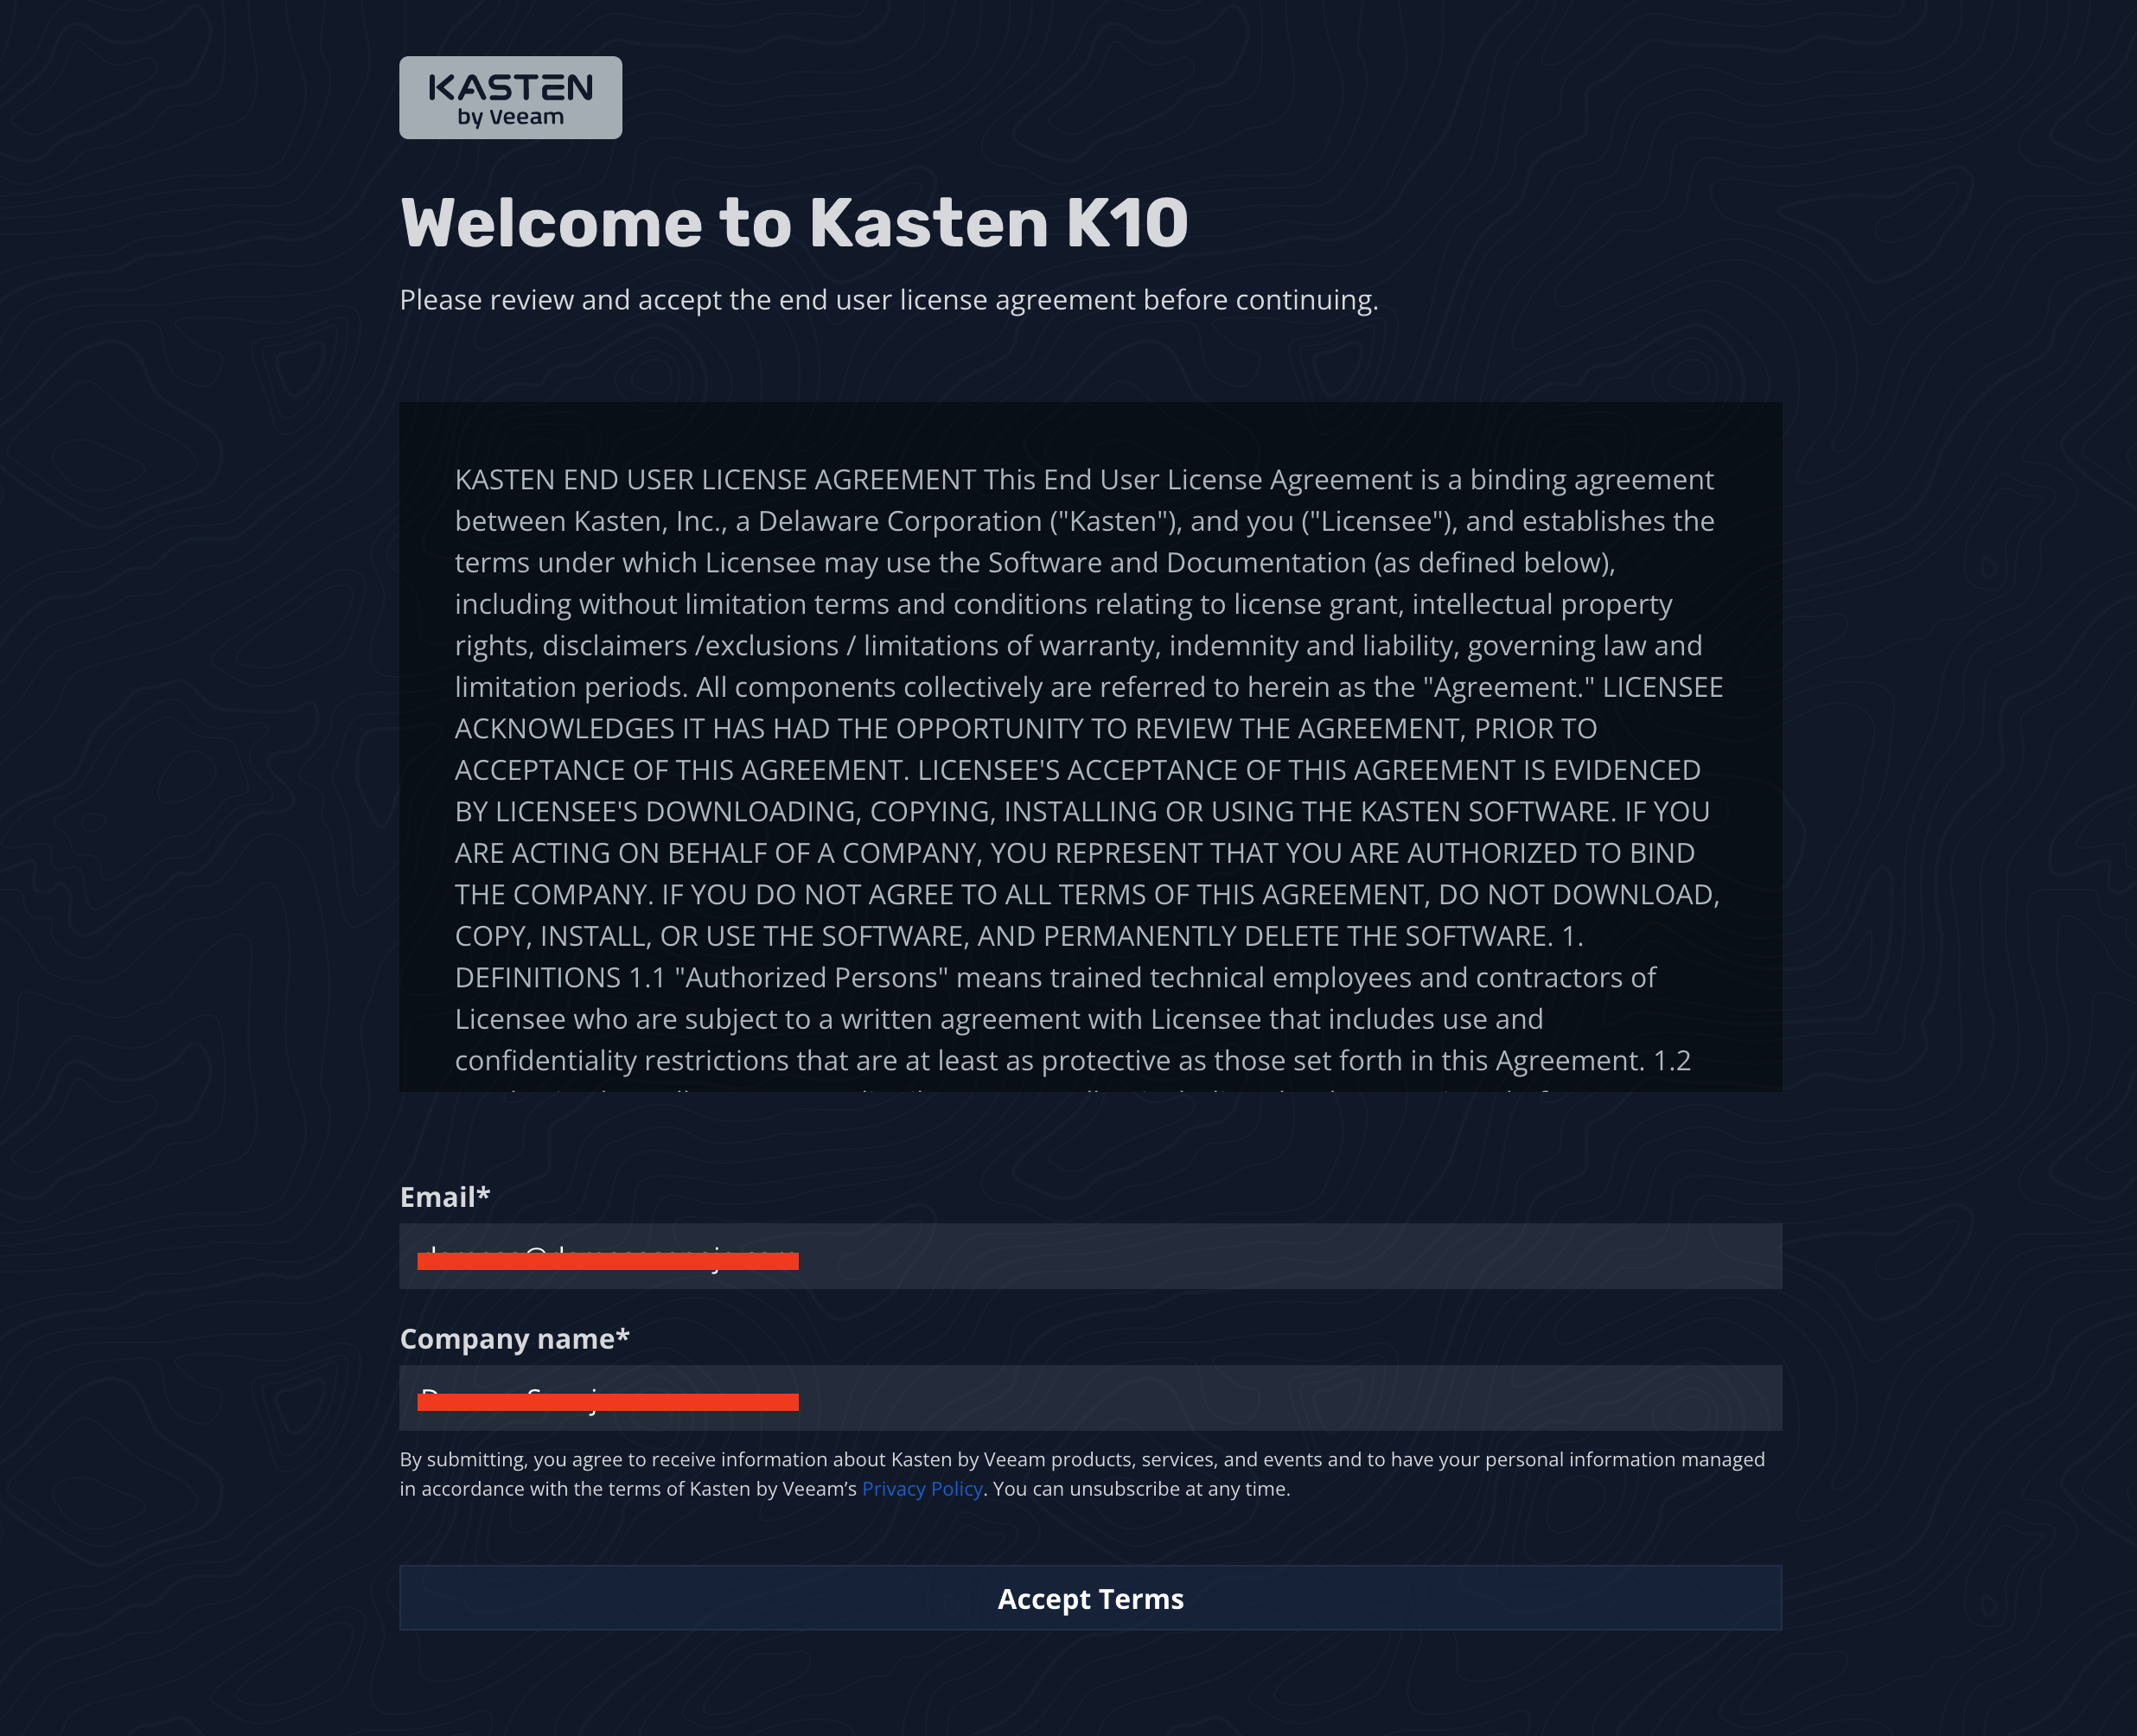
Provide a business email and company name, then click the button to accept the terms. This will take you to the dashboard:
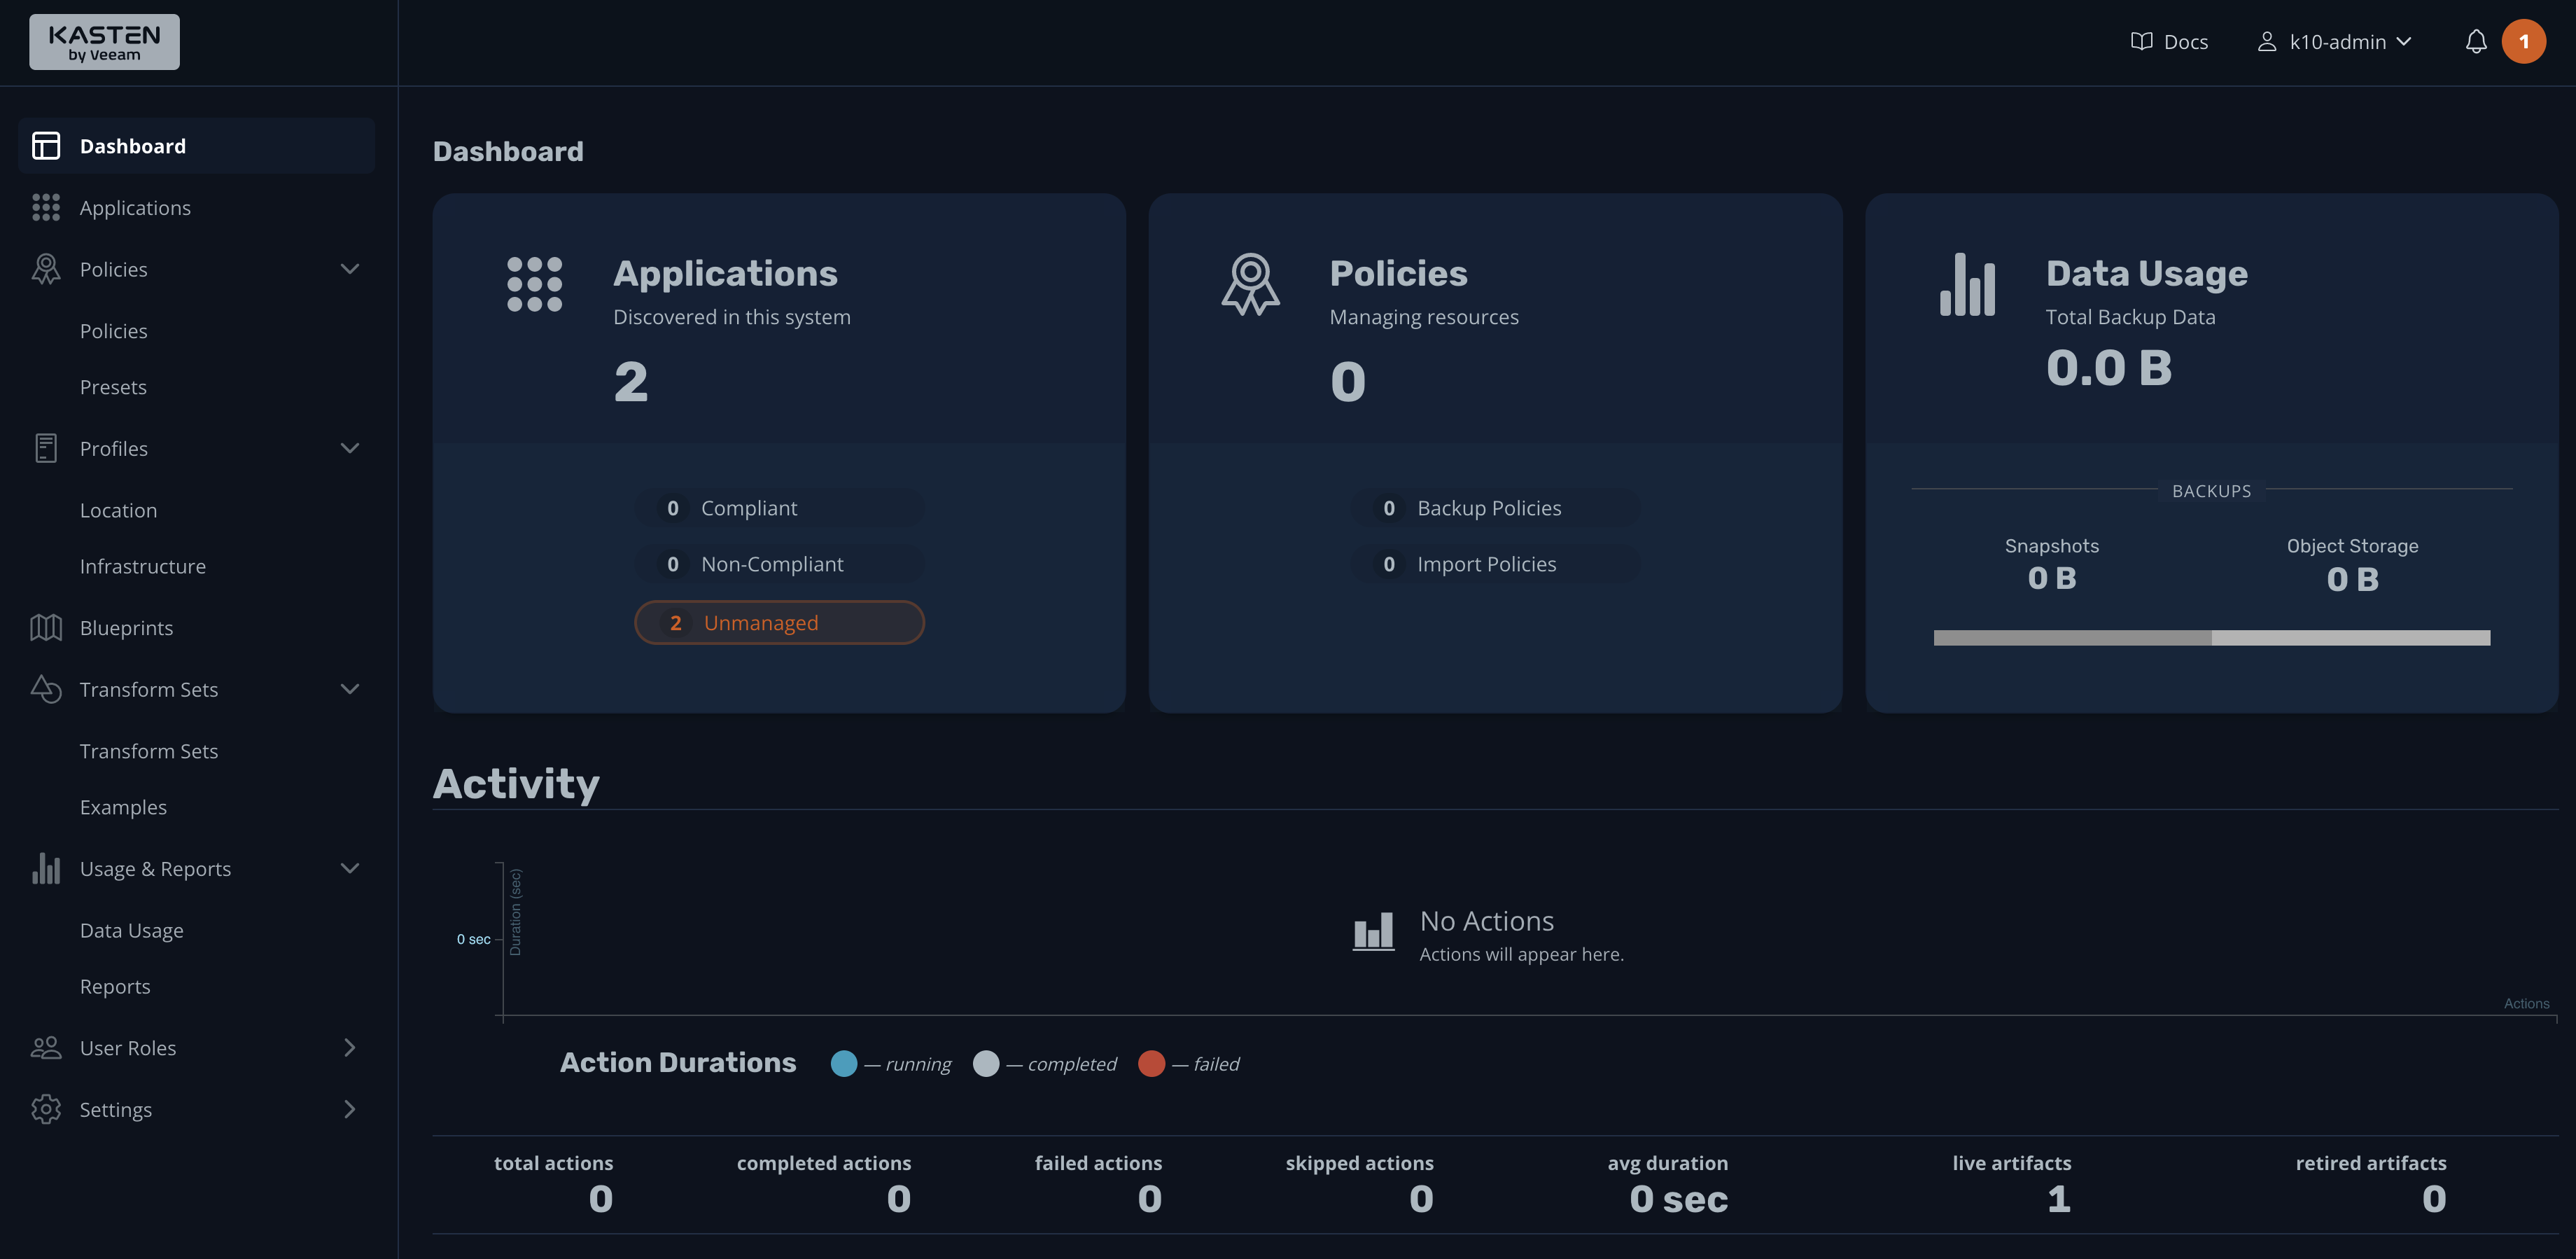
That's it! Kasten K10 is ready to perform your first backup of the Kubernetes cluster.
Backup Process
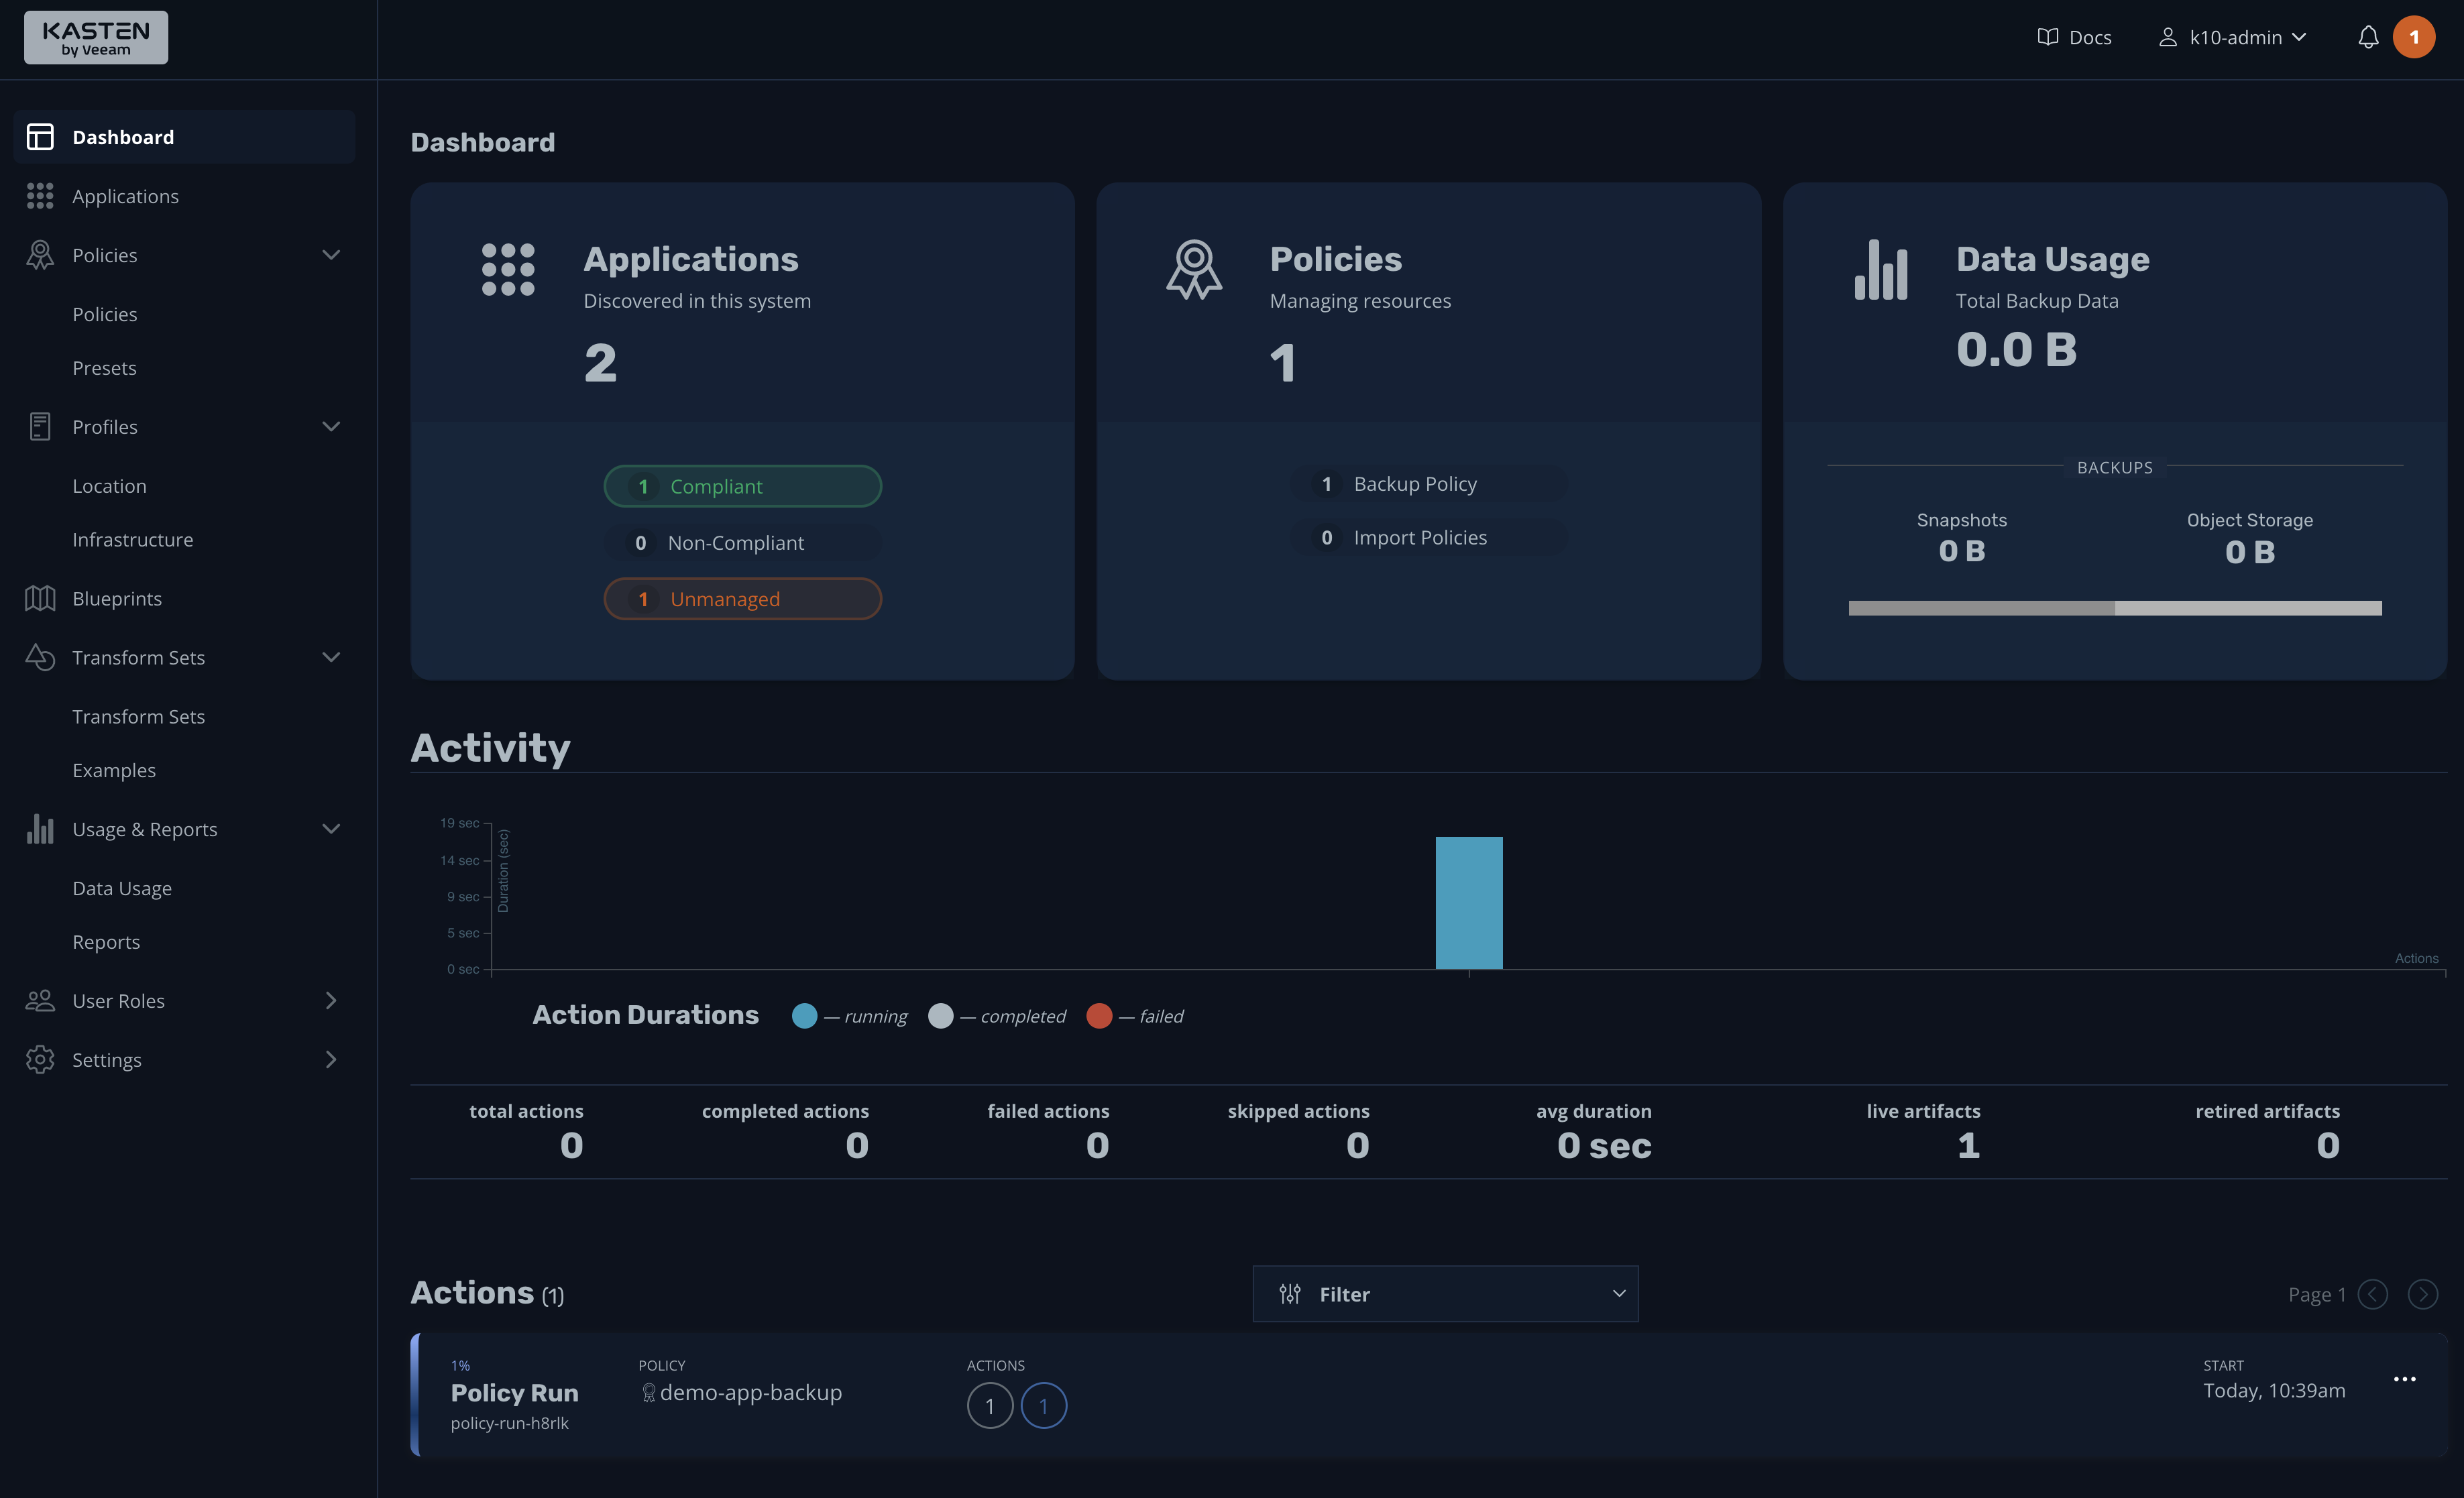
You may have noticed in the previous image that the Applications widget lists two applications on the system. If you click it for more details, you'll be taken to the Applications dashboard:
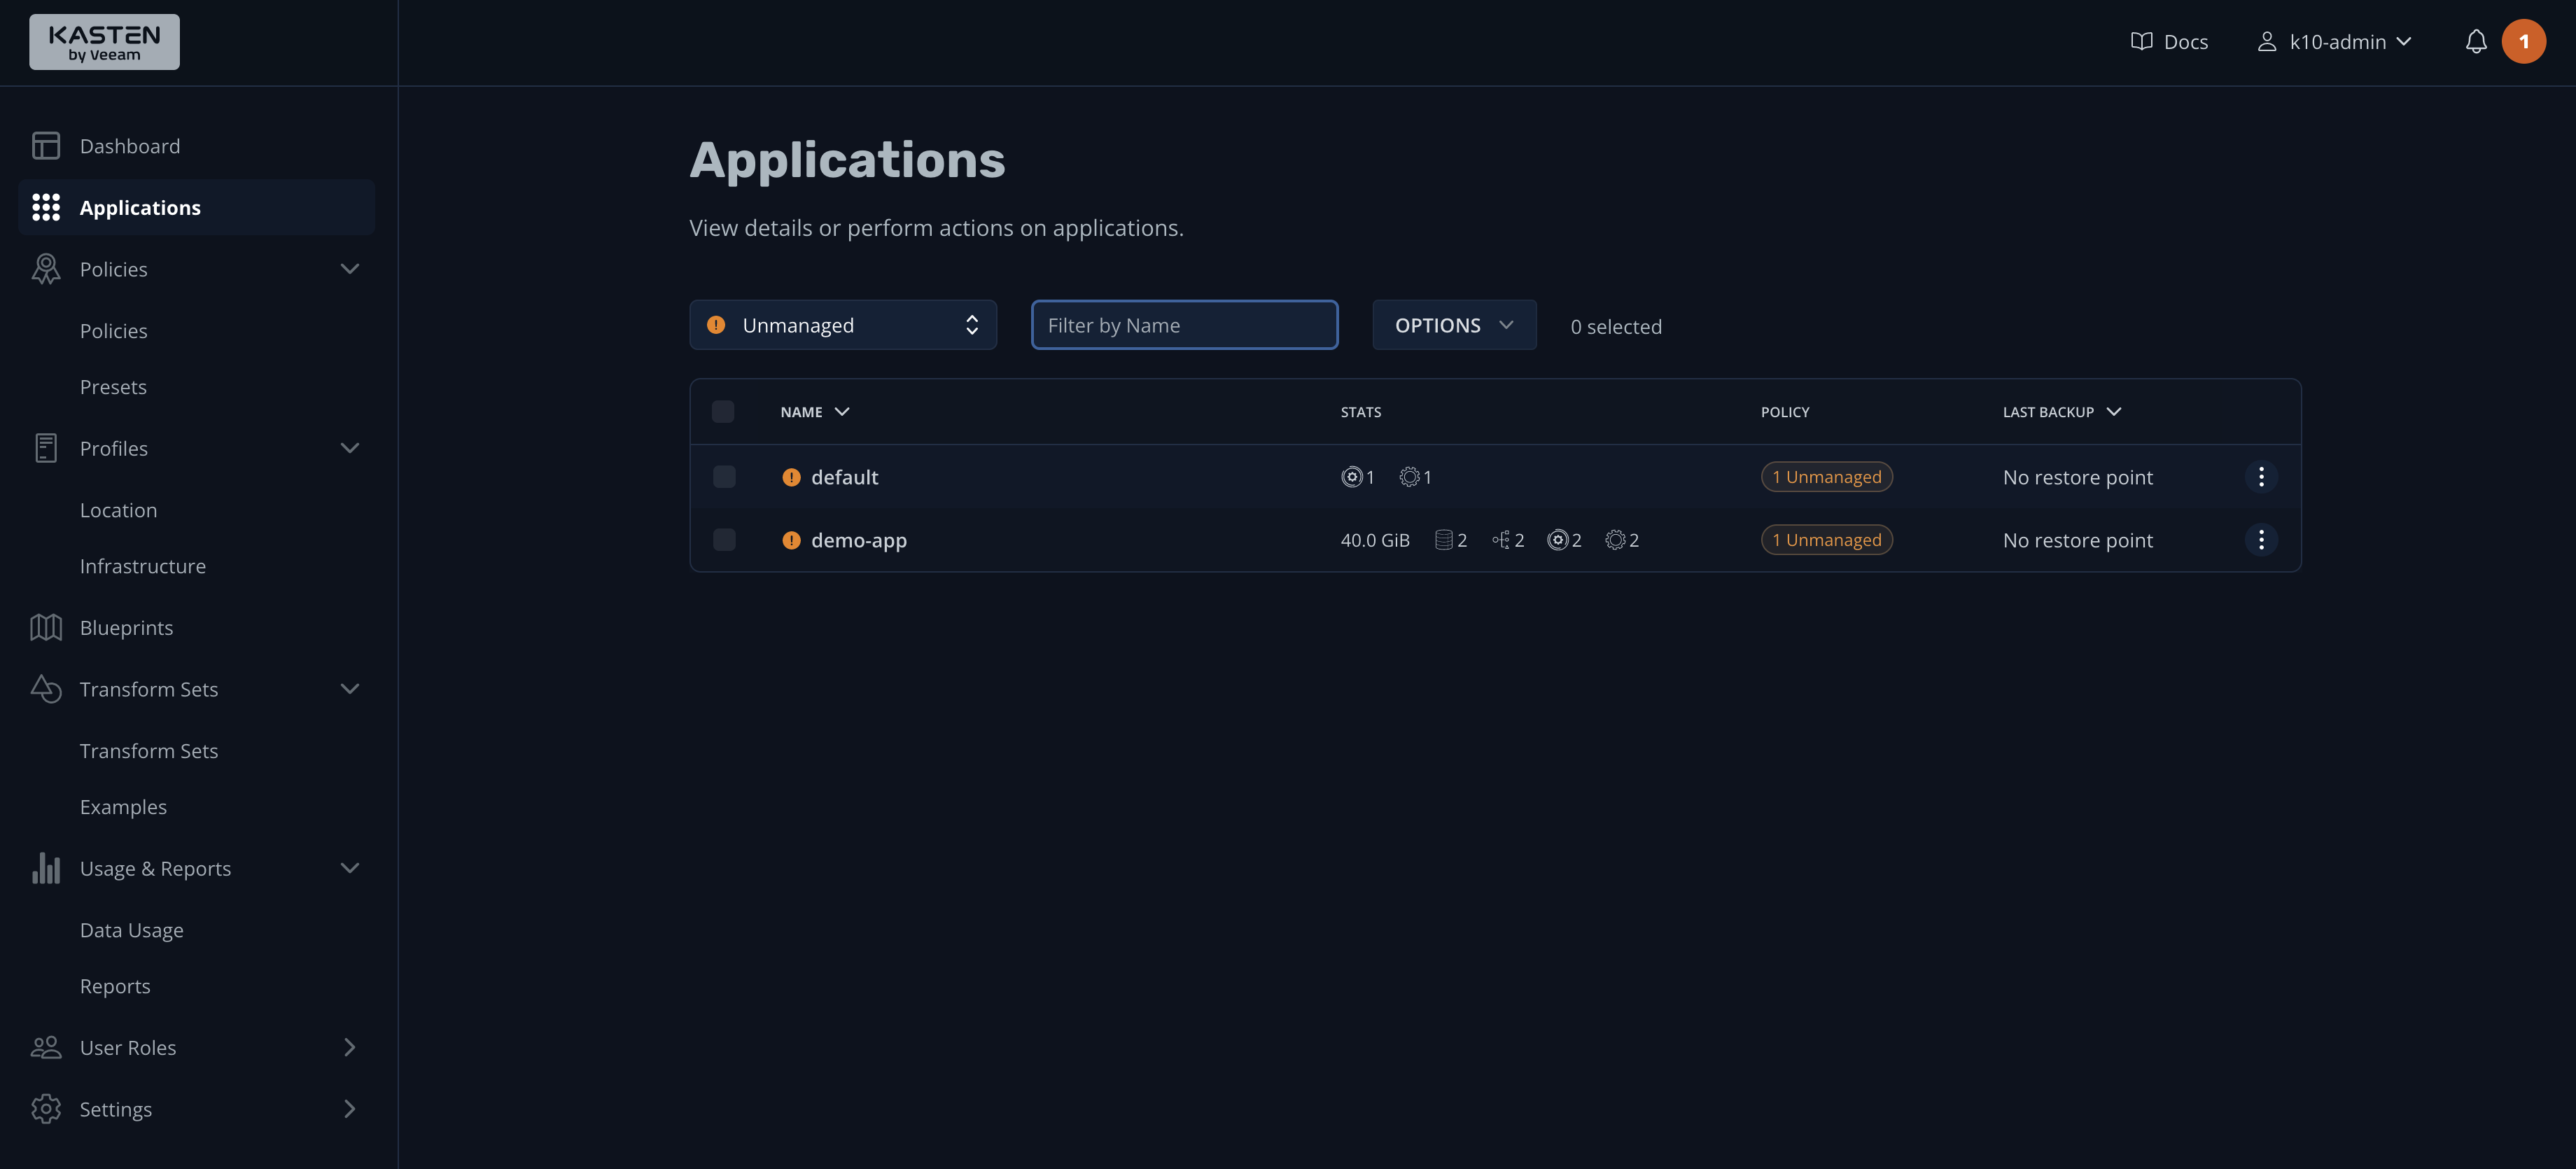
K10 assumes that you use a namespace-based approach to deploying your applications and services, so "applications" are actually the namespaces of your Kubernetes cluster. This explains why the demo-app and default namespaces are listed in the screenshot.
Creating a Backup Policy
On the Applications dashboard, the STATS column lists the space used by persistent volumes (40 GiB), along with the number of configs, services, and workloads in the demo-app namespace. You'll also notice that the POLICY column indicates "Unmanaged," which means that you have not established a schedule (policy) for backing up this application. Correct that by clicking the hamburger menu on the right and selecting Create a Policy:

The next thing you'll see is the New Policy pop-up window:

By default, the name field will be automatically populated using the format NAMESPACE_NAME-backup, but you can change it to any other name you like. Optionally, you can also add comments to help explain the backup policy.
For this tutorial, the snapshot action was chosen with a daily backup frequency. However, K10 supports other intervals as well as advanced frequency options that allow you to customize the snapshot interval according to your requirements. Likewise, you can configure snapshot retention policies that fit your needs.
If you scroll down, you'll notice that there are more options:
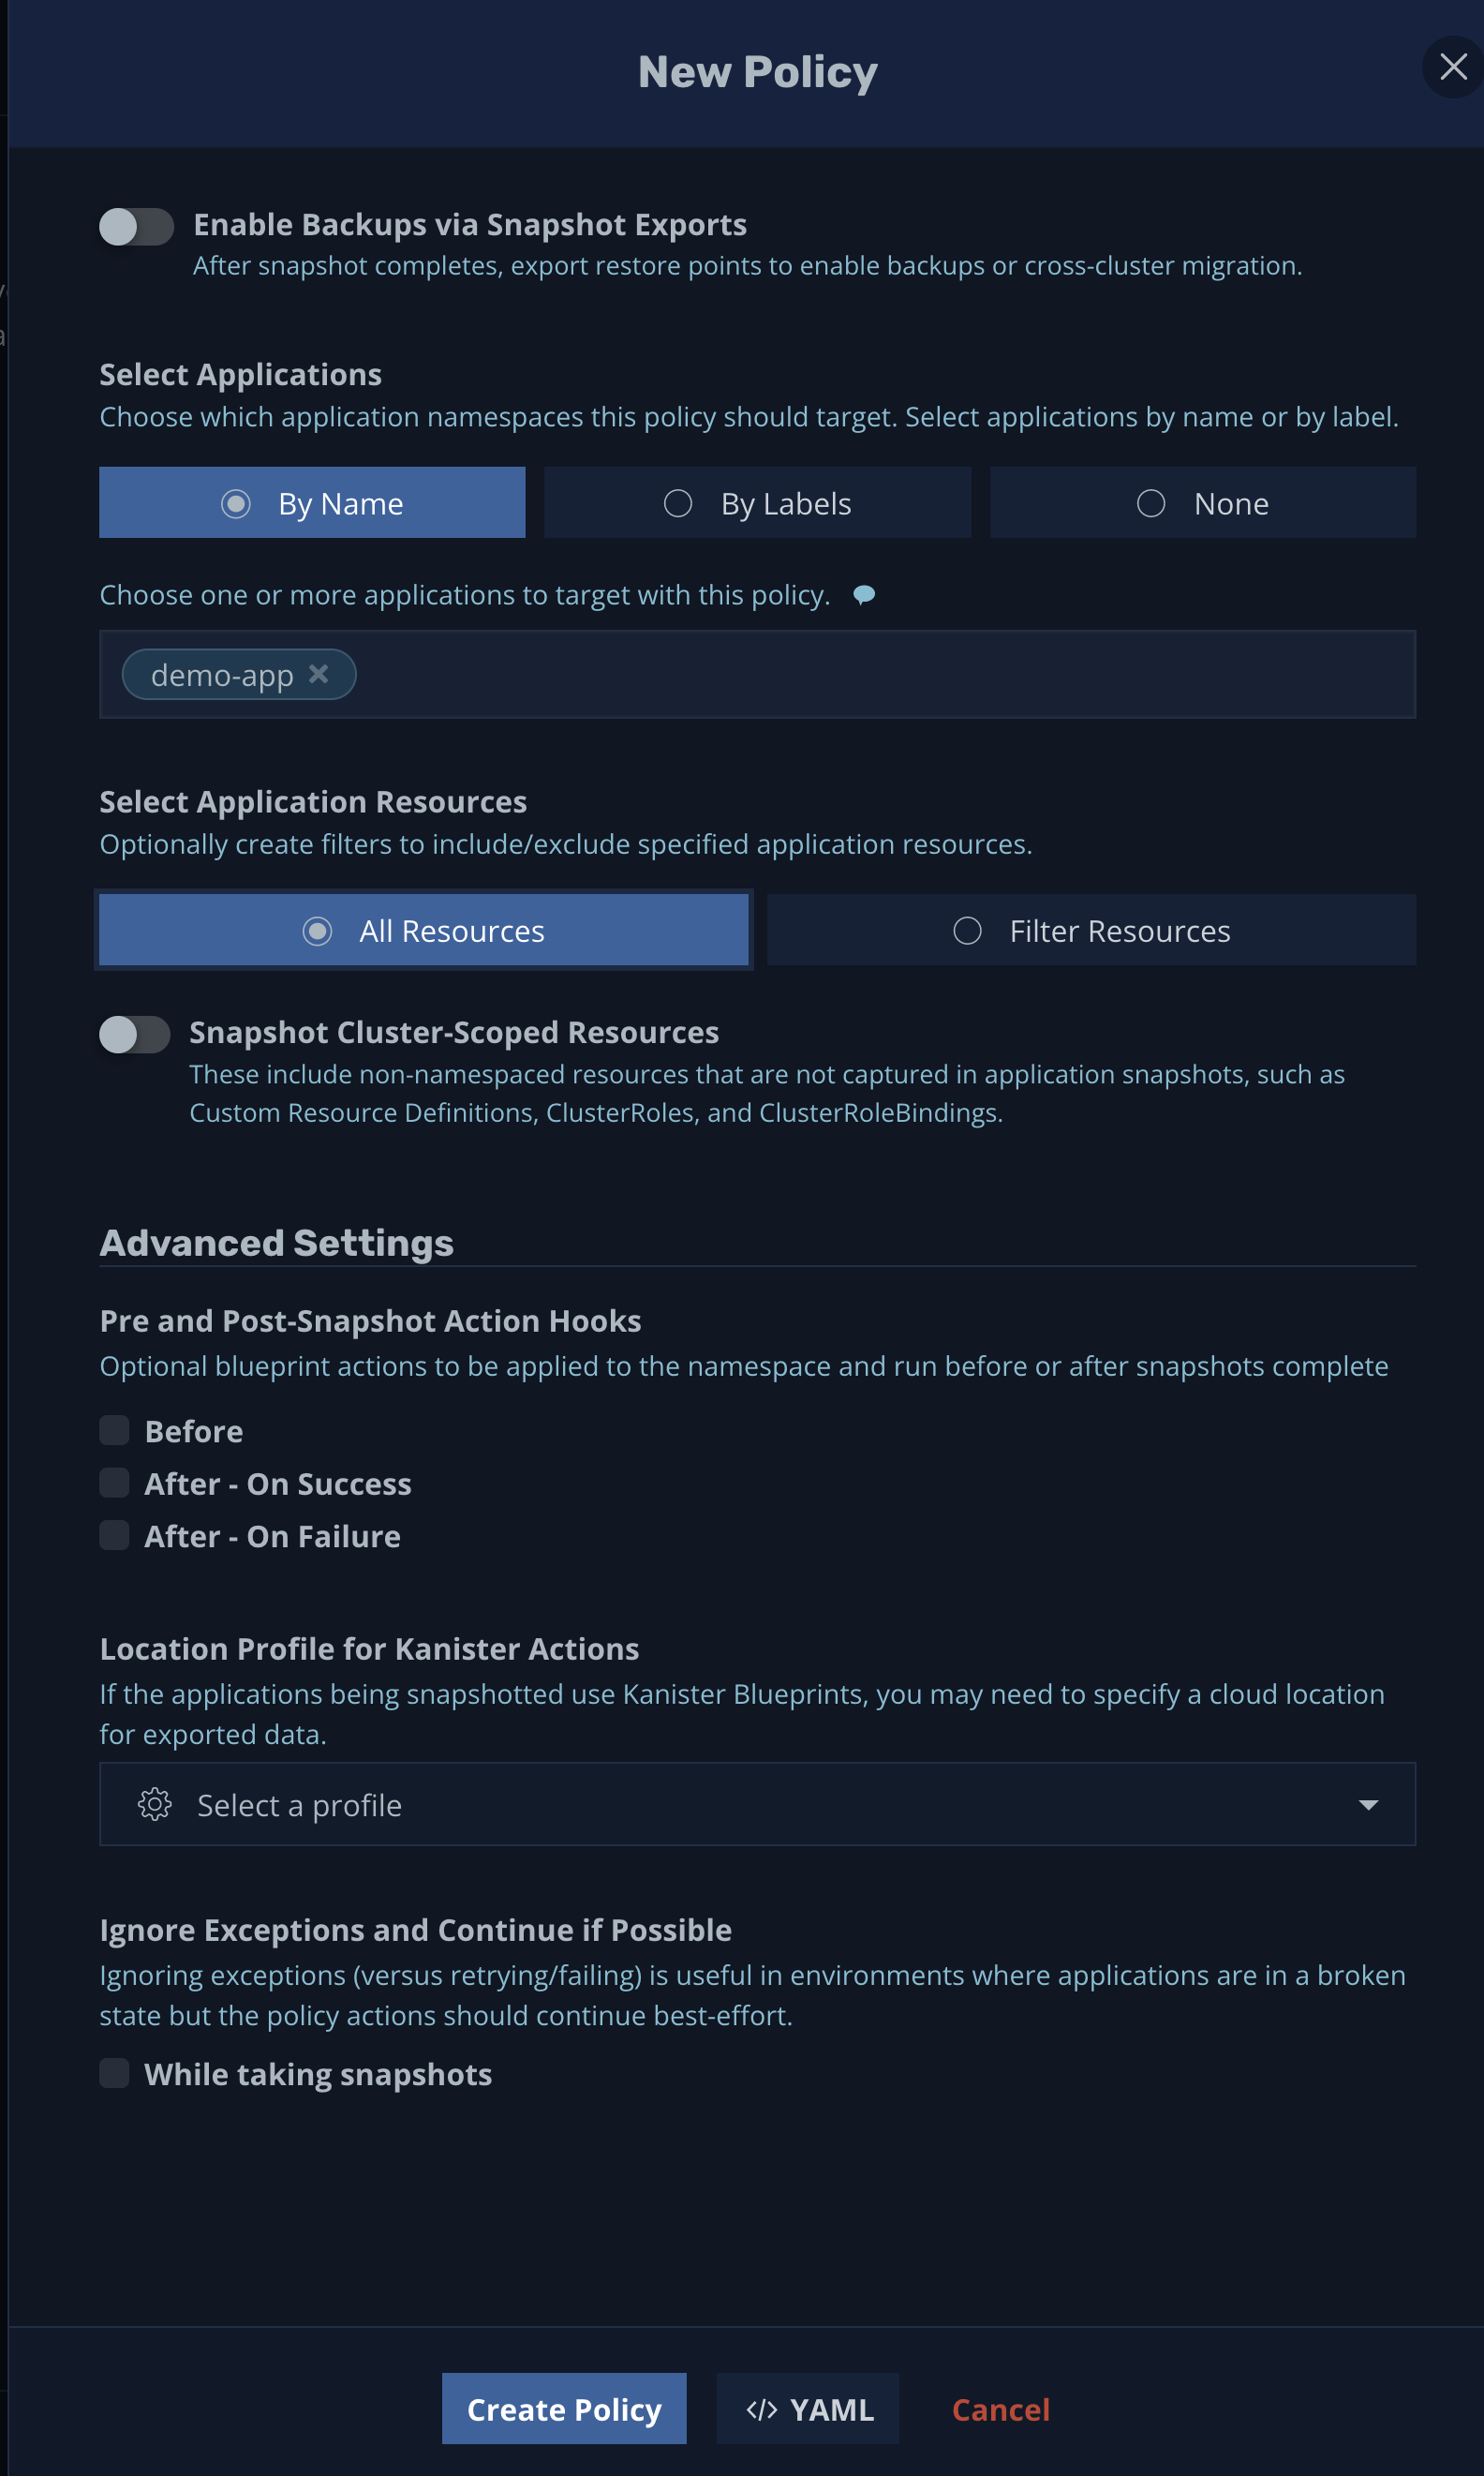
You can enable snapshot exports for cross-cluster migration, select target applications by name or label, choose which resources will be included in the backup, and set up pre- and post-snapshot action hooks and a location profile.
For this example, accept the default settings to back up all resources in the demo-app namespace.
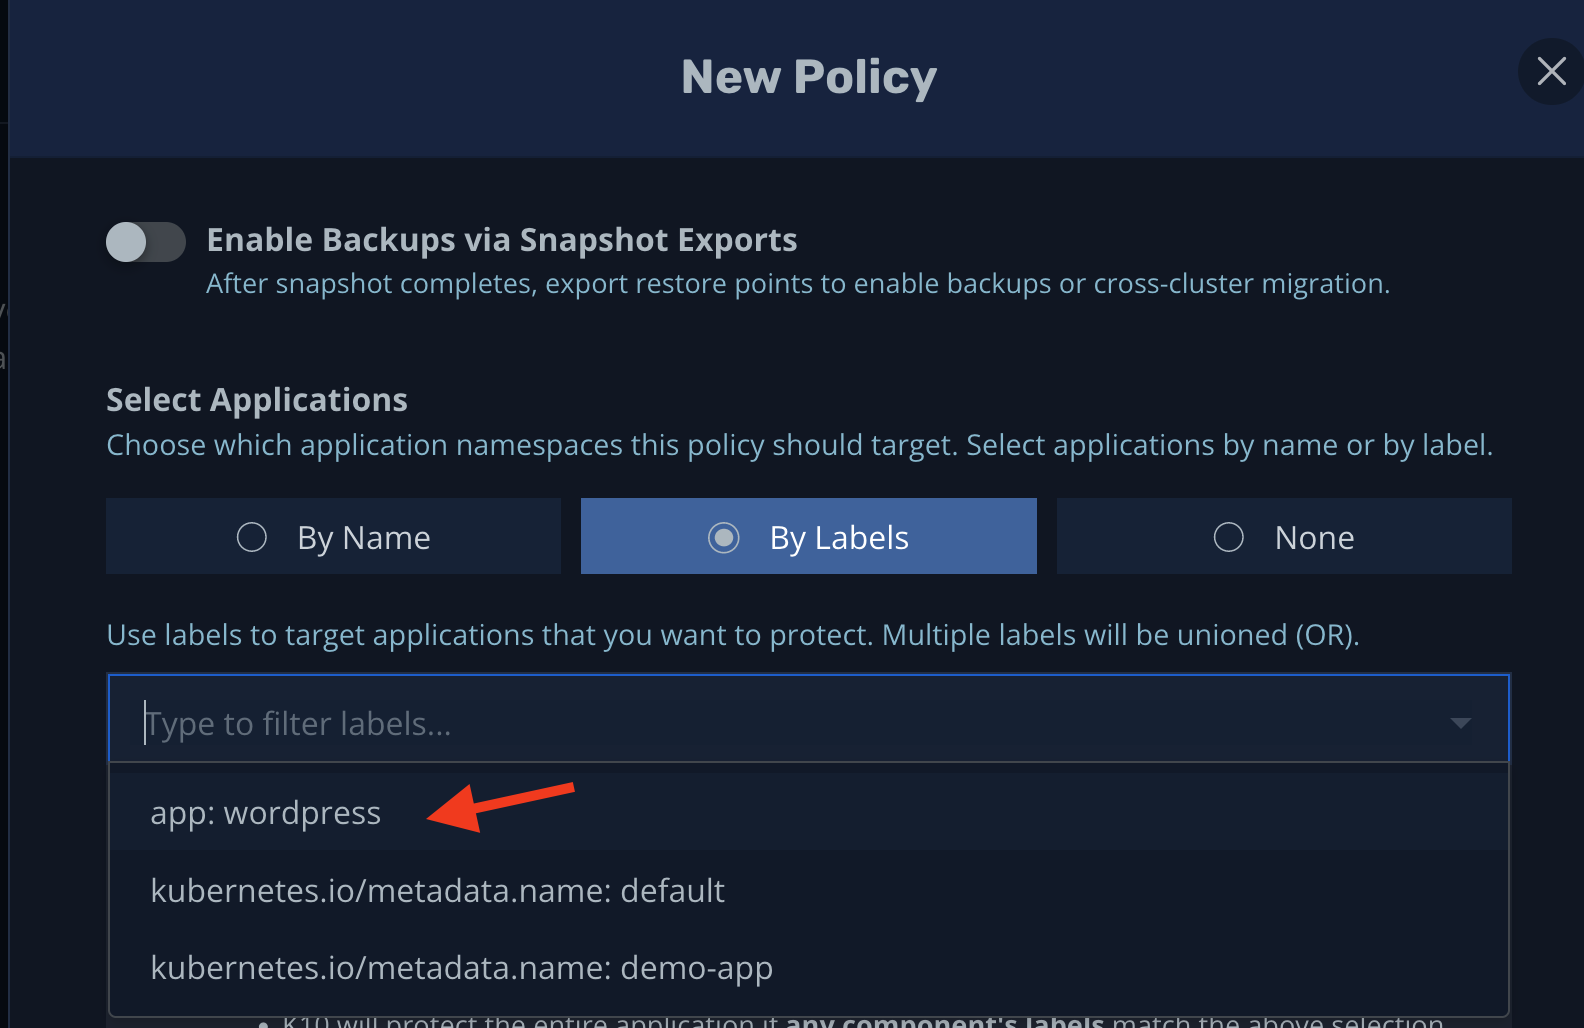
It's considered best practice to make frequent backups of critical components of your app (the database, for example) as well as key Kubernetes cluster configuration resources. To do this, you can take advantage of Kubernetes labels, as shown below:
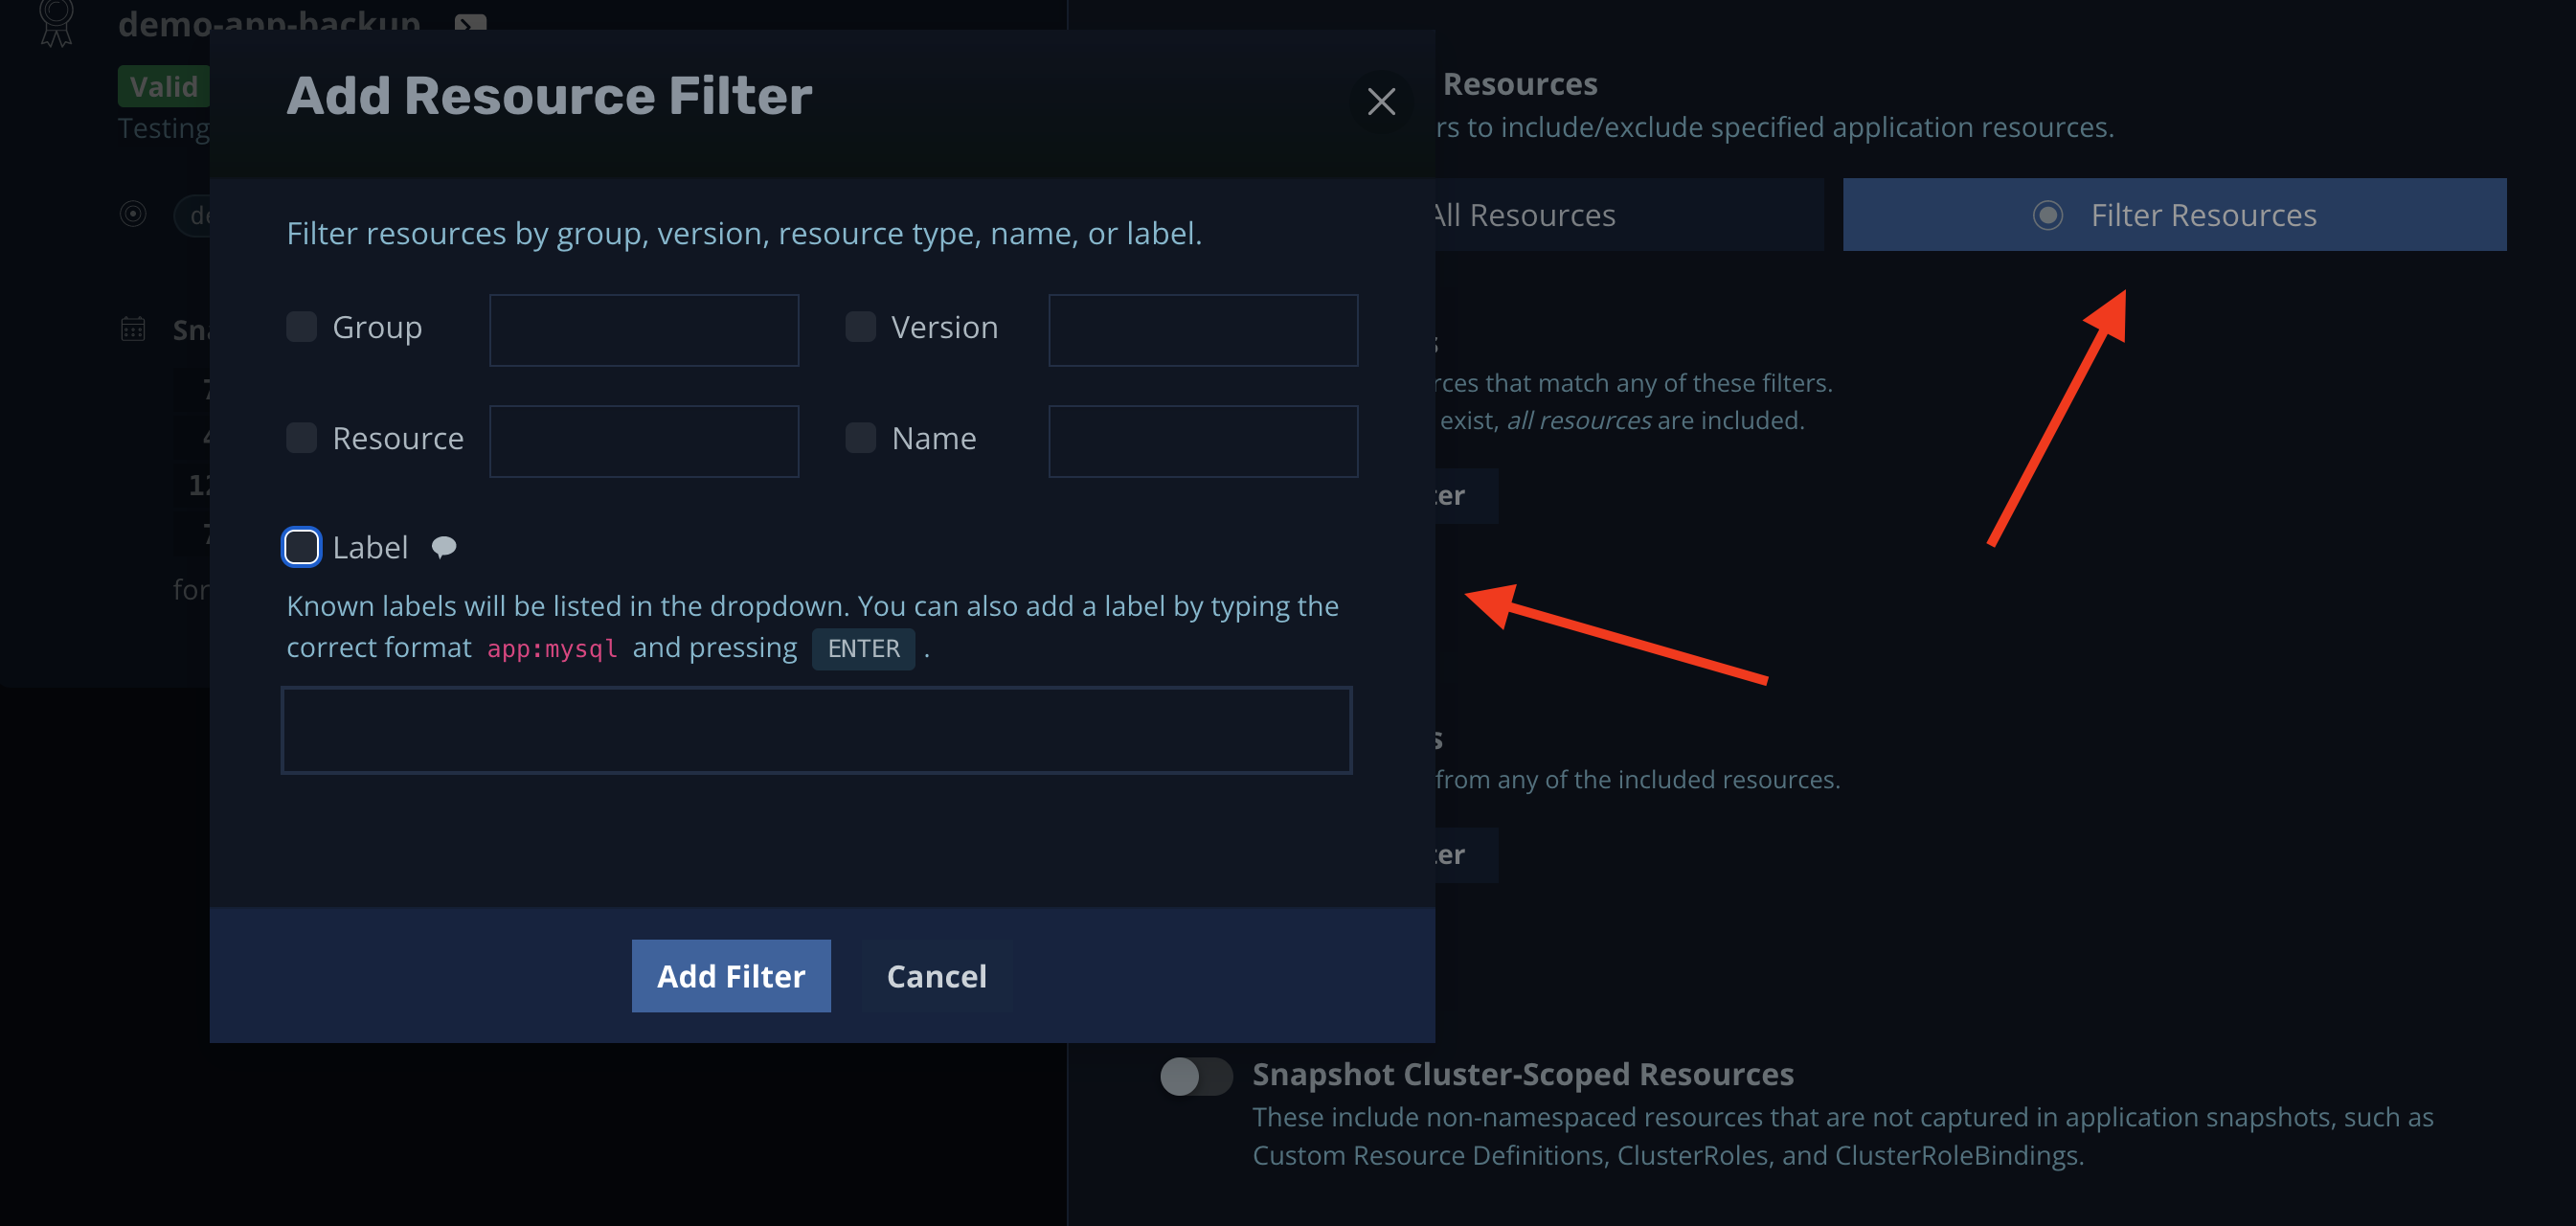
Alternatively, you can filter resources by group, version, name, and so on:
Put another way, you can create different policies with different intervals and resources.
Now, press the Create Policy button to save the new policy, which will take you to the Policies page:
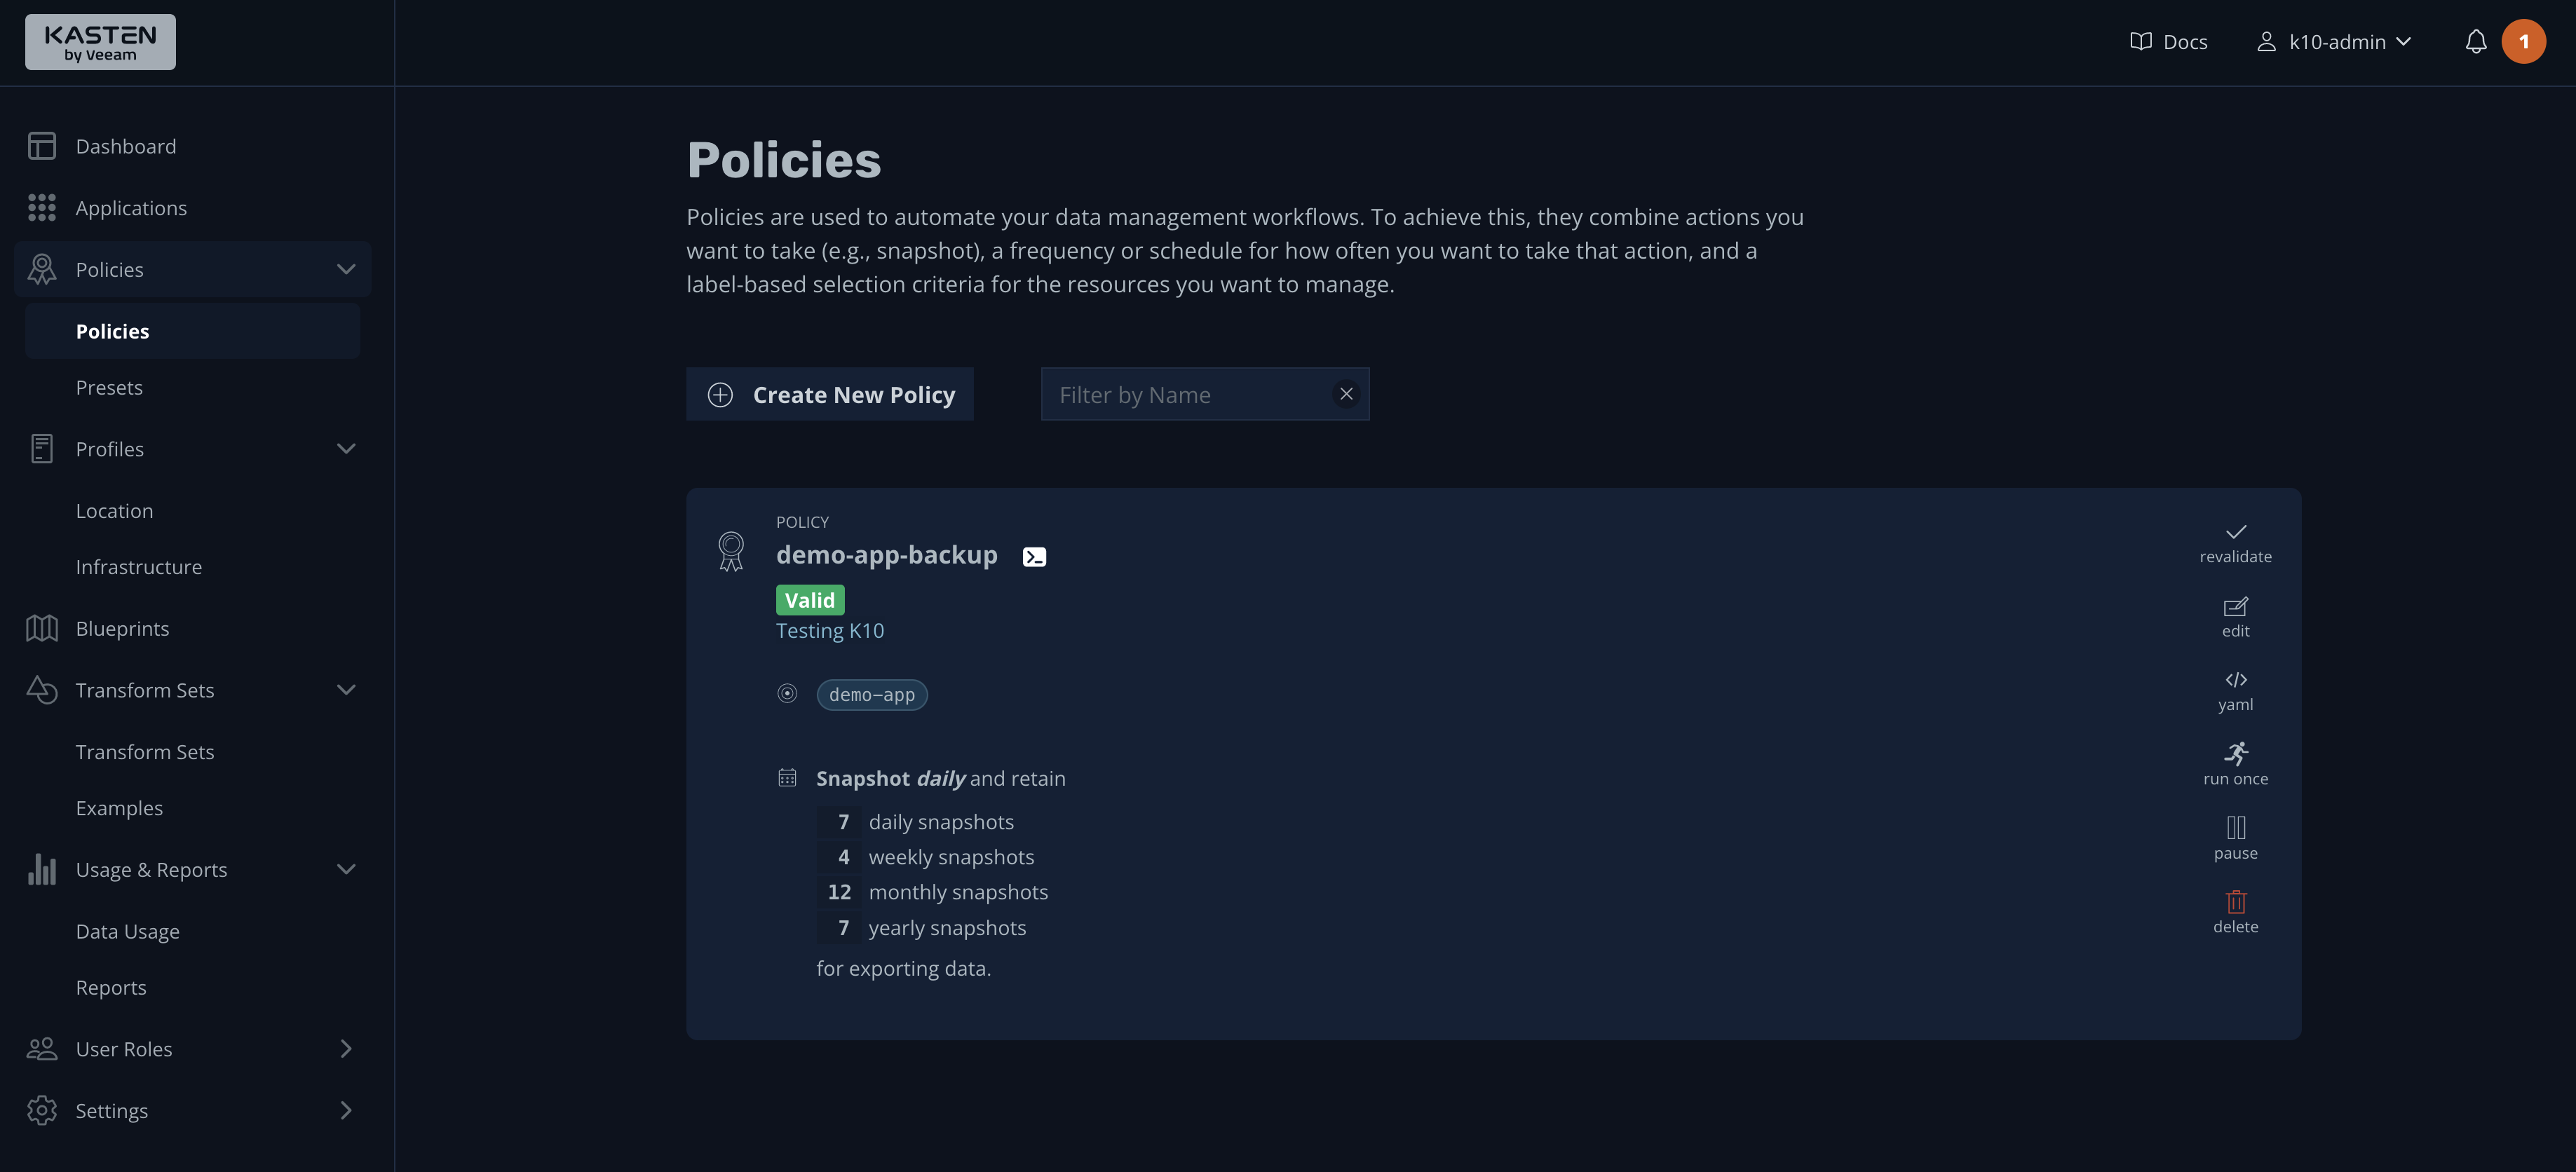
As you can see, a summary of the backup policy is displayed, along with various actions on the right side.
Manual Backups
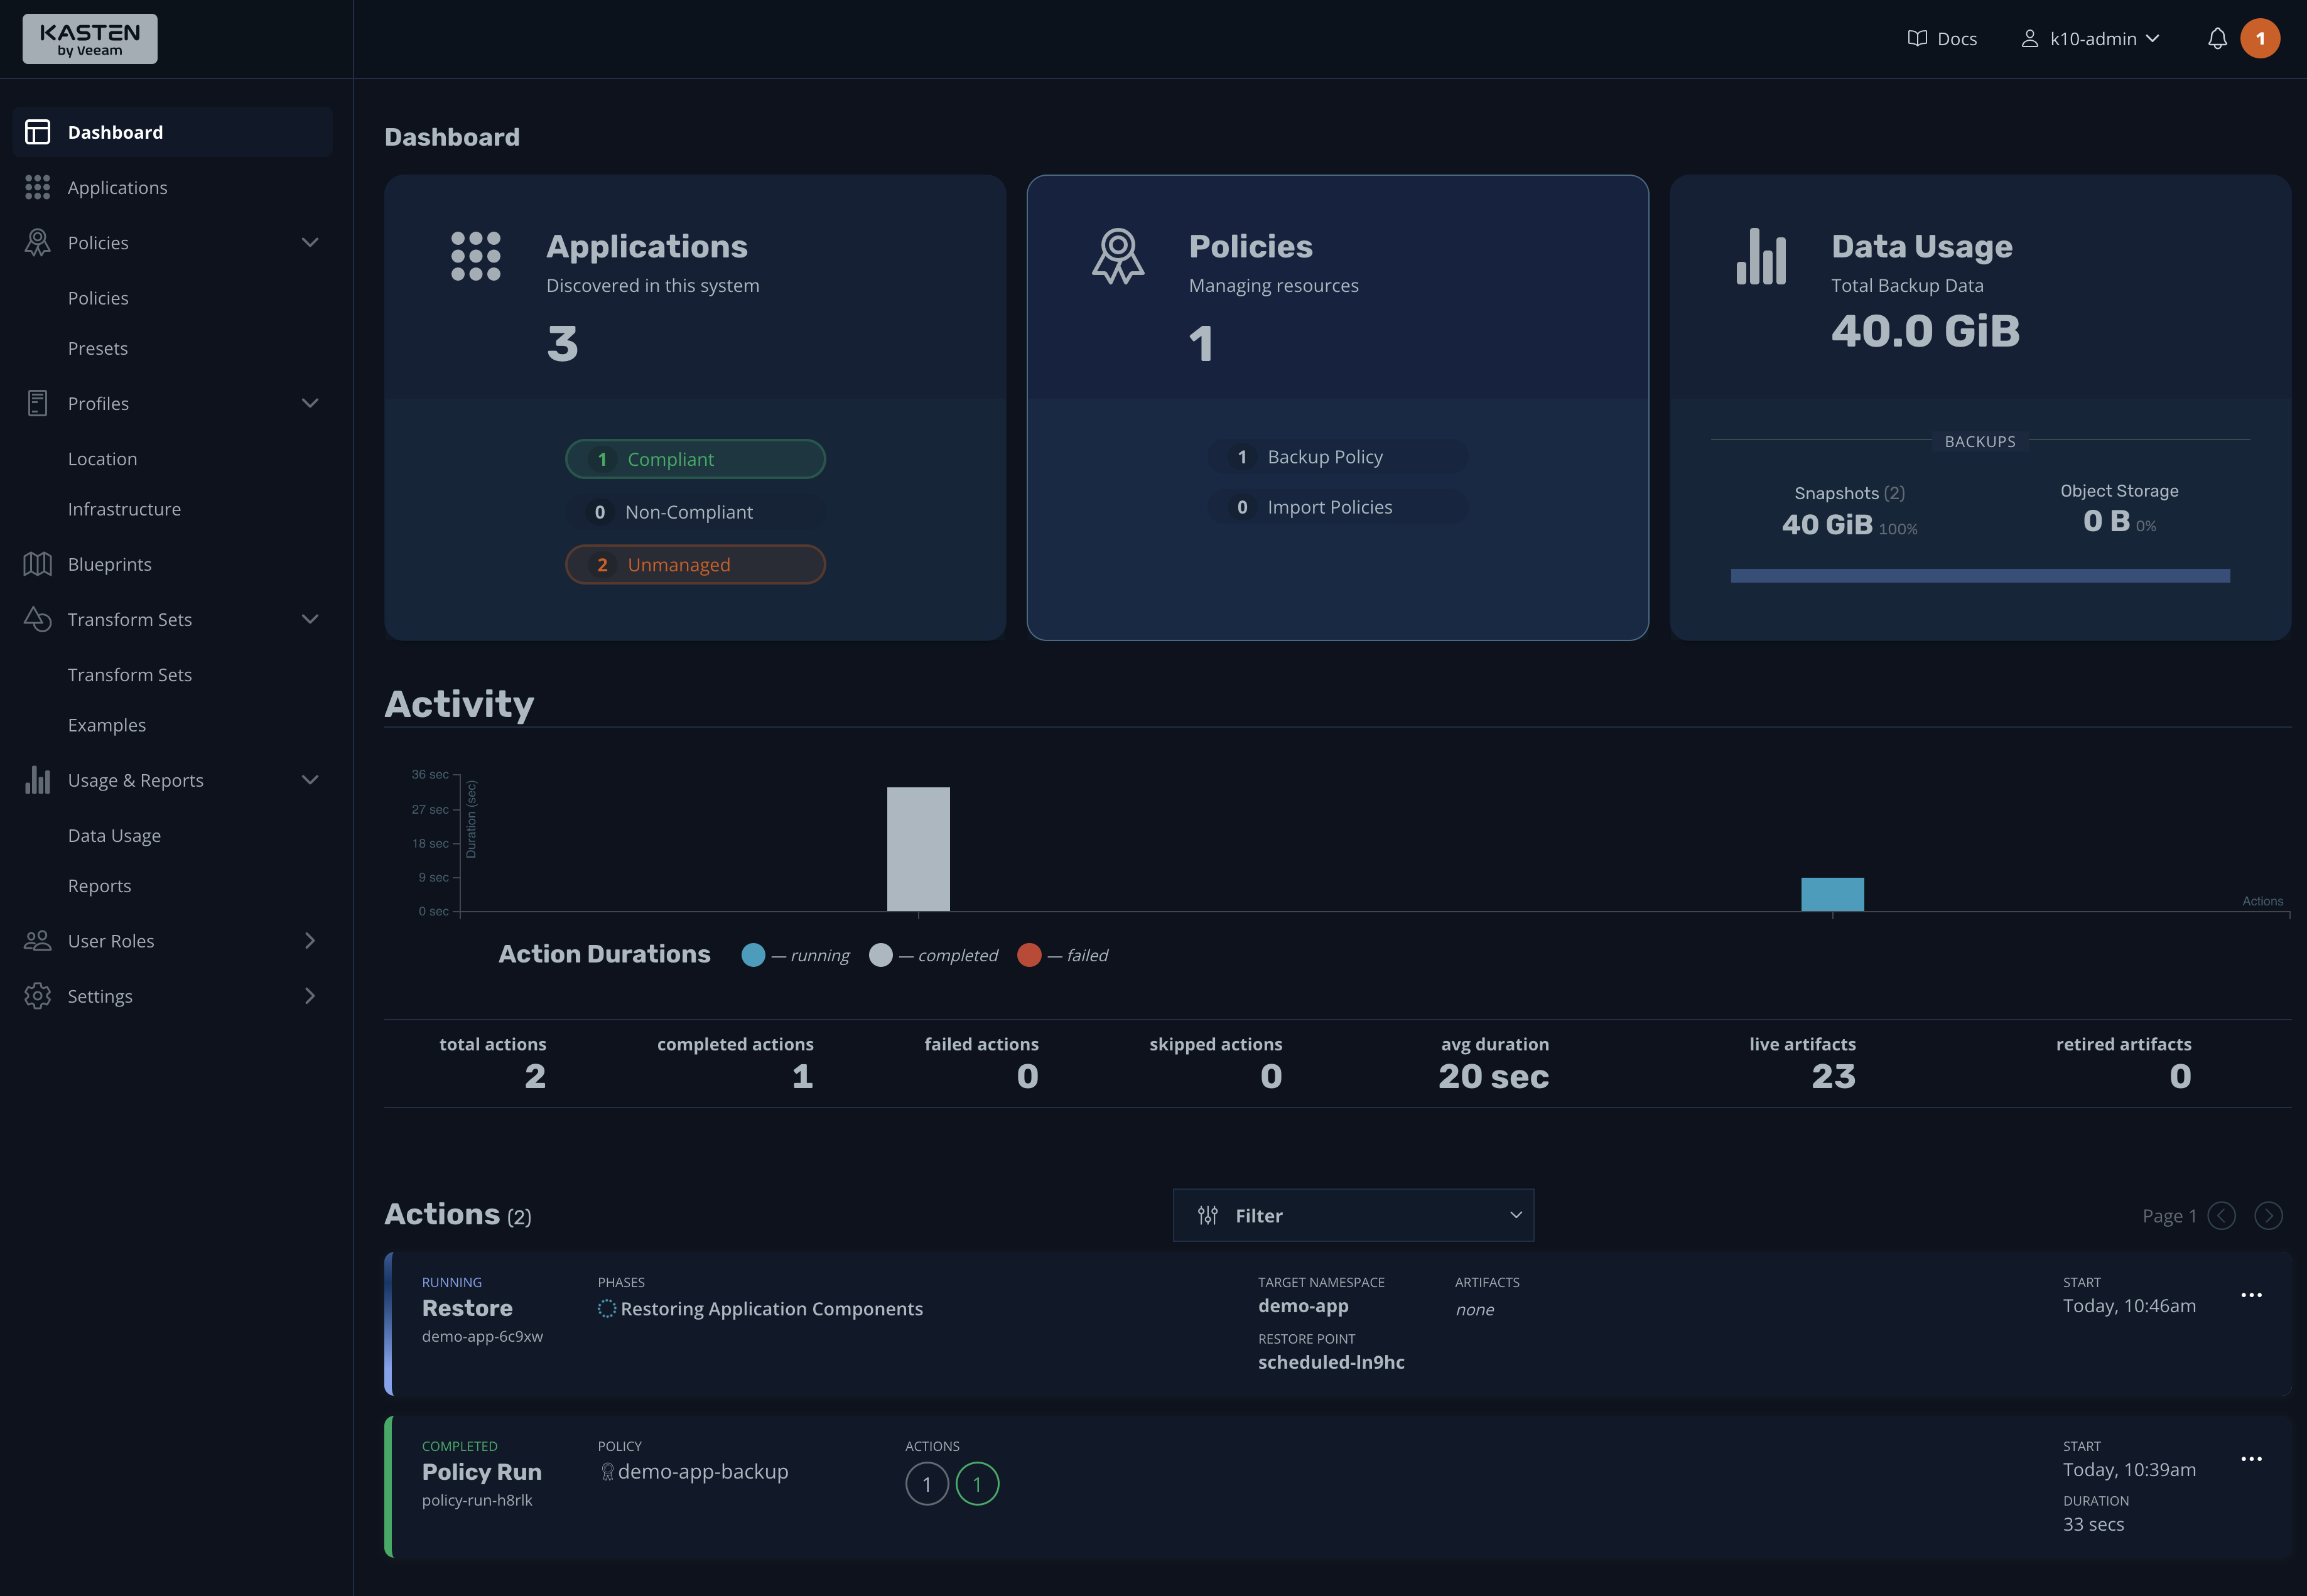
There's no better way to test a policy than to run it; do so by pressing the run once icon. Confirm that you want to run the backup, then go to the dashboard to see the progress of the backup:
Once the process is finished, you should see an output indicating that the backup was successful:

If you click it, its details will be shown:
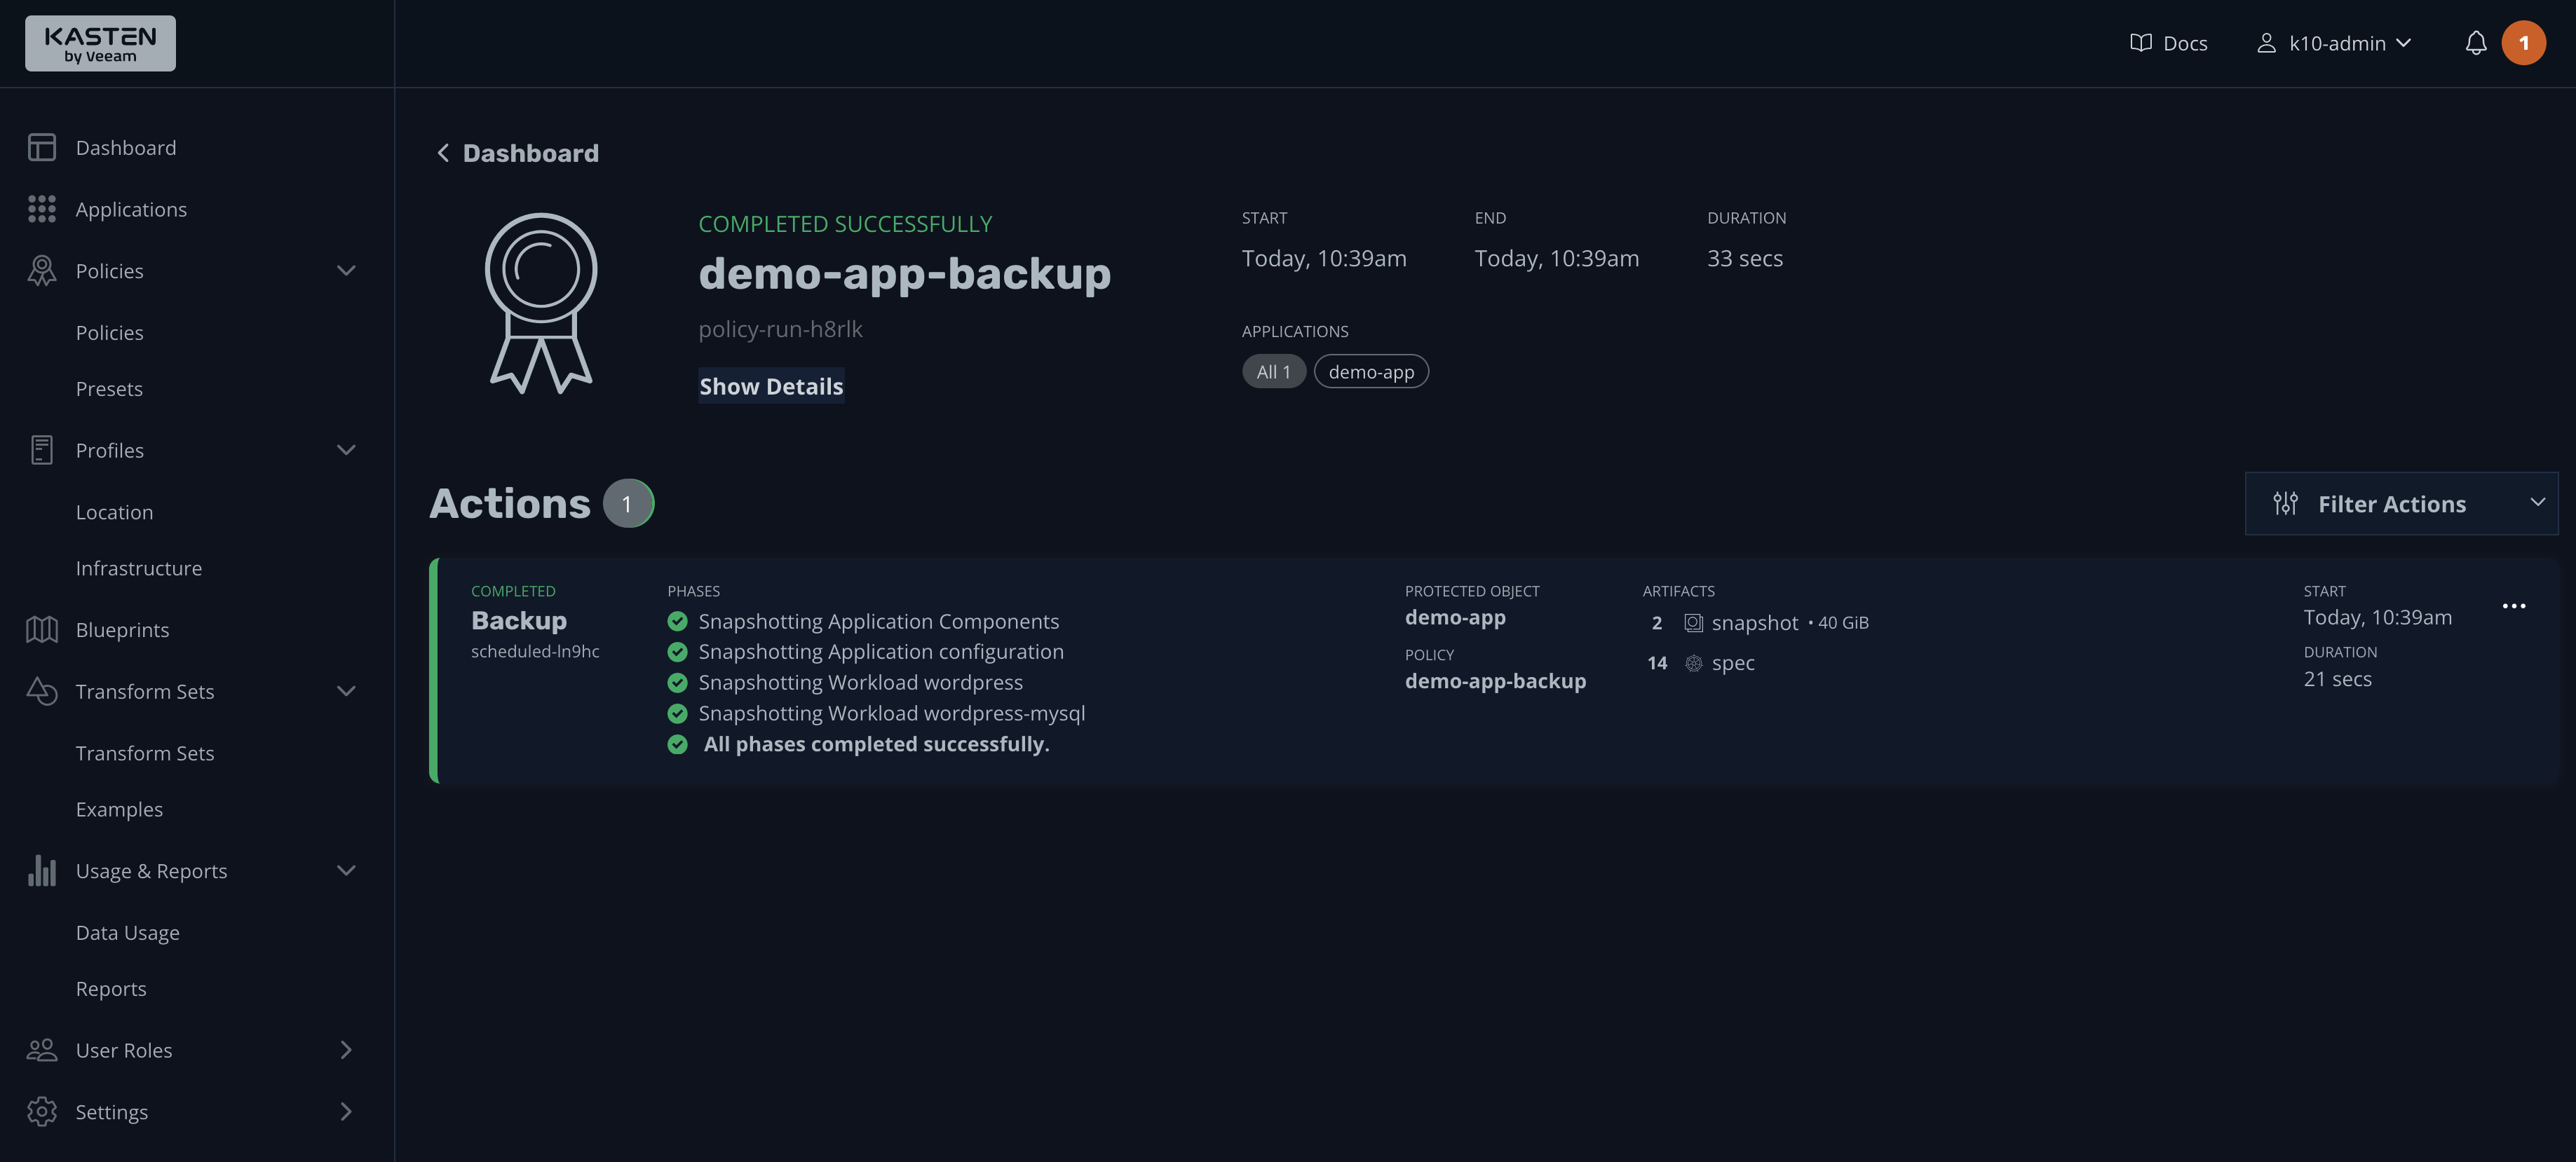
In short, during the backup process, you can either back up the entire namespace or choose what components you need to back up. Furthermore, using backup policies, you can set hourly, daily, weekly, or even custom schedules based on your requirements.
A backup is useless if it cannot be trusted; therefore, it's best practice to frequently validate backups by restoring them in a separate environment to check data integrity. That's precisely what you will do next, during the restore process.
Restore Process
Let's check that the restore process is working as expected. To do this, you could take advantage of the post that was previously created or modify it again if you wish:
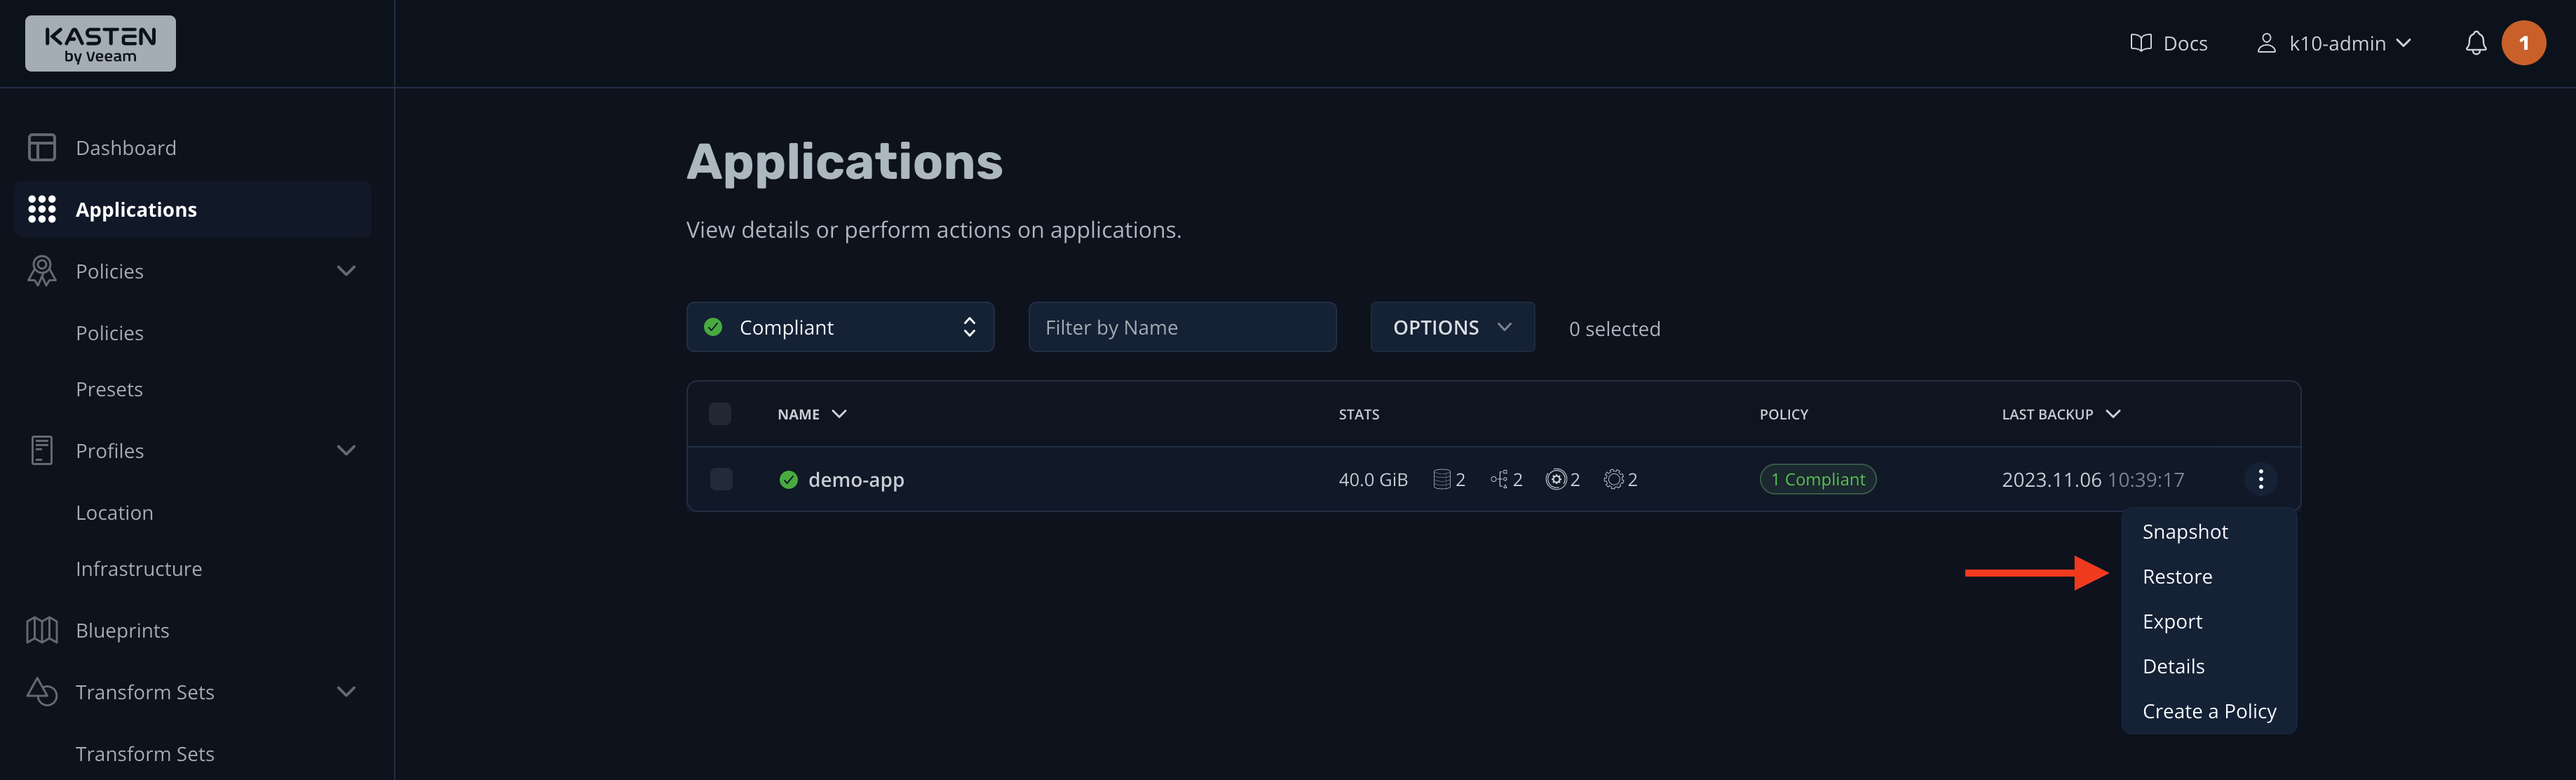
Next, go to the K10 dashboard and click the Applications widget. You'll notice that only the demo-app is listed. This is because the "Compliant" filter is on, which means only apps that have a backup policy will be listed. Click the hamburger menu and select Restore:
This will take you to a screen listing all the backups available for this application. K10 calls these "restoration points." Click the only one available:
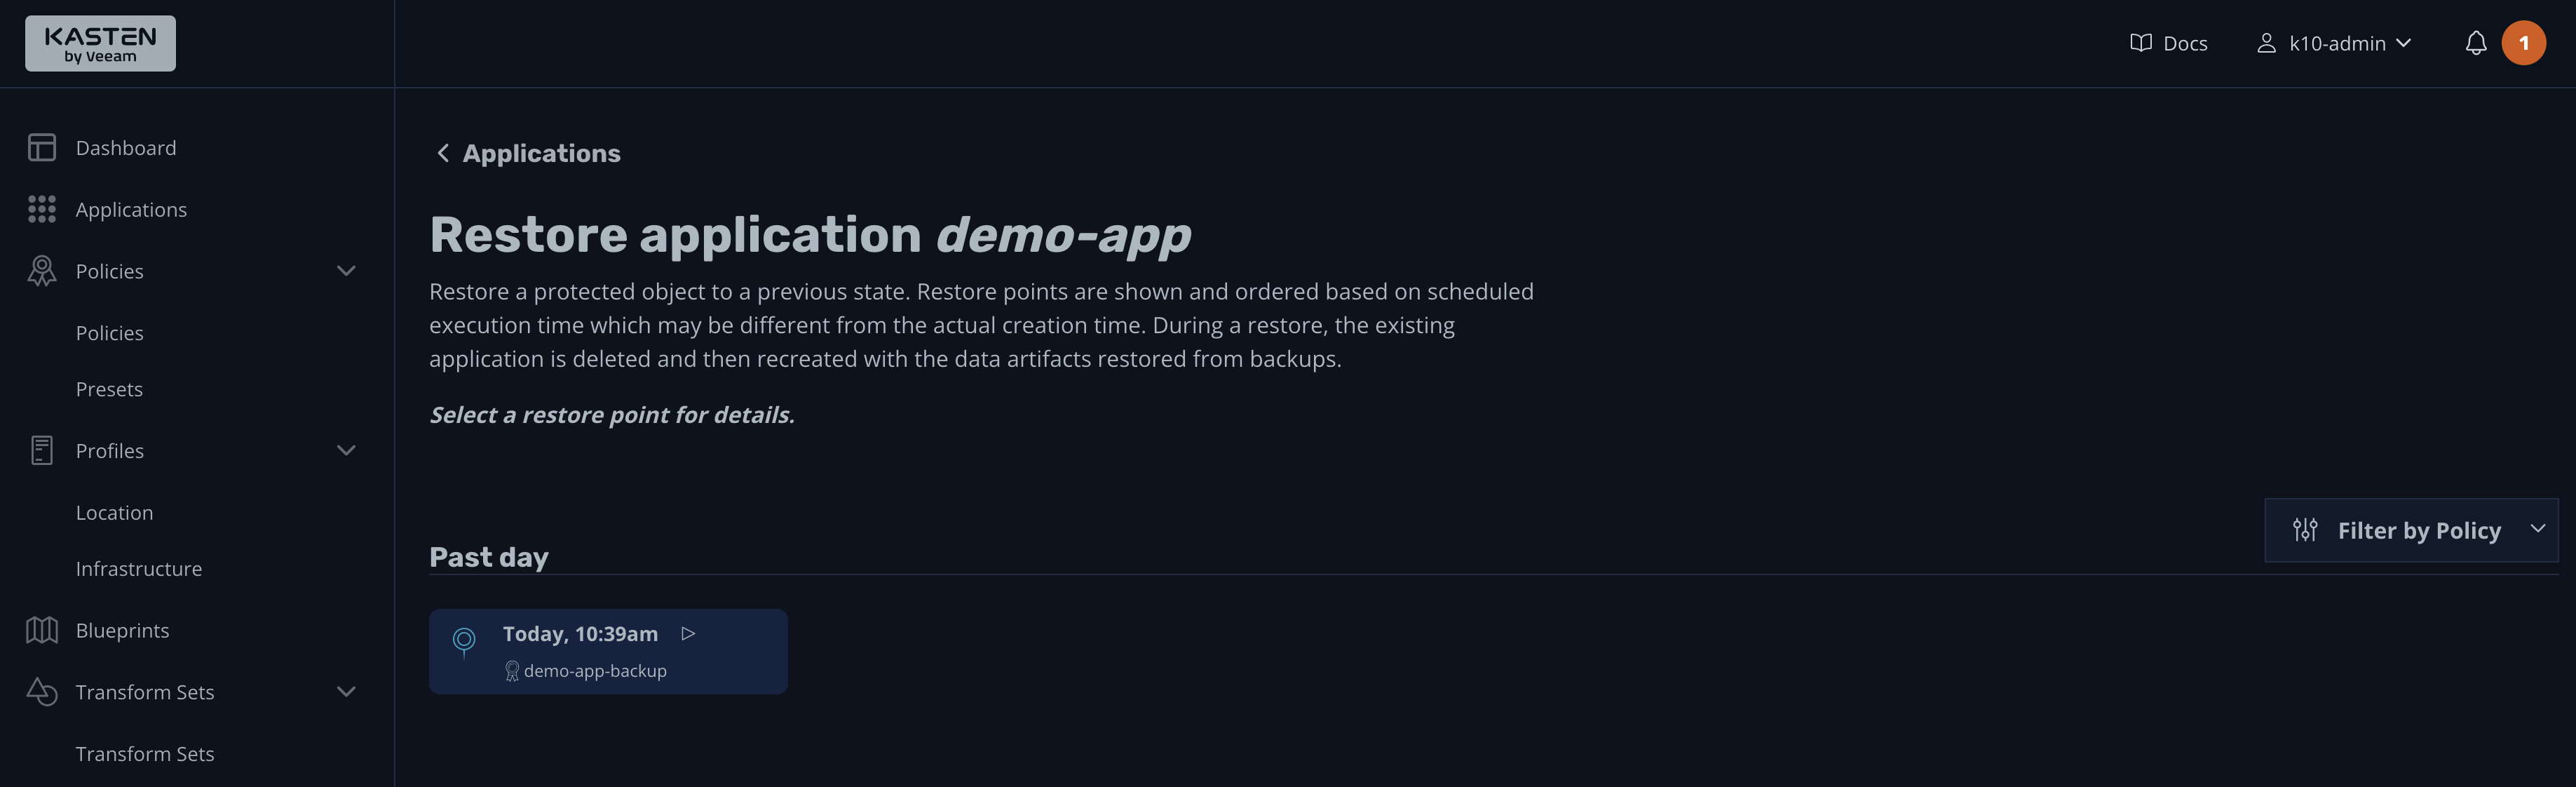
A pop-up window will appear with detailed information about the restore point, including the name of the backup policy, the kubectl command to display the restore point information, and the application name (the namespace where you want to restore the app):
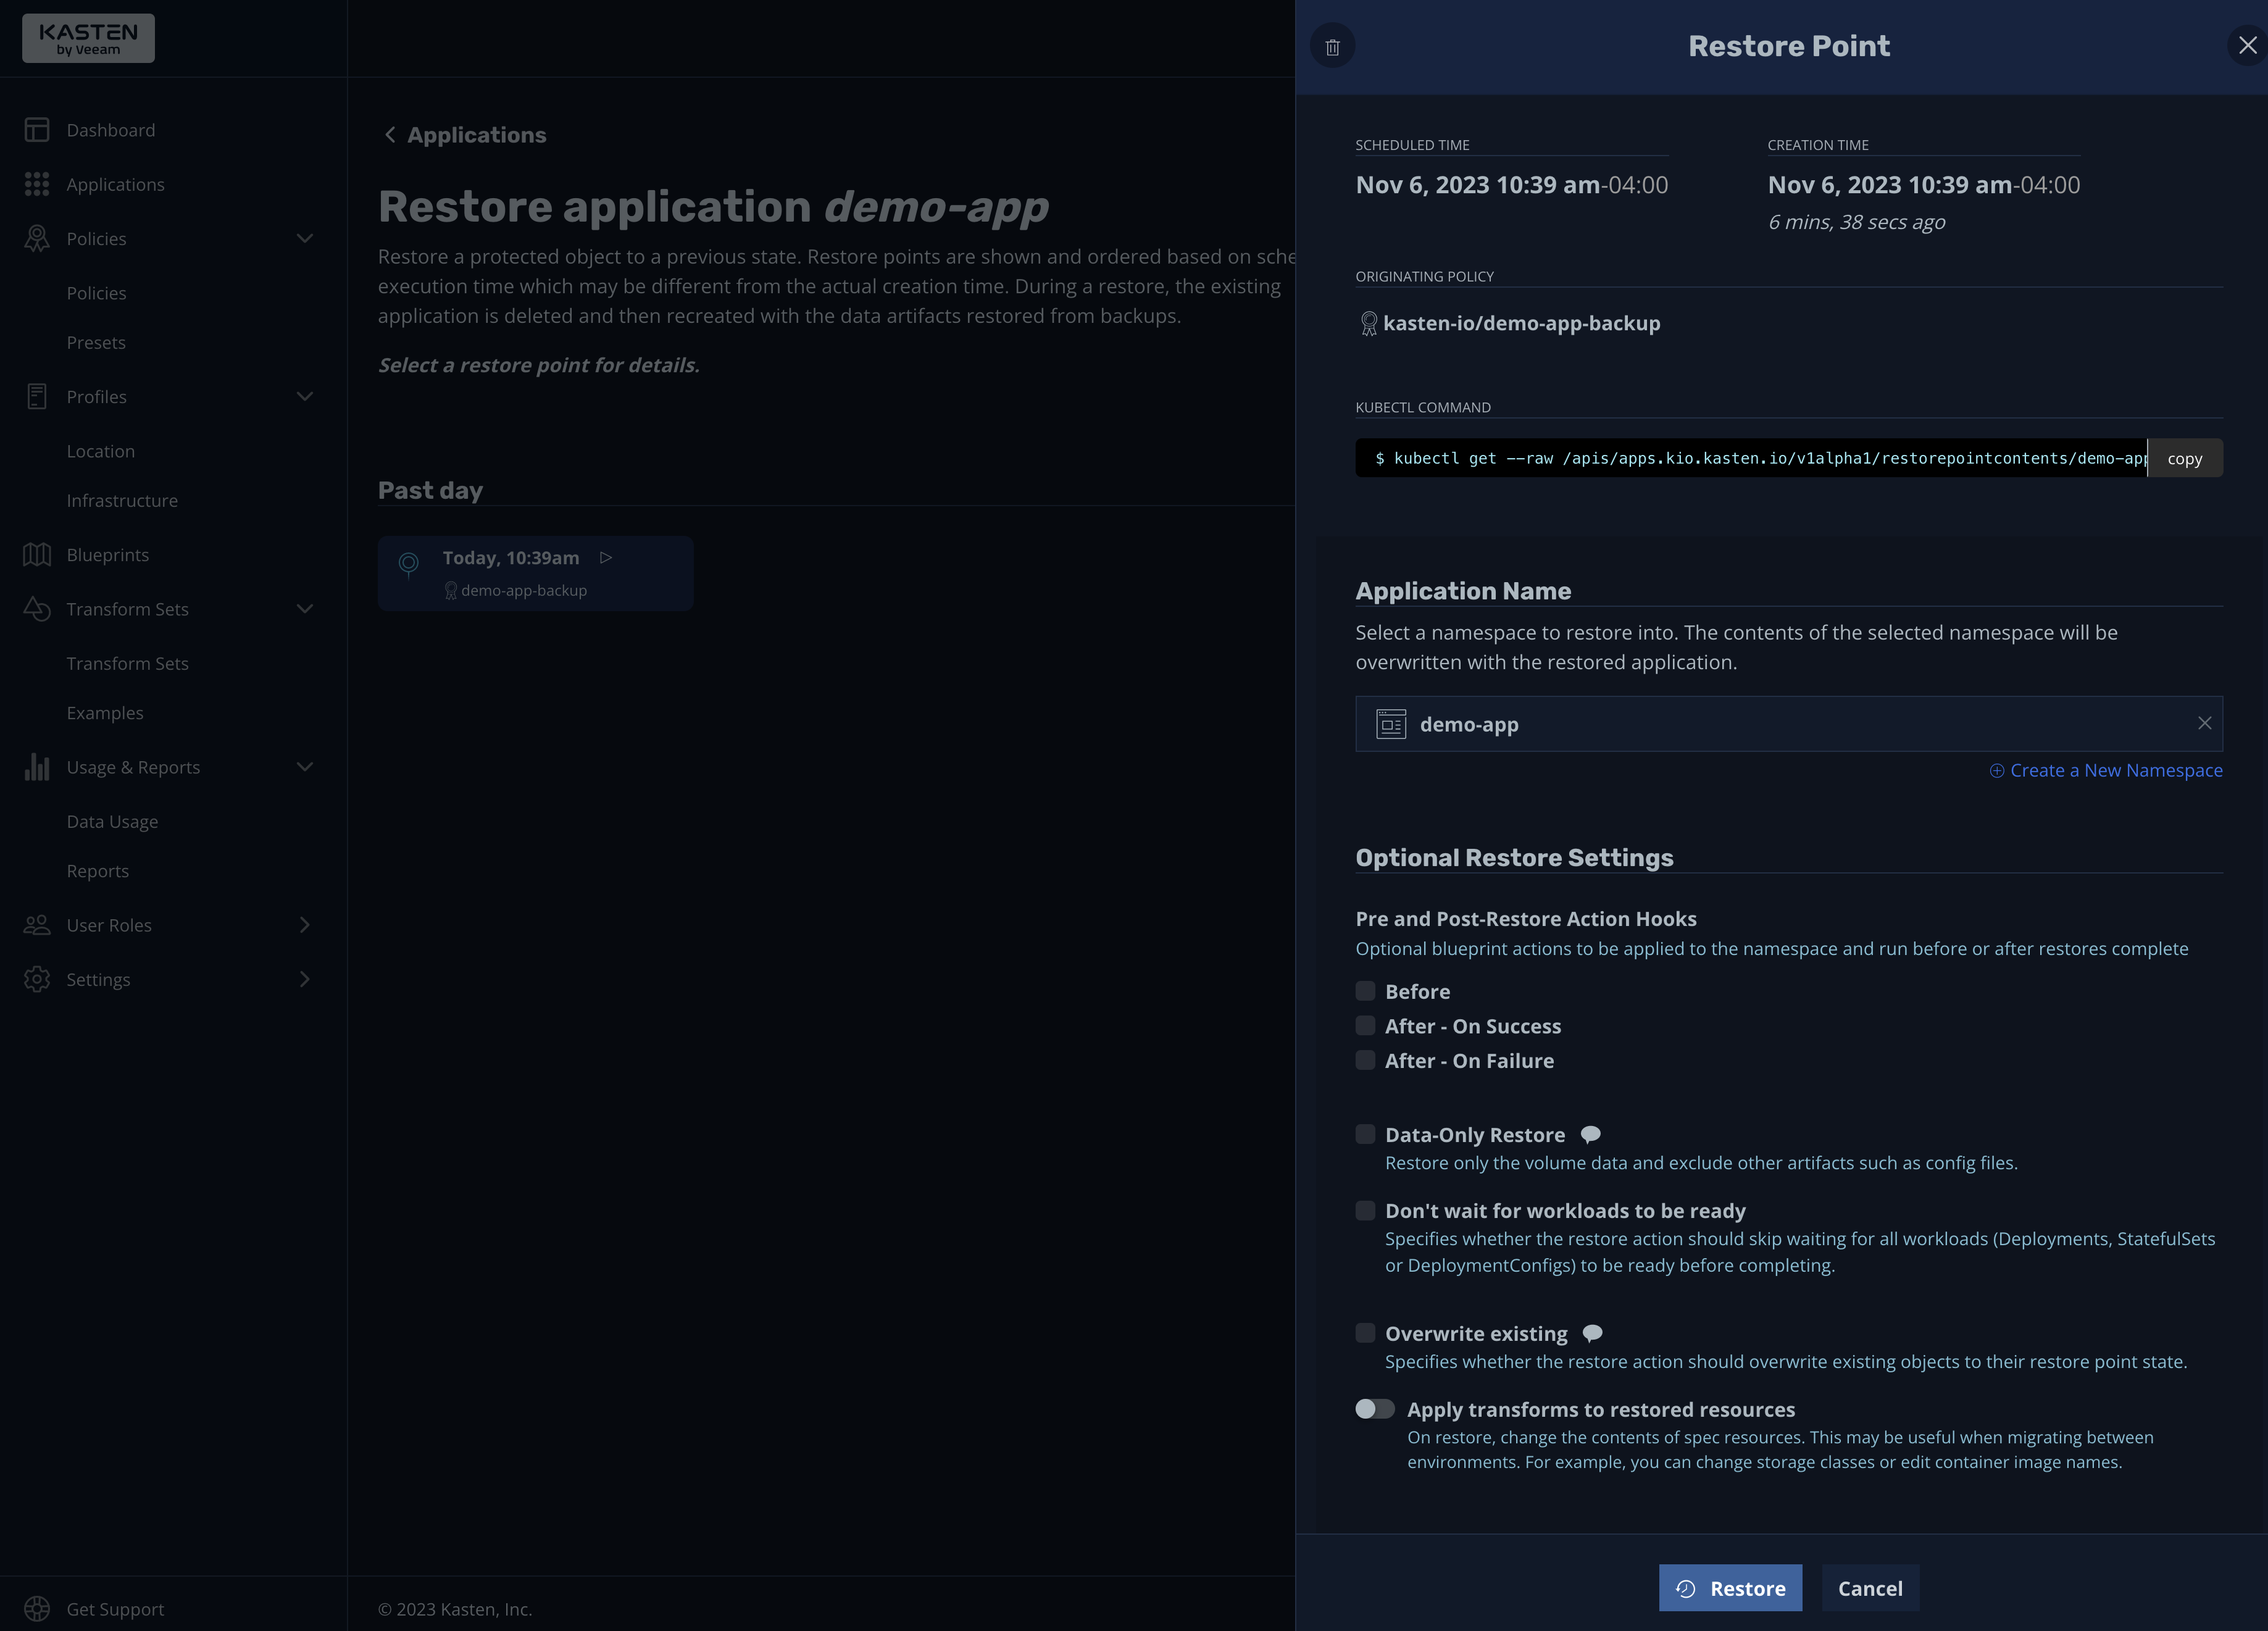
Please note that it's considered best practice to stop your applications before starting the restore process to ensure data integrity. These options are available under the "Optional Restore Settings" section. There, you can configure action settings (blueprints) that can be executed before the restoration process or after it (on success or failure). You'll also see options to restore only the volume data and not other artifacts, and settings for not waiting for workloads to be ready.
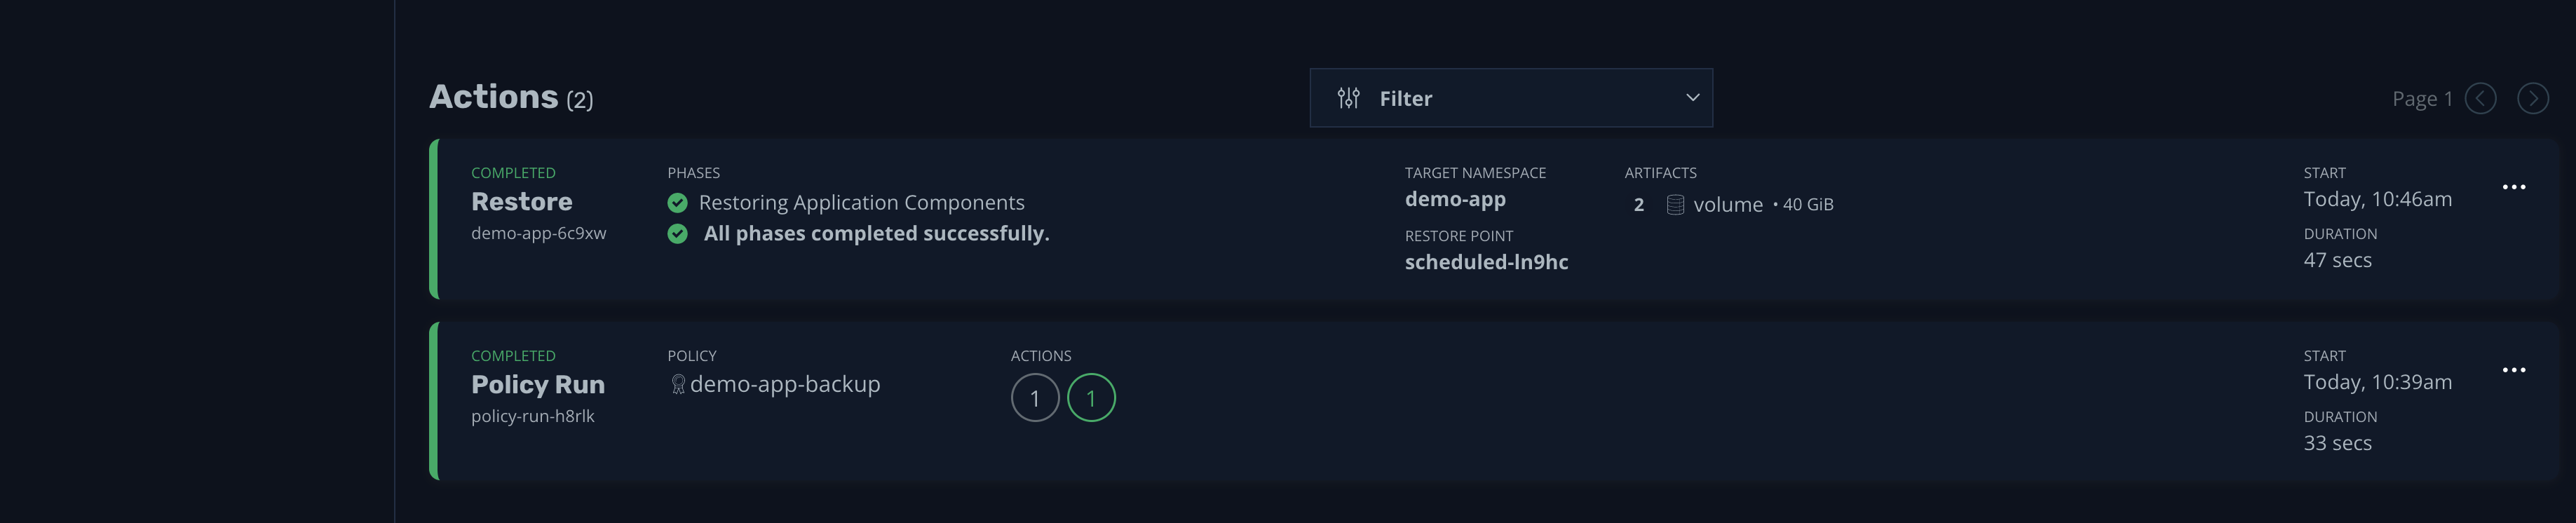
For now, accept the default settings and begin the restore process. As before, you can follow the process from the dashboard:
Once the process is complete, you can see more details by clicking the event:
That's it; the restore process is complete. However, you overwrote the existing namespace during the process. A better way would be to follow best practices and restore the backup to a different namespace. Let's see how to do so.
Restore Backups to a Different Namespace
Restoring backups to a different namespace is considered best practice, as it allows you to validate backups without affecting running apps and services.
You can start this process from the Restore Point screen, where you can create a new namespace and select it as the target of the restore process:

Once the restore process is complete, you'll see both environments on the Applications screen, one "Compliant" and the other "Unmanaged" (since it does not have a backup policy):

You can now run kubectl get svc -n demo-app-backup and get the new external IP provided by the load balancer. This tests the application thoroughly to verify that everything is working as it should.
Overall, the restore process consists of identifying the components you want to restore, stopping the application, and specifying the restore target. As you can see, K10 allows you to conveniently perform all of these operations with its GUI.
Store Backups in an Offsite Location
A best practice that cannot be overlooked is saving backups in an offsite location. In K10, you can achieve this using location profiles, as shown in the screenshot below:
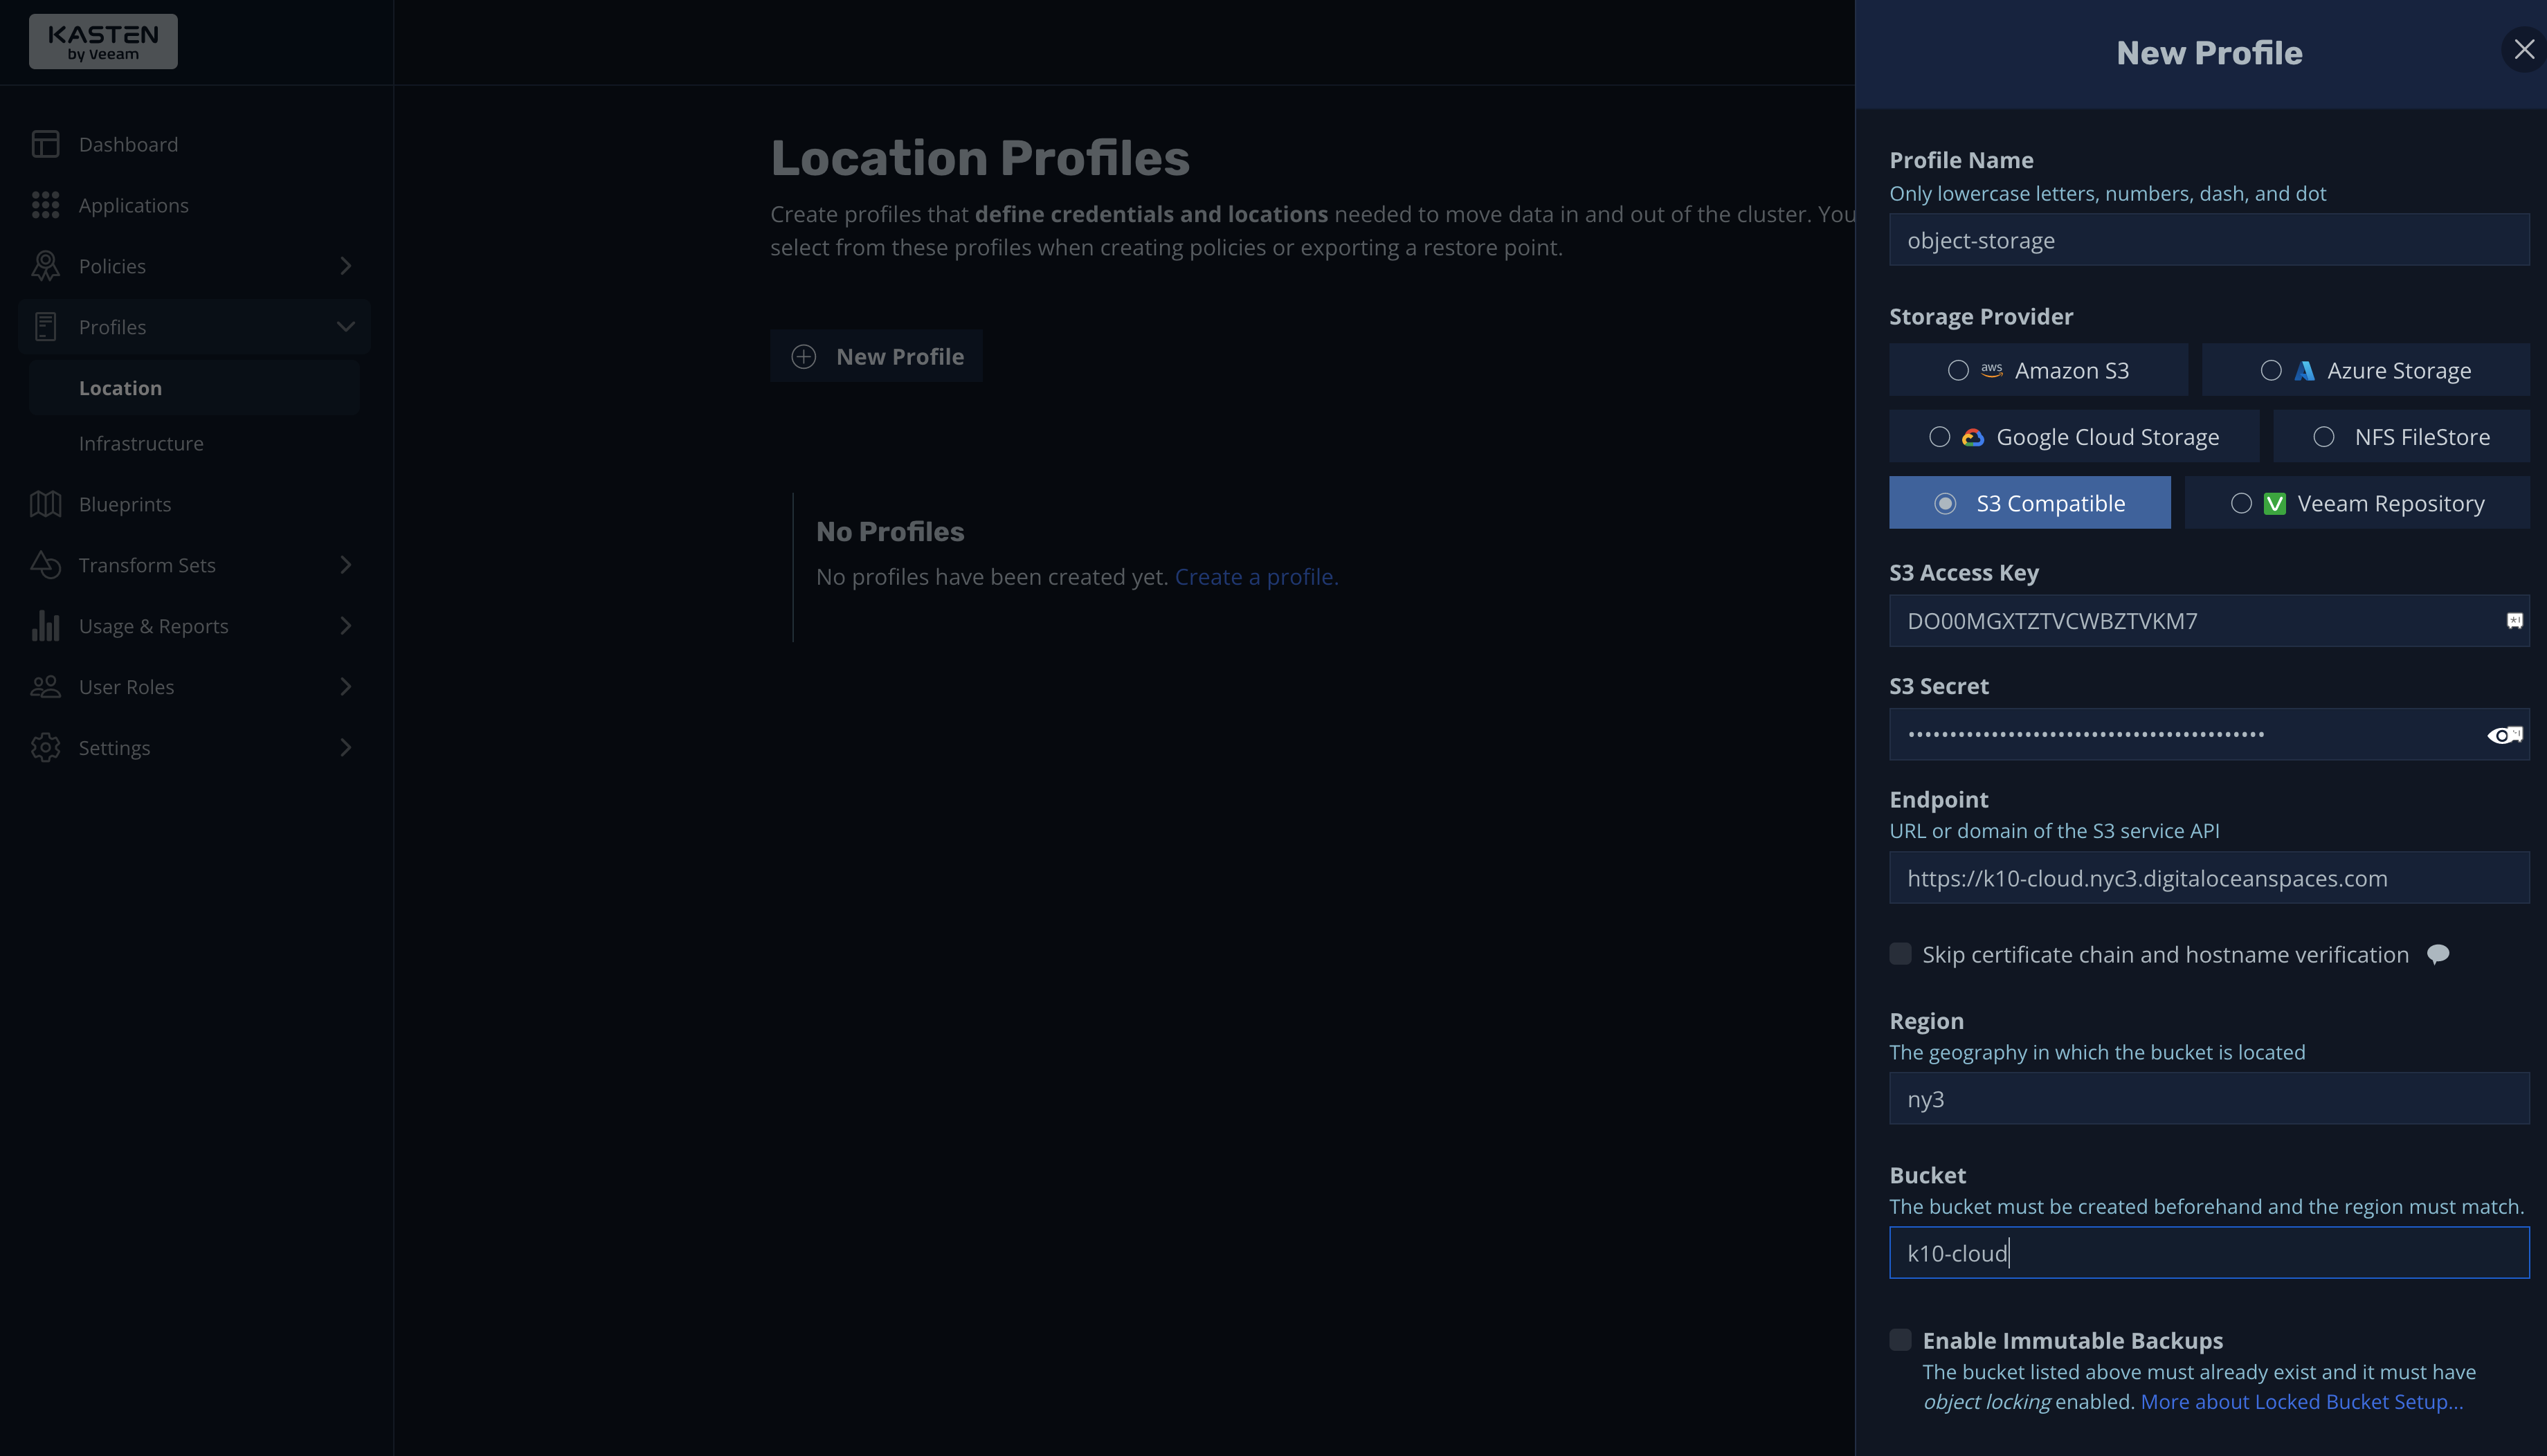
From the New Profile screen, you can configure object storage providers, including Amazon S3, Azure Storage, Google Cloud Storage, NFS FileStore, S3 Compatible, and Veeam Repository. Furthermore, you can configure different providers and buckets and assign them to different backup policies using blueprints.
Overview of Best Practices for Backing Up and Restoring Kubernetes Clusters
During this tutorial, you saw how K10 makes it easy to enforce best practices for backing up and restoring Kubernetes clusters. To summarize, you can:
Conclusion
Through this tutorial, you learned how to back up and restore Kubernetes clusters and apps and, thus, how to secure your data and ensure business continuity. More than that, you also learned some best practices for effective backup and restoration of Kubernetes clusters and apps. With these skills, you're now well-equipped to protect your data in Kubernetes from any unforeseen circumstances, ensuring your applications are always safe, operational, and ready to deliver the best performance.


