Table of Contents
As Kubernetes usage grows, optimizing resource usage is more critical than ever. The Native Sleep Mode introduced in vCluster 0.22 provides a neat and easy solution for cost savings and efficient resource management. In this blog, we’ll dive deep into the functionality of Sleep Mode, demonstrate its implementation, and discuss its significance for Kubernetes workloads.
Introduction to Native Sleep Mode
The native workload sleep mode feature in vCluster 0.22 enables you to scale down Kubernetes resources(Deployments, ReplicaSets, ReplicationControllers, DaemonSets) during periods of inactivity. This feature ensures cost and resource efficiency by "sleeping" unused deployments, ReplicaSets, and DaemonSets while retaining the ability to wake them when activity is detected. Unlike traditional external processes, this feature is embedded directly within the vCluster control plane, making it easy to use without additional setup.
Yes you heard it right! You need not install any other tooling like KEDA and do the configurations yourself.
The Workload native Sleep Mode is a valuable tool for teams looking to manage workloads dynamically, reduce cloud costs, and test setups in resource-constrained environments.
Importance of Sleep Mode for Workloads
Key Benefits:
- Cost Efficiency: Reduce cloud bills by scaling down idle resources.
- Resource Optimization: Free up cluster capacity for other workloads.
- Dynamic Scaling: Automatically wake resources when activity resumes, ensuring a seamless user experience.
- Simplified Management: Embedded functionality eliminates the need for external tools or agents.
- Sustainability: The less resources you use, the more sustainable way you are using your Kuberentes cluster.
By leveraging Sleep Mode, organizations can:
- Manage resource-heavy testing environments more effectively.
- Schedule predictable shutdowns for non-critical workloads.
- Optimize resources in multi-tenant environments.
Working Example
To demonstrate the Sleep Mode functionality, we’ll use the KillerCoda Kubernetes Playground, which provides an easy-to-use environment for testing Kubernetes features.
Prerequisites:
- Access to the KillerCoda Kubernetes Playground.
- Installed vCluster CLI.
Step-by-Step Implementation:
1. Set Up the Environment
Go to KillerCoda playground and you will see a two node Kubernetes Cluster
Command:
kubectl get nodesOutput:

2. Install vCluster
Download and install the vCluster CLI:
curl -L -o vcluster "https://github.com/loft-sh/vcluster/releases/latest/download/vcluster-linux-amd64" && sudo install -c -m 0755 vcluster /usr/local/bin && rm -f vcluster3. Create a vCluster with Sleep Mode Enabled
Save the following configuration as vcluster.yaml:
experimental:
  sleepMode:
    enabled: true
    autoSleep:
      afterInactivity: 2m # Reduced for demo purposes
      exclude:
        selector:
          labels:
            dont: sleep
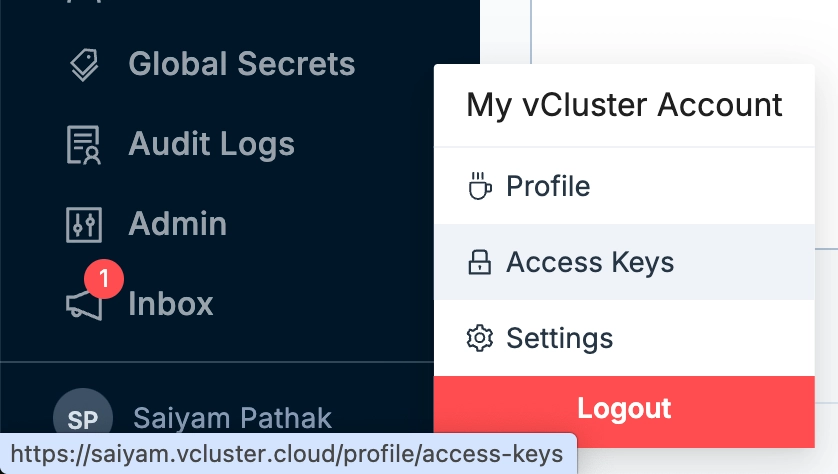
Enable vClusterPro in order to use this feature: For simplicity, I am using my vcluster.cloud account and then creating the access key to login and enable pro features. In this way I don’t have to run any agent on the current cluster. You can either run vcluster platform start or sign up on vCluster cloud and once you login, you should be able to go to access keys and create a short lived access key for the demo (Remember to delete the key post demo for security reasons).
Command:
vcluster platformlogin https://saiyam.vcluster.cloud --access-key <your-access-key>Output:

Create the vCluster:
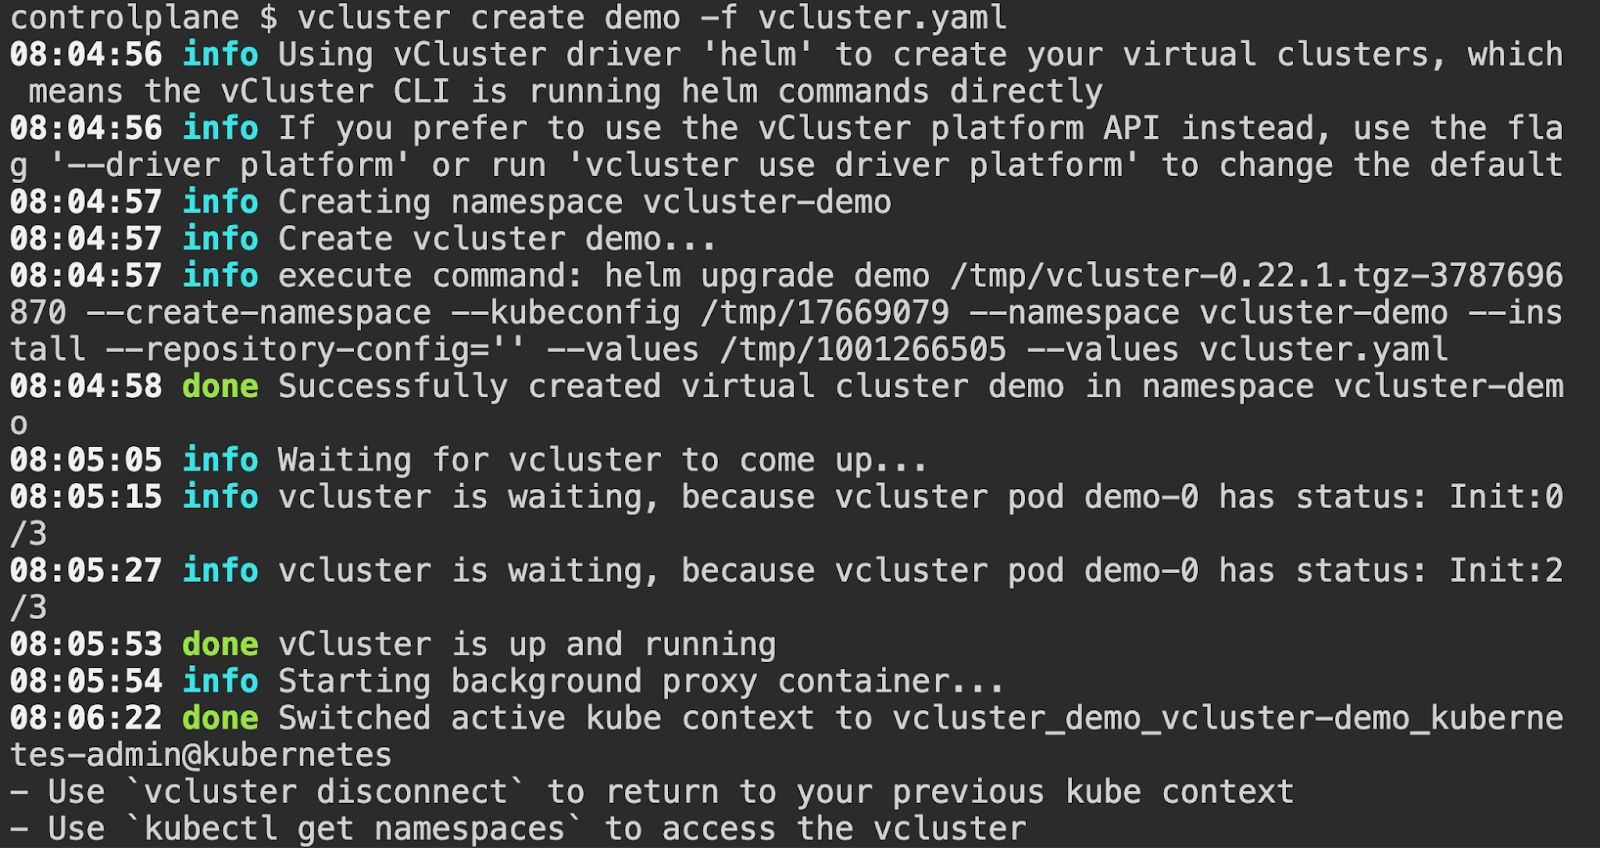
Now we can create the vCluster with the created vcluster.yaml file
Command:
vcluster create demo -f vcluster.yamlOutput:
4. Deploy Workloads inside vCluster
Create a deployment and a service: Make sure you are in the vcluster context(If you are using Killercoda, it will automatically switch the context for you)
kubectl create deployment nginx --image=nginx --replicas=3
kubectl expose deployment nginx --port=80 --target-port=80 --type=ClusterIP
5. Installing NGINX ingress controlled on the virtual cluster
Now, we will install nginx ingress controller inside the virtual cluster created.
Command:
helm repo add ingress-nginx https://kubernetes.github.io/ingress-nginx
helm repo update
helm install ingress-nginx ingress-nginx/ingress-nginx \
  --namespace ingress-nginx \
  --create-namespace \
  --set controller.hostNetwork=true \
  --set controller.dnsPolicy=ClusterFirstWithHostNet \
  --set controller.service.type=ClusterIP
Make sure you have the ingress class inside the host cluster, if not, you can configure that.
Command:
kubectl apply -f - <<EOF
apiVersion: networking.k8s.io/v1
kind: IngressClass
metadata:
  name: nginx
spec:
  controller: k8s.io/ingress-nginx
EOF
6. Create ingress for the application
Create a file ingress.yaml and replace the IP mentioned in the host with the service IP of nginx ingress controller.
Command:
kubectl get svc -AOutput:

Ingress File
Create the following ingress file:
vi ingress.yaml
Add the following in the file:
apiVersion: networking.k8s.io/v1
kind: Ingress
metadata:
  name: nginx-ingress
  annotations:
    nginx.ingress.kubernetes.io/mirror-target: 'enabled'
spec:
  ingressClassName: nginx
  rules:
  - host: demo.10.110.22.160.nip.io
    http:
      paths:
      - path: /
        pathType: Prefix
        backend:
          service:
            name: nginx
            port:
              number: 80
Apply using kubectl apply -f ingress.yaml
The success would show creation:

7. Verify Sleep Mode
In another tab, run the following command to keep a watch on the deployments but we need to make sure that the ingress controller deployment does not go to sleep. For this we will use the label that we specified in the vcluster.yaml -> dont=sleep earlier to make sure a deployment with that label won’t go to sleep.
Command -
kubectl label deploy -n ingress-nginx ingress-nginx-controller dont=sleep Output:

In the new tab run the following command:
kubectl get pods -A -w
Output:

Wait for 2 minutes (the inactivity timeout). Check the status of your deployments:
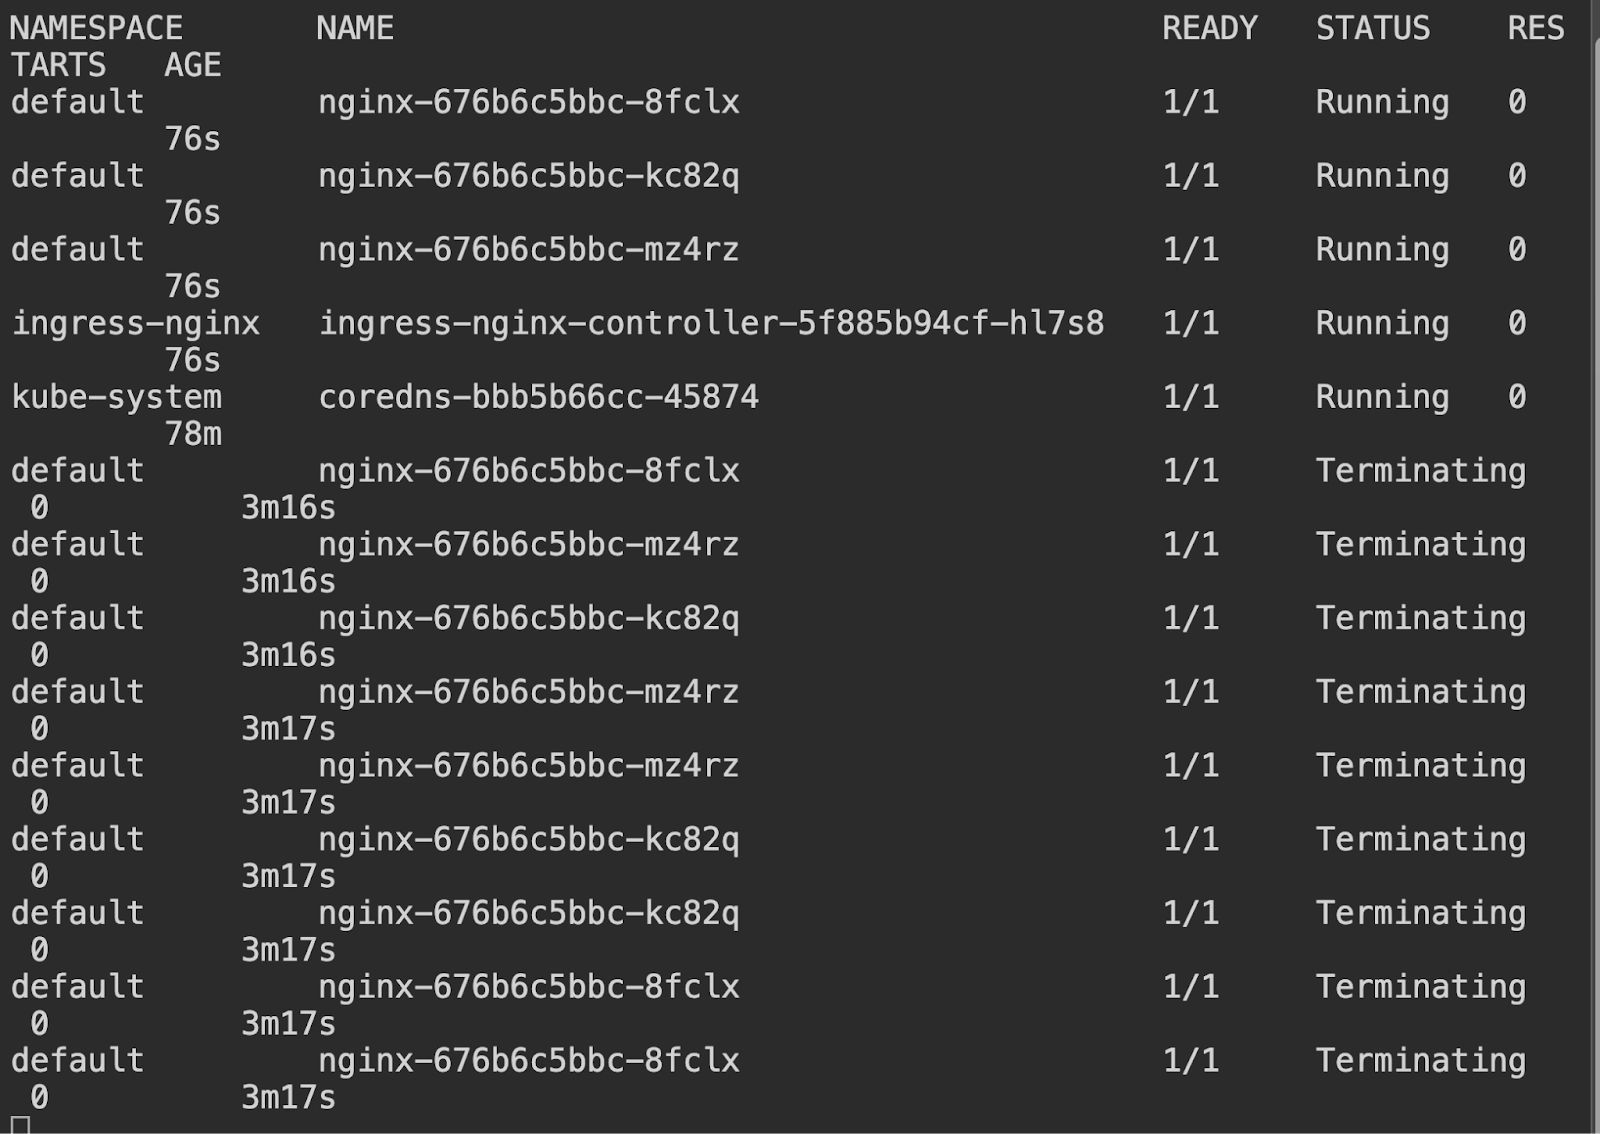
You will see that the deployment scales down to zero and that is exactly what we specified in the vcluster.yaml spec.
You should see the sleepy-deployment scaled down to 0 replicas, while no-sleep-deployment remains active.
To wake the sleeping deployment, simply interact and curl the ingress:
Command:
curl demo.10.110.22.160.nip.ioOutput:
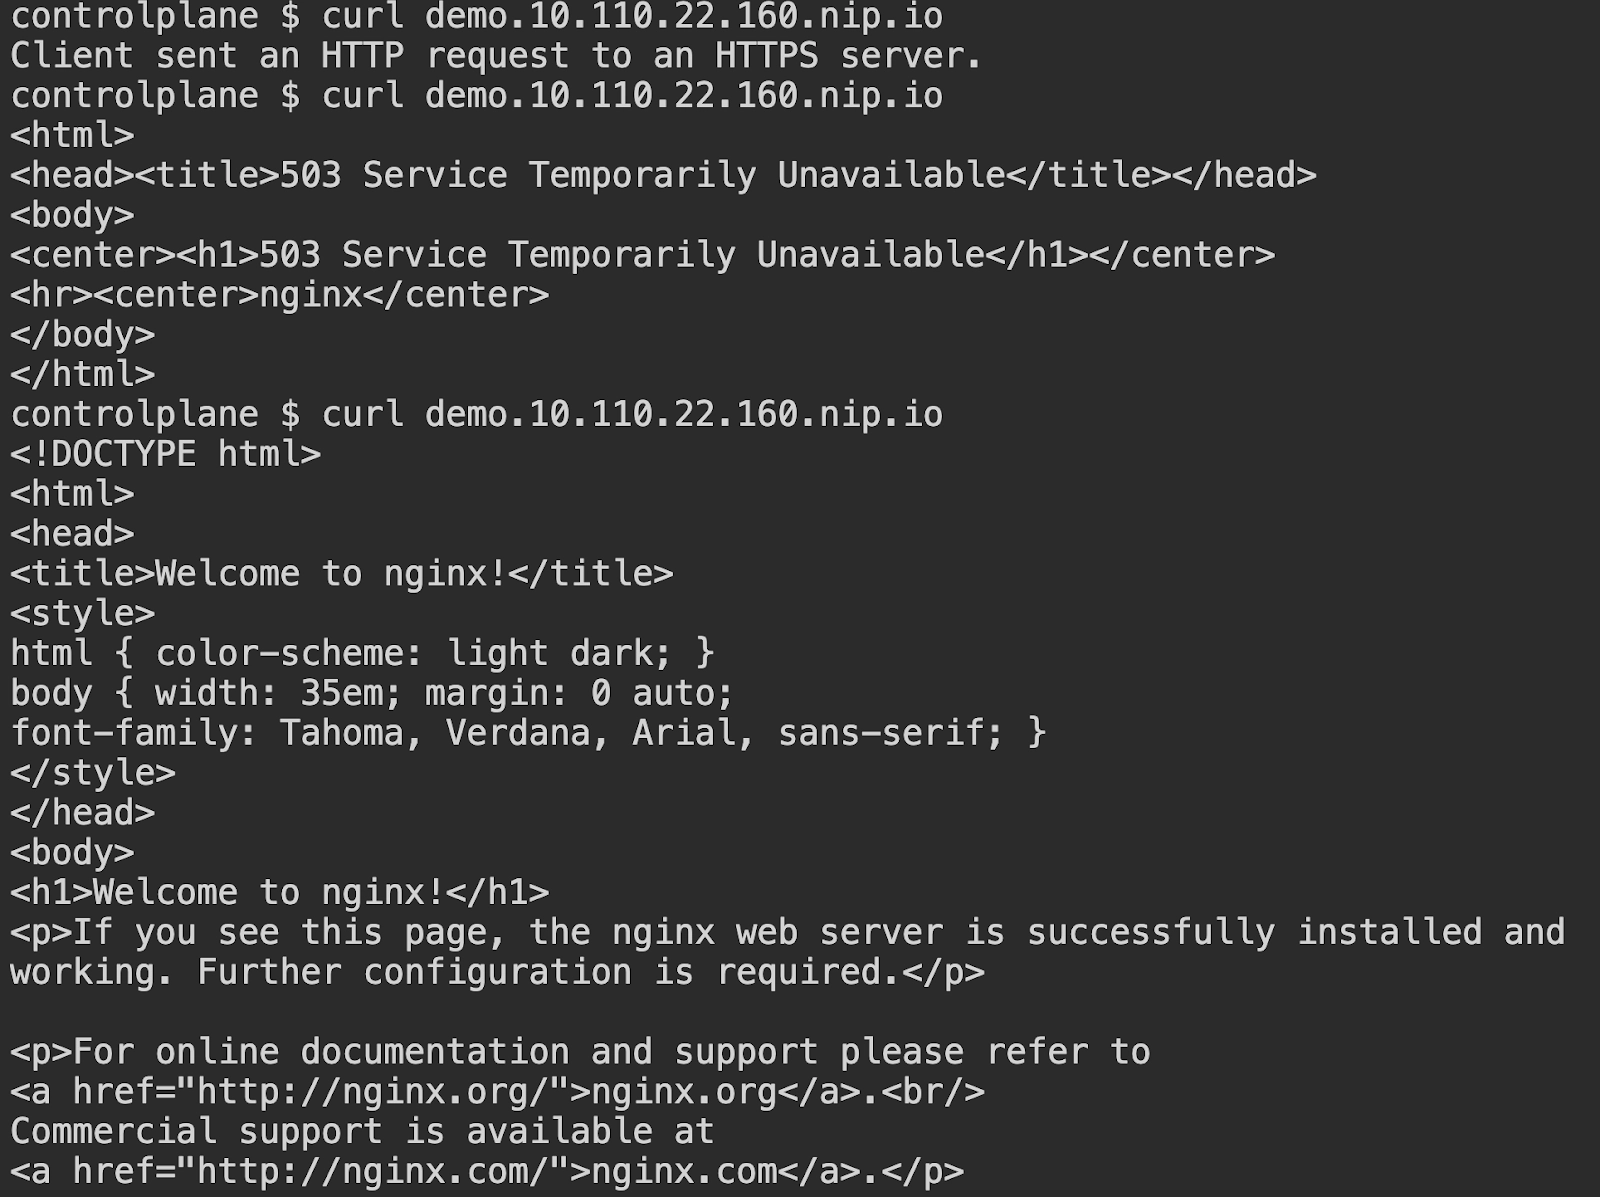
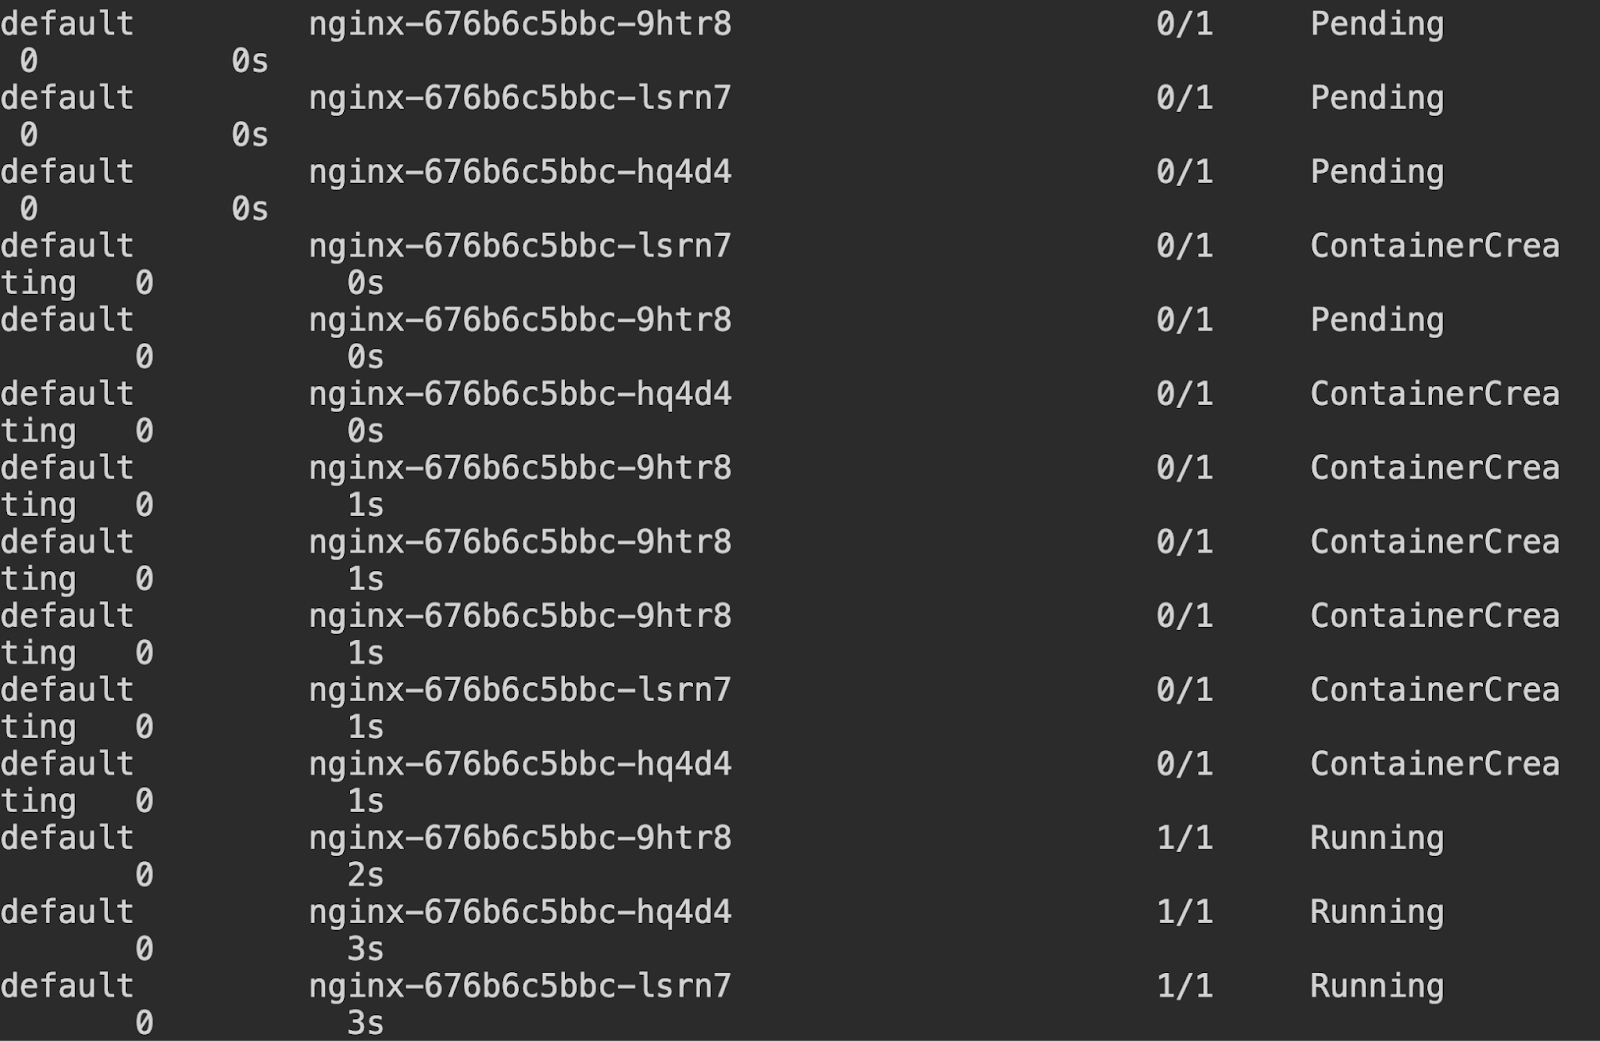
You can see that as soon as you hit the ingress endpoint, it is detected within the virtual cluster and the pod starts up, time taken to get the proper response is the time taken by the pod to startup which is very little.
You can see that from the other tab that within 2 seconds the pod came up after the first request hit.
Conclusion
The Native Sleep Mode in vCluster 0.22 is a game-changer for cost and resource optimization in Kubernetes environments. By enabling automated scaling of idle resources, it empowers teams to:
- Reduce operational expenses.
- Manage workloads effectively.
- Gain insights into resource usage and optimization opportunities.
Sleep Mode lays the groundwork for future innovations in dynamic resource management. Whether you’re testing in the KillerCoda Playground or deploying in a real-world environment, this feature is a must-try for Kubernetes practitioners looking to make their clusters smarter and more efficient.
Don’t forget to check out the vCluster documentation for more details! Join us at our Slack Community here.


.png)

