Shared Secrets
Shared secrets are a way to securely store Loft wide secrets. A shared secret is very similar to a Kubernetes secret, but can be managed through Loft UI or CLI. Shared secrets consist of multiple keys and values. Shared secrets are namespace scoped and can be optionally encrypted with a custom defined encryption key. Shared secrets can be used to:
- Store and share sensitive information across your users and teams independent of the connected clusters
- Use a shared secret as a single source of truth and sync them to regular Kubernetes secrets across your connected clusters
- Automatically login users into container image registries on
loft loginthrough shared image pull secrets - Read/Write sensitive data in pipelines or outside of Kubernetes via Loft CLI
loft get secret my-secret.my-key
Create a new Shared Secret
Shared secrets can be created via kubectl, loft CLI or the loft UI.
- UI
- CLI
- kubectl
Make sure you have the loft CLI installed and are logged into the loft instance.
Next you can create a new secret by using:
# This will create a new shared secret with
# the key 'my-key' and value 'my-value'
loft set secret new-secret.my-key my-value
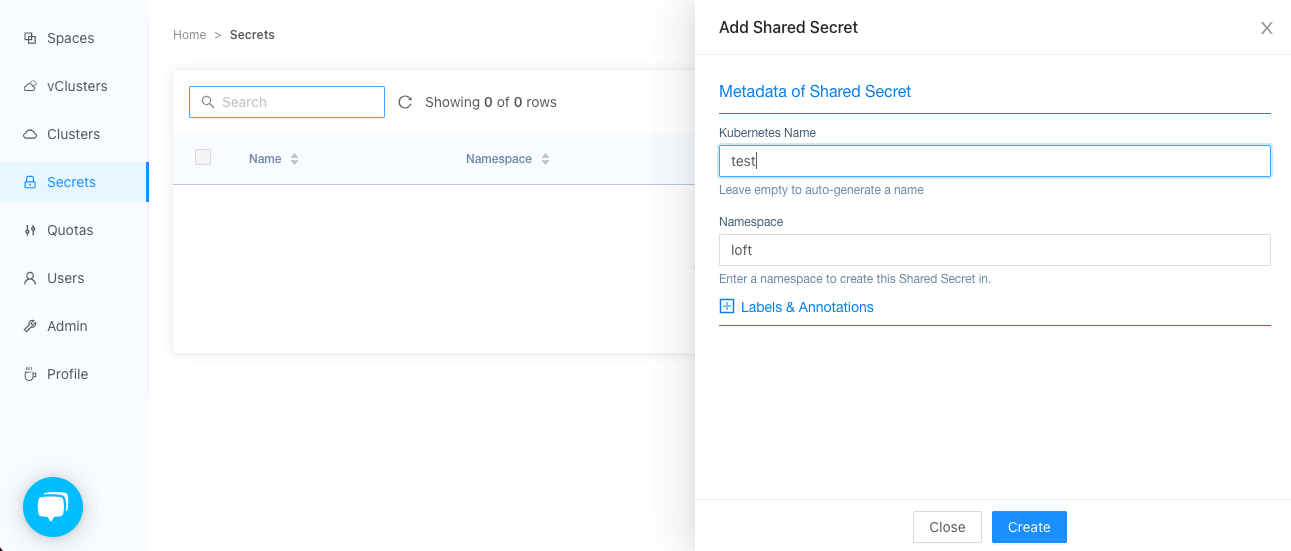
You can only create shared secrets in the Kubernetes cluster where Loft is installed. To create a new shared secret, create a file called secret.yaml with:
apiVersion: management.loft.sh/v1
kind: SharedSecret
metadata:
  name: test
  namespace: loft
spec:
  data:
    # You can define key values here like this
    my-key: BASE64_ENCODED_VALUE
Then do a kubectl create -f secret.yaml to create a new shared secret.
It is good practice to use a single shared secret for multiple keys, e.g. it makes sense to have a shared secret prod and development with different access rights for different teams and users.
Manage Access to Shared Secrets
You can define which users or teams are able to view, update, sync or delete the shared secrets. This can be done either by using the loft UI or kubectl in the management cluster (the cluster where loft is installed).
- UI
- kubectl
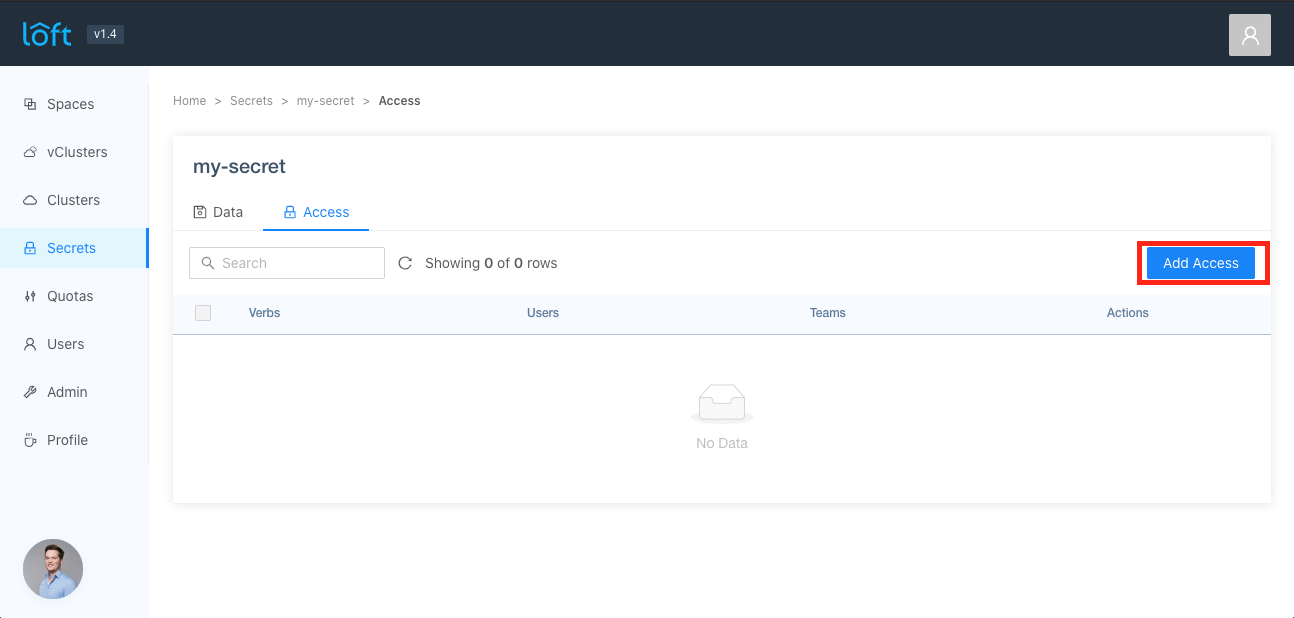
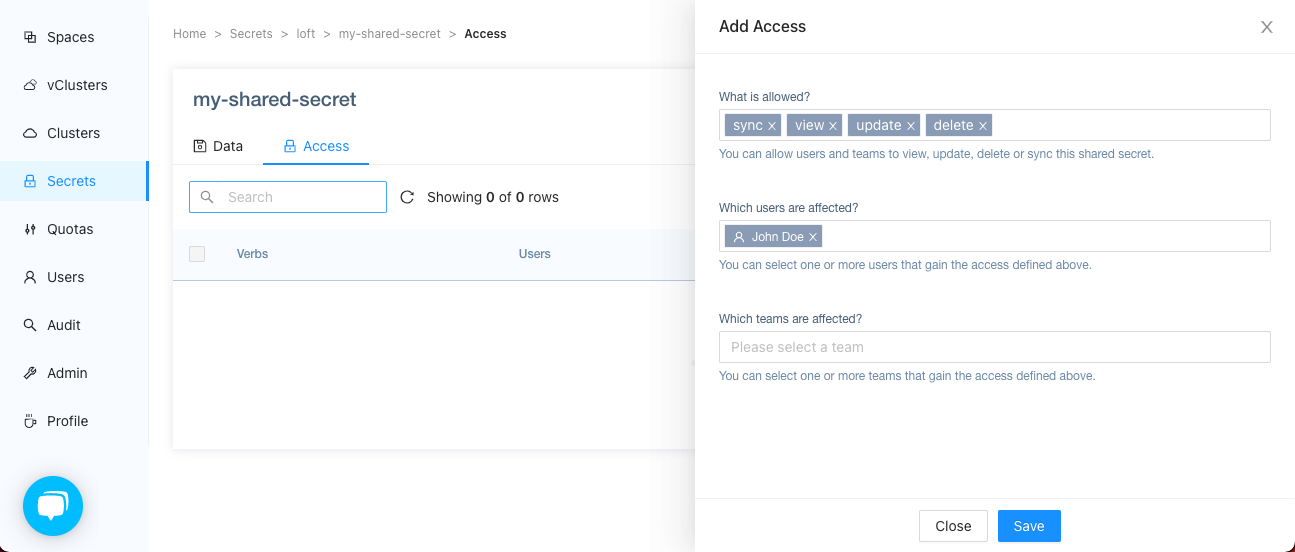
Go to the Secrets view and click on a shared secret. Then click on 'Access' and on the 'Add Access' button.
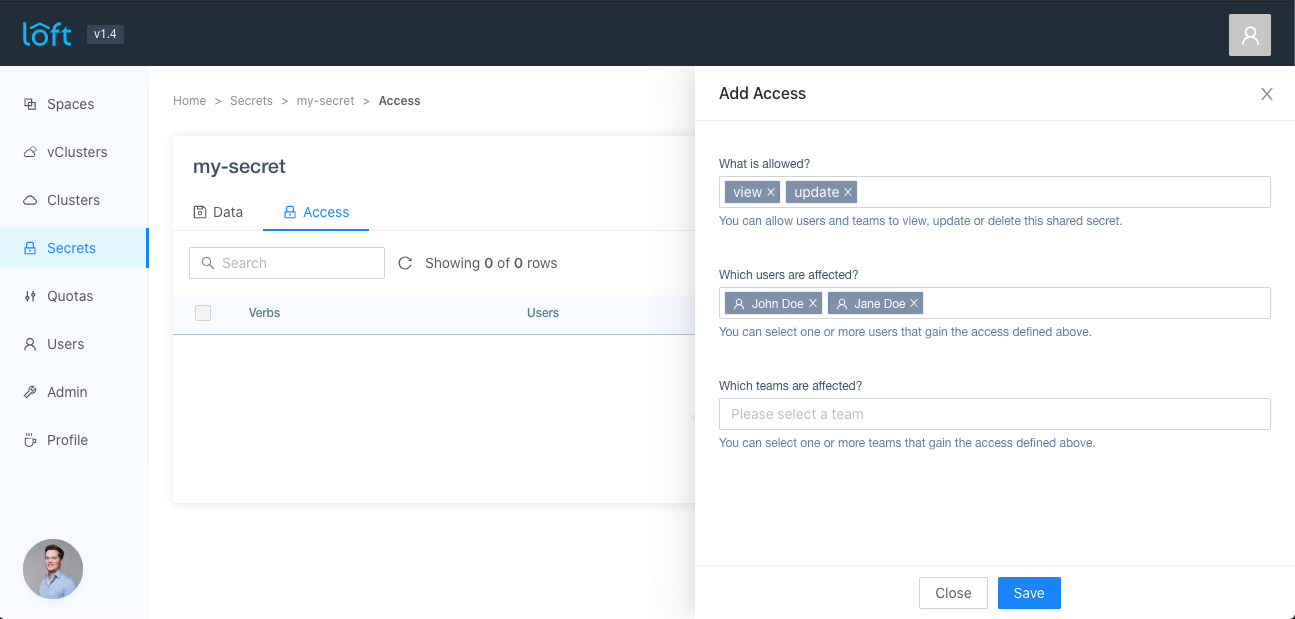
When the drawer opens you are able to configure the following options:
- Verbs: what access rights should the defined users and teams have to this shared secret
- Users: which users are effected by these access rights
- Teams: which teams are effected by these access rights
After you have configured the verbs, users and teams, press the 'Save' button.
You can change the access for a shared secret with kubectl by executing the following command in the Loft management cluster:
kubectl edit sharedsecrets.management.loft.sh my-secret
In the yaml that is shown, edit the section spec.access:
apiVersion: management.loft.sh/v1
kind: SharedSecret
metadata:
  name: my-secret
  ...
spec:
  data: ...
  # This section defines the access to the secret
  # Each entry will create a new role and each
  # user or team defined will create a new role binding
  # for that role
  access:
    # You can choose one or more of these verbs (get = view)
  - verbs: ["get"]
    # kubernetes names of the Loft users
    users: ["my-user"]
    # kubernetes names of the Loft teams
    teams: ["my-team"]
  - verbs: ["get", "update", "delete"]
    users: ["my-admin"]
    teams: ["my-admin-team"]
If a user can access a shared secret is purely defined through kubernetes RBAC.
loft creates the required roles and role bindings automatically in the background based on what is defined in the spec.access section of the SharedSecret resource.
A user or team can access a shared secret if the right is granted to 'get' (verb) 'sharedsecrets' (resource) in 'storage.loft.sh' (api group) in the namespace where the secret is stored (typically the namespace where loft is installed). This however also means that cluster admins will be able to access all shared secrets, since they have the right to access all resources in all namespaces.
Read from a Shared Secret
Reading a key from a shared secret can be done through the loft UI, loft CLI or kubectl.
- UI
- CLI
- kubectl
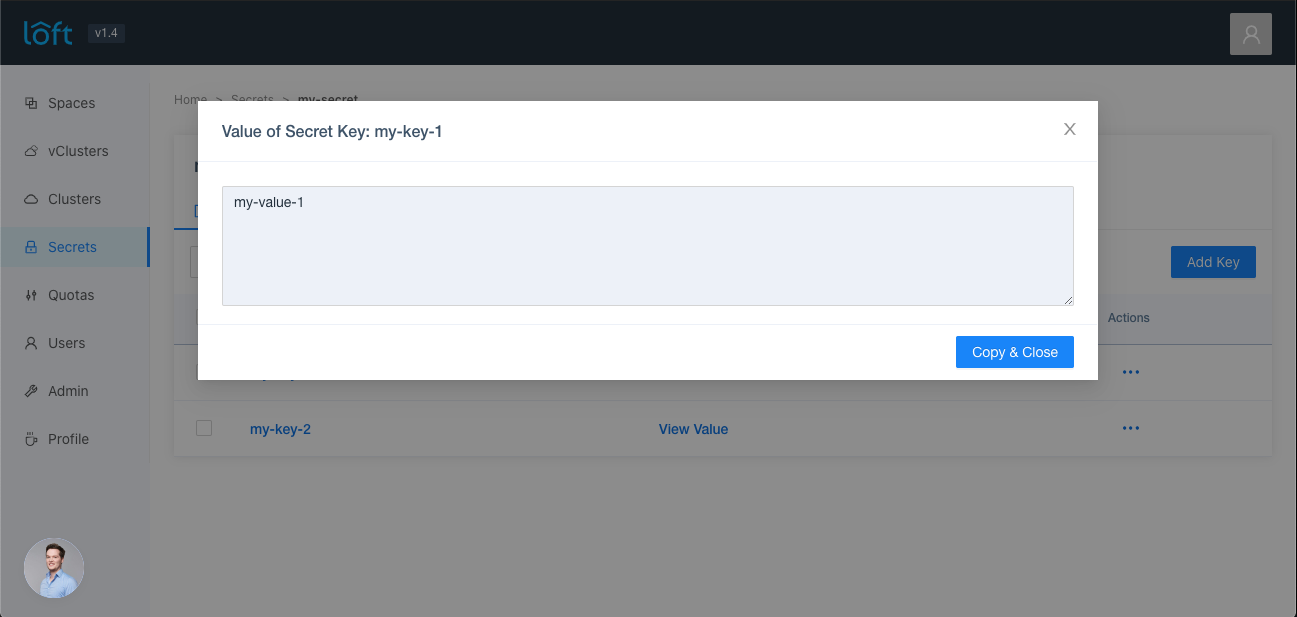
Go to the Secrets view and click on a shared secret name. A list of available keys should appear. Then click on 'Show Value'.
Make sure you have the loft CLI installed and are logged into the loft instance.
Next you can read a secret by using the following command:
# This will read a value from a shared secret
loft get secret my-secret.my-key
The full output could look like this:
$ loft list secrets

    Name      Namespace   Keys            Age
    test      loft        abc,ffff,test   3d23h
    test123   loft        test            3d23h

$ loft get secret test.abc
test
You can read a shared secret by executing the following command in the management cluster:
kubectl get sharedsecrets.management.loft.sh my-secret -n loft -o yaml
You can view the secret data in the returned yaml:
apiVersion: management.loft.sh/v1
kind: SharedSecret
metadata:
  name: my-secret
  ...
spec:
  data:
    my-key-1: BASE64_ENCODED_VALUE
    my-key-2: BASE64_ENCODED_VALUE
Change data in a Shared Secret
Changing the data of a shared secret can be done through the loft UI, loft CLI or kubectl.
- UI
- CLI
- kubectl
Go to the Secrets view and click on a shared secret name. A list of available keys should appear. Then either click on an already existing key name or on 'Add Key'.
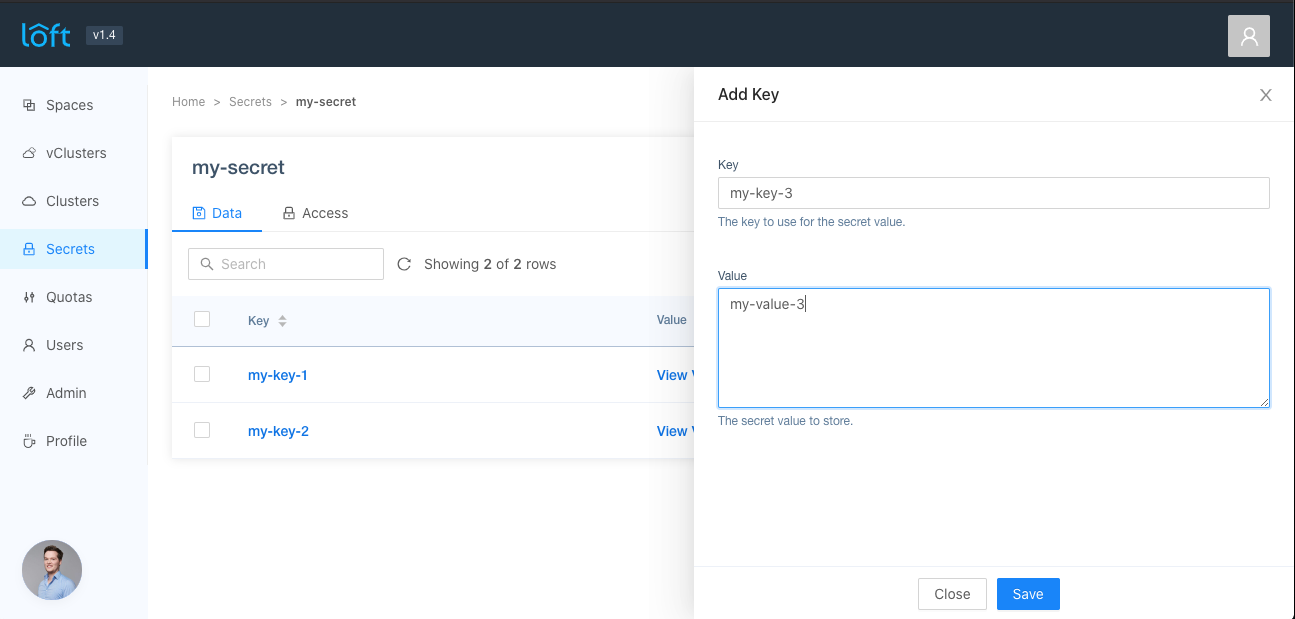
Click on 'Save' and the key should appear in the list.
Make sure you have the loft CLI installed and are logged into the loft instance.
Next you can set a key for a secret by using the following command:
# This will set a value for a shared secret key
loft set secret my-secret.my-key my-value
You can edit a shared secrets data by executing the following command in the management cluster:
kubectl edit sharedsecrets.management.loft.sh my-secret -n loft
You can edit the secret data in the yaml:
apiVersion: management.loft.sh/v1
kind: SharedSecret
metadata:
  name: my-secret
  ...
spec:
  data:
    # Add, change or remove keys here
    my-key-1: BASE64_ENCODED_VALUE
    my-key-2: BASE64_ENCODED_VALUE
Sync Shared Secrets
One benefit of shared secrets is that you can sync them to any connected cluster and Kubernetes secret. When a shared secret is synced, all keys and values will be copied to the target Kubernetes secret.
Before you can sync a shared secret, make sure you have assigned the verb sync to the user or team that owns the space where you want to sync the secret to. Loft only allows shared secret sync in spaces that are owned either by Loft users or Loft teams that have the RBAC sync permission in the Loft cluster to sync the shared secret.
If a user or team has the appropriate RBAC permissions, you can sync a shared secret to a Kubernetes secret by simply creating a new secret with the following labels:
apiVersion: v1
kind: Secret
metadata:
  name: my-synced-shared-secret
  namespace: space-owned-by-user-or-team
  labels:
    # Name of the shared secret
    loft.sh/sharedsecret-name: my-shared-secret
    # Namespace of the shared secret
    loft.sh/sharedsecret-namespace: loft
type: Opaque
This will tell Loft to fill the Kubernetes secret with the keys and values of the shared secret and keep it up to date if the corresponding shared secret changes.
If you define additional keys or values in a secret that has a label loft.sh/sharedsecret-name and loft.sh/sharedsecret-namespace, these will be automatically overridden by Loft.
Sync permissions are determined via RBAC in the cluster where Loft was installed in. Since Kubernetes allows constructs in cluster roles or roles in the form of
- verbs: ["*"]
  apiVersions: ["*"]
  apiGroups: ["*"]
  resources: ["*"]
Admin users or teams in the Loft cluster that are bound to such a role will be able to sync all shared secrets as well. So please make sure you do not assign more RBAC permissions to users or teams that are not actually needed.
You can disable syncing of shared secrets by setting the annotation loft.sh/disable-sync to true on a shared secret. This prevents any user or team from syncing the shared secret to any connected Loft cluster.
Image Pull Secrets
Shared image pull secrets are created and maintained like every other shared loft secret. However, they can be used to automatically login users to specified container image registries as soon as they run loft login (no locally installed docker needed).
Creating a shared image pull secret is very similar to creating an image pull secret in kubernetes itself:
On your computer, you must authenticate with a registry in order to grant other users or teams access to it:
docker login [optional-docker-registry]
When prompted, enter your Docker username and password.
The login process creates or updates a config.json file that holds an authorization token.
View the config.json file:
cat ~/.docker/config.json
The output contains a section similar to this:
{
    "auths": {
        "https://index.docker.io/v1/": {
            "auth": "c3R...zE2"
        }
    }
}
Note: If you use a Docker credentials store, you won't see that auth entry but a credsStore entry with the name of the store as value.
With that information you can create a shared loft secret.

Note: The actual name of the shared secret or key name do not matter and can be chosen freely.
Next, you can configure a user or team to use that image pull secret, by editing the Image Pull Secrets section of the user or team.
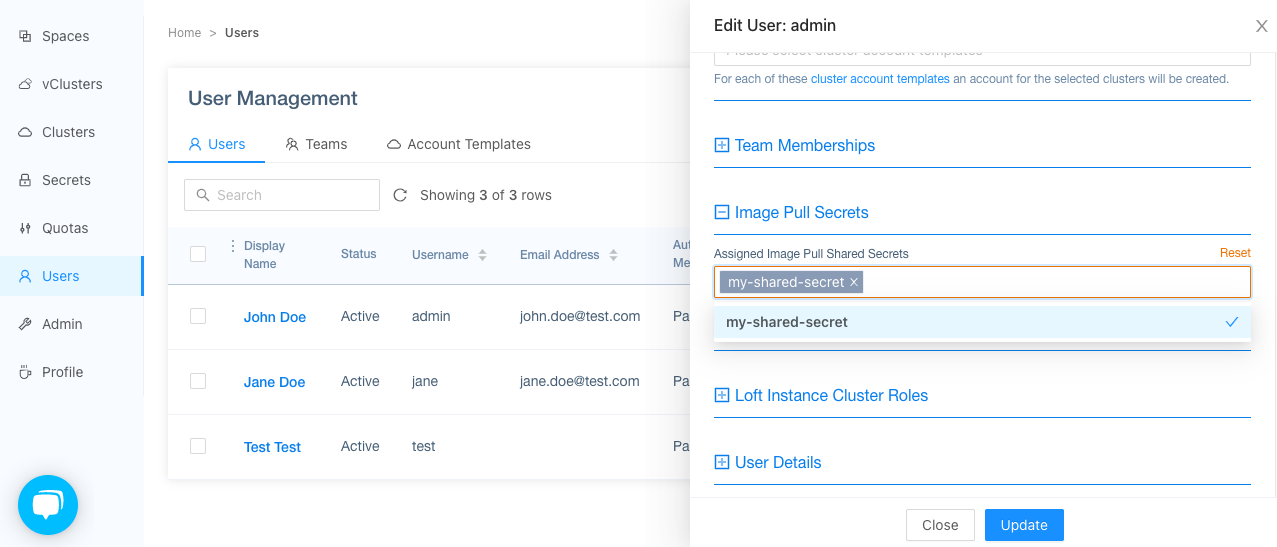
Then press 'Update'. If the user will now login, he will also login into the specified container registry:
$ loft login loft.my-company.tld
[info]   If the browser does not open automatically, please navigate to https://loft.my-company.tld/login?cli=true
[done] √ Successfully logged into loft at https://loft.my-company.tld
[done] √ Successfully logged into docker registry 'docker hub'
In order for the user to login with an image pull secret, the user or the team need to have access to view the shared secret, otherwise they will not be able to login into the container registry. You can change the access to a shared secret in the Secrets > YOUR-SECRET > Access tab.
Enable Shared Secrets Encryption
This is an enterprise feature. Please make sure your license permits secrets encryption before you follow this guide.
By default, secrets are not encrypted and stored plain text (base64 encoded) in the underlying shared secrets custom resource. You can configure loft to encrypt the data of secrets by specifying an encryption key. This can be done via helm:
helm upgrade loft loft --repo https://charts.loft.sh/ \
  --namespace loft \
  --reuse-values \
  --set env.SECRETS_ENCRYPTION_KEY=my-secret-encryption-key
From now on all secrets will be encrypted with the specified encryption key.
If you lose the encryption key, the secrets data cannot be recovered. You will have to manually delete all shared secrets via kubectl: kubectl delete sharedsecrets.storage.loft.sh -n loft --all
