Harbor Container Registry
Harbor is an open source registry that secures artifacts with policies and role-based access control, ensures images are scanned and free from vulnerabilities, and signs images as trusted. As a CNCF Incubating project, Harbor delivers compliance, performance, and interoperability to help you consistently and securely manage artifacts across cloud native compute platforms like Kubernetes and Docker.
In Loft, Harbor can be installed as an App and Loft users can log in to Harbor via Loft or your configured external authentication provider in Loft. Before you start, please make sure you have a running Loft instance available.
Setup Harbor
In order to deploy Harbor, you have to connect the cluster that you want to install Harbor in. Next, go to the cluster overview page. To access Harbor in the cluster, you will need to deploy an ingress controller (if you don't already have one) and the cert-manager for creating a tls certificate. You can do this by deploying the predefined apps nginx-ingress, cert-manager and cert-issuer (you will only need to deploy those, if the connected cluster is NOT the cluster that Loft is installed in):
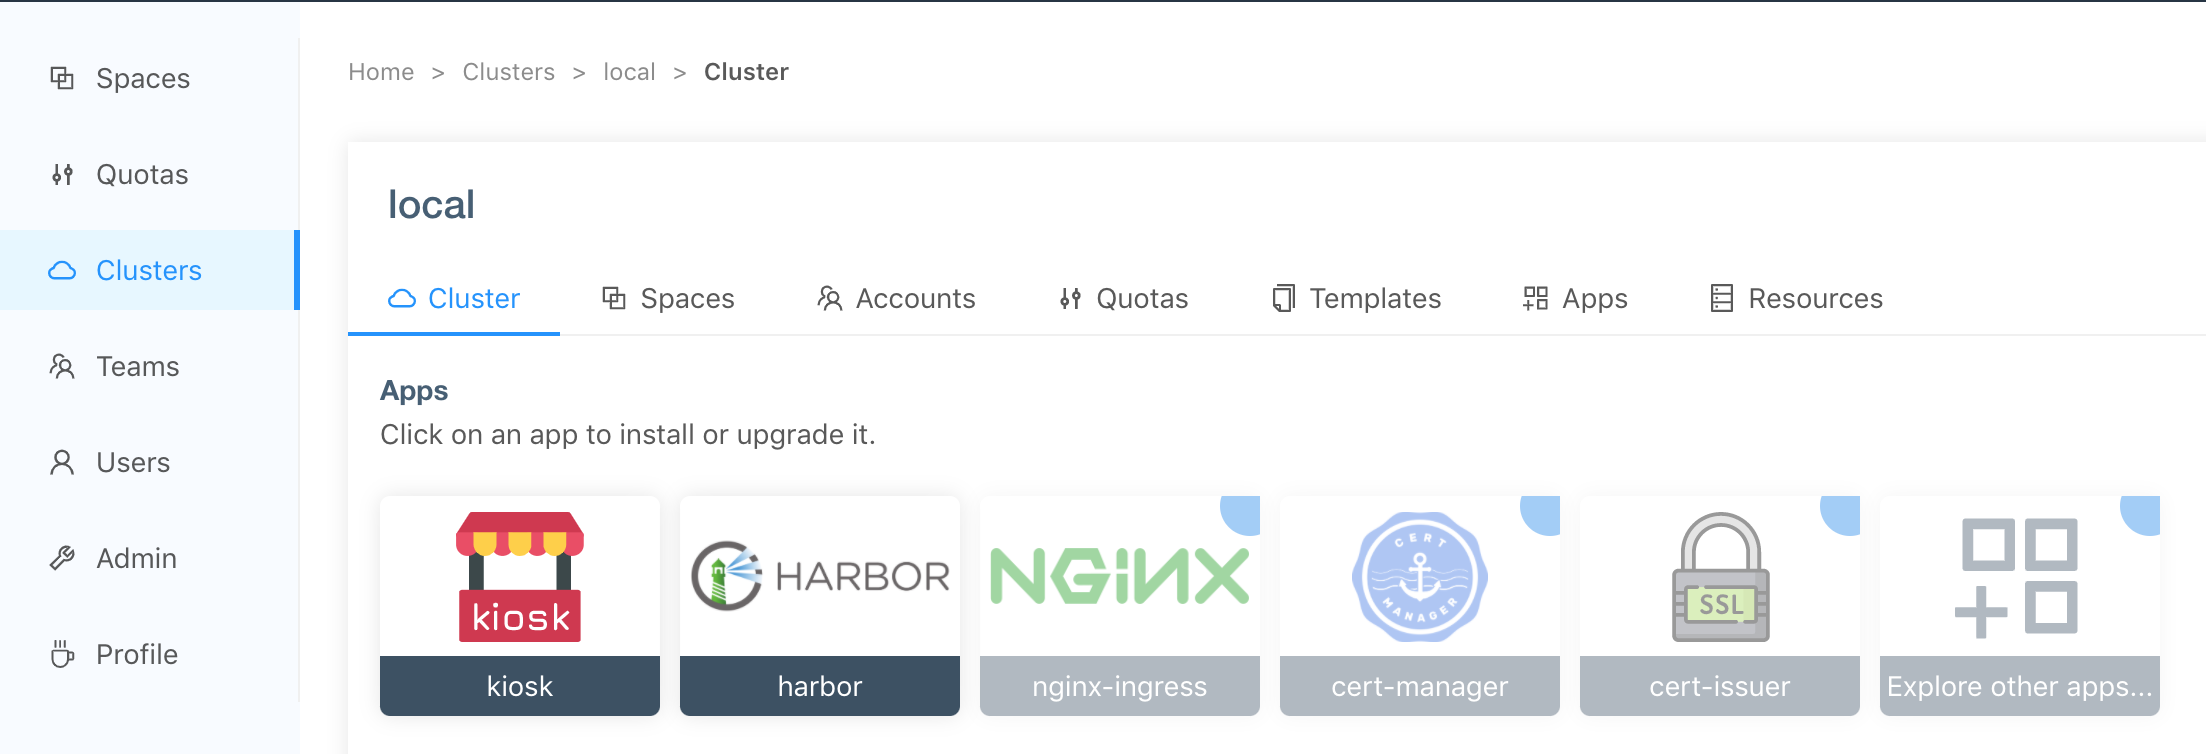
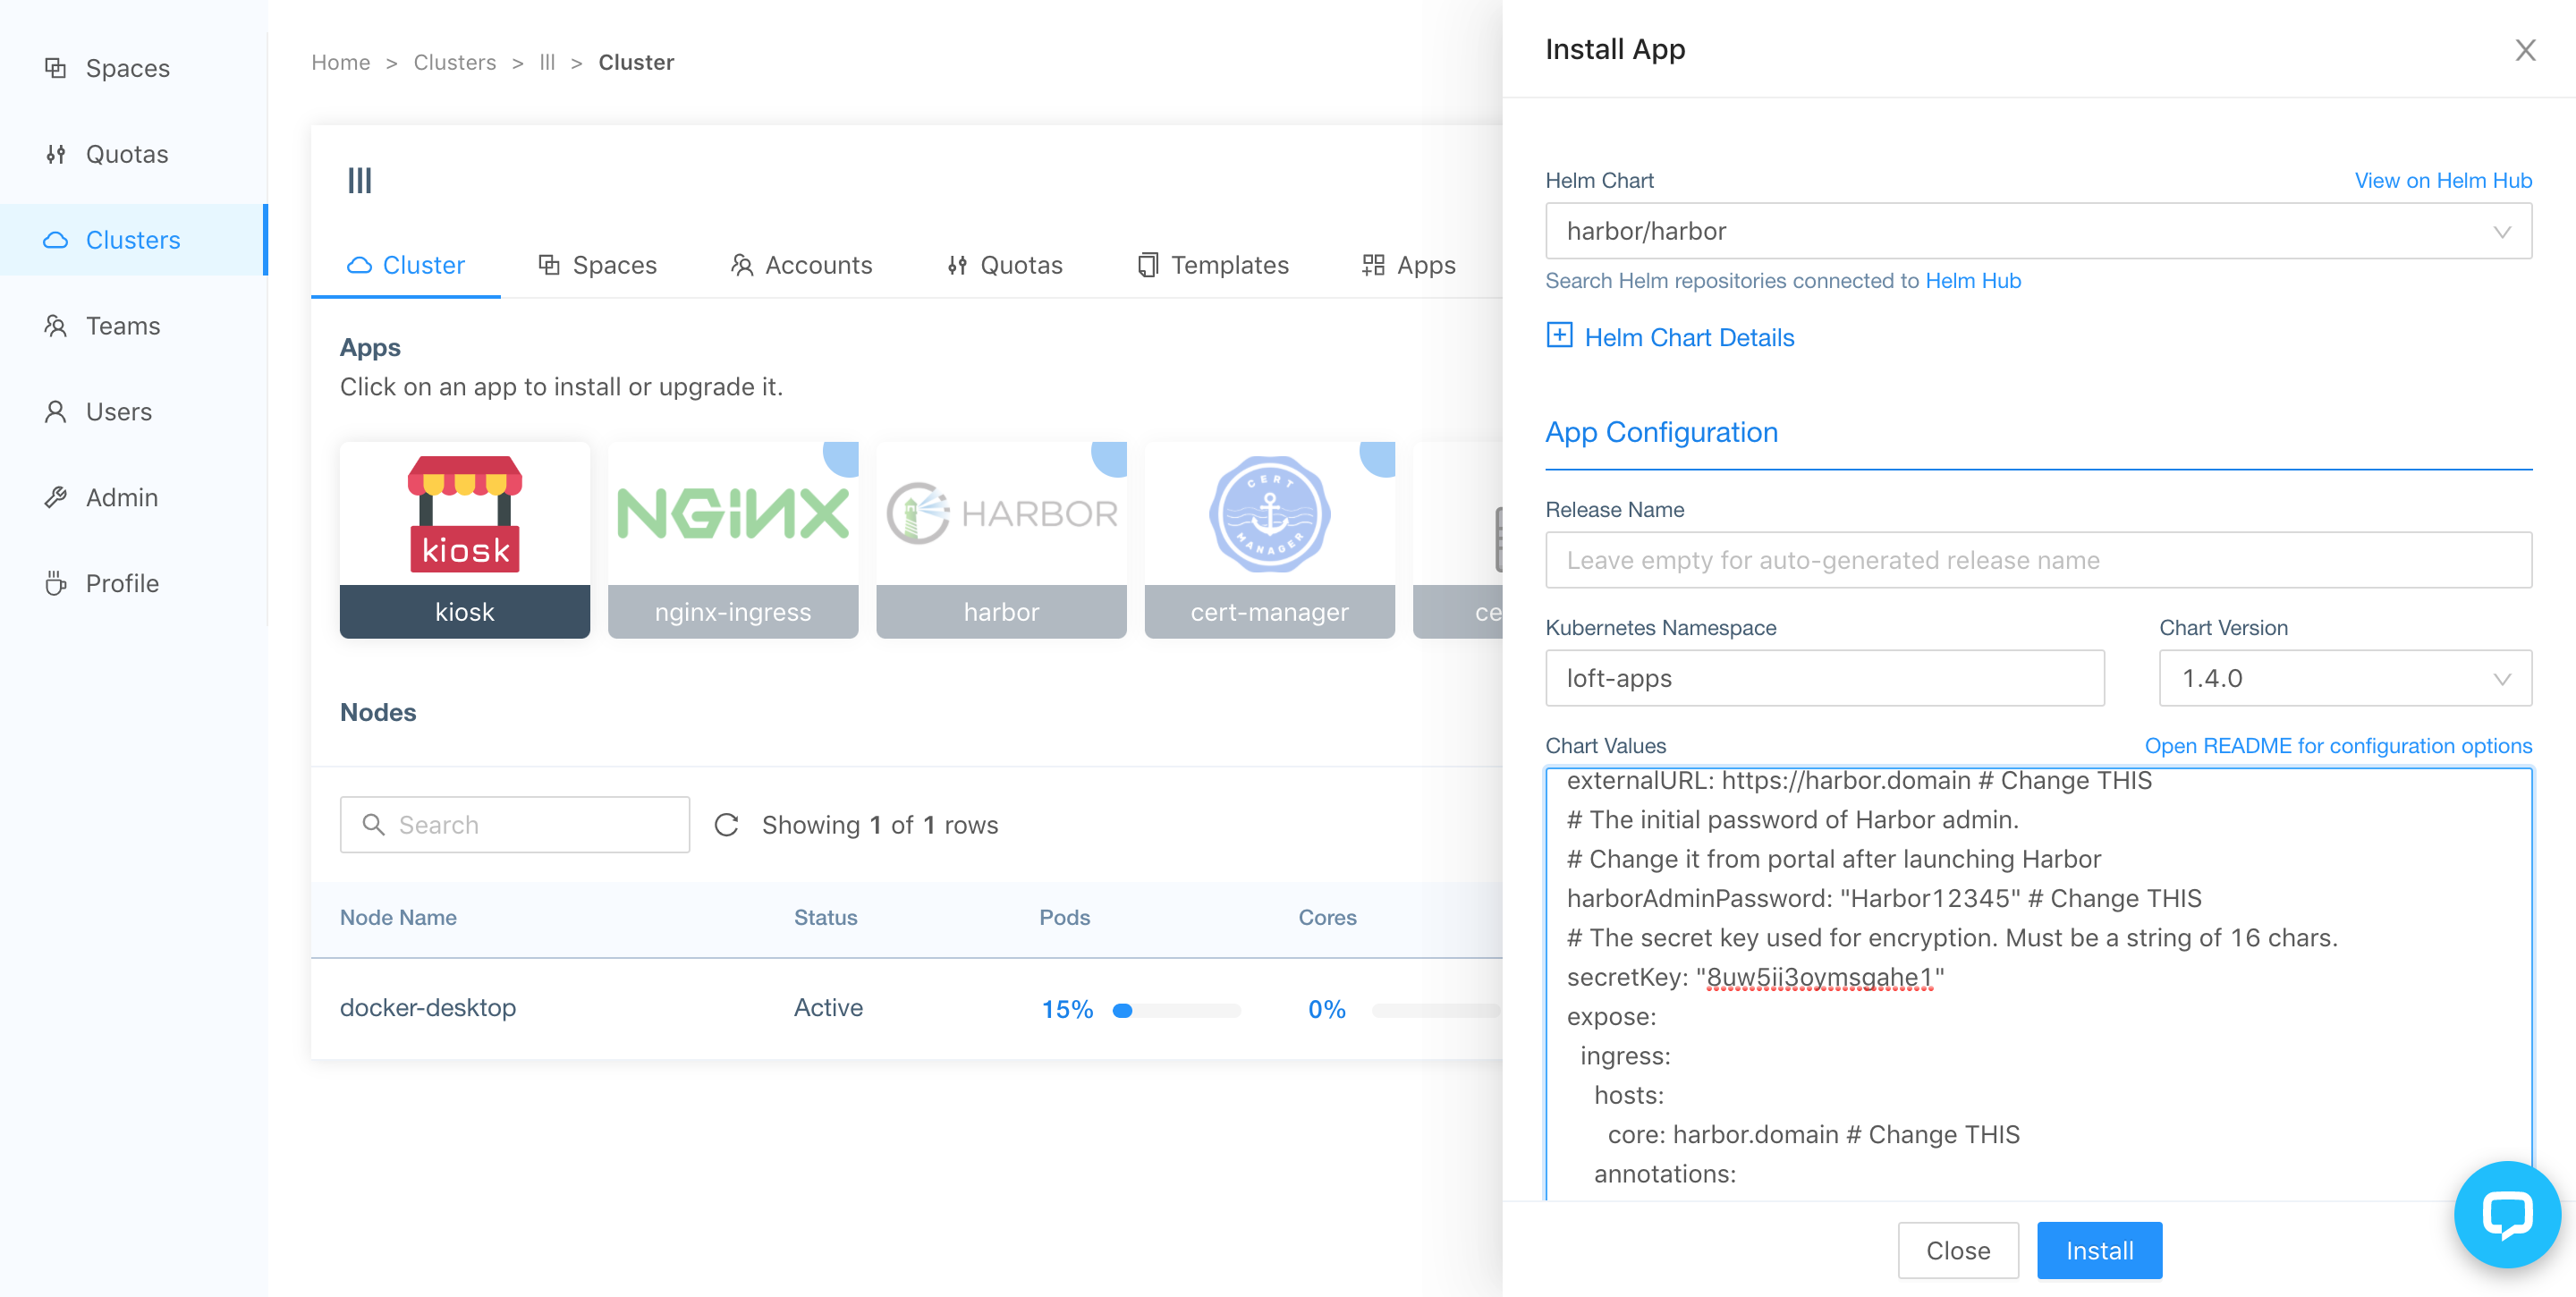
Once you have an ingress controller and cert-manager running, click on the Harbor Icon. The drawer should open, where you are now able to configure Harbor. A complete overview of all Harbor configuration options is available at the official Harbor helm chart documentation.
An example configuration to configure Harbor could look like this:
# The external URL for Harbor core service. It is used to
# 1) populate the docker/helm commands showed on portal
# 2) populate the token service URL returned to docker/notary client
externalURL: https://harbor.domain # Change THIS
# The initial password of Harbor admin.
# Change it from portal after launching Harbor
harborAdminPassword: "Harbor12345" # Change THIS
# The secret key used for encryption. Must be a string of 16 chars.
secretKey: "8uw5ii3oymsgahe1"
expose:
  ingress:
    hosts:
      core: harbor.domain # Change THIS
    annotations:
      # Please make sure you have the Loft app cert-issuer installed
      # for automatic certificate generation
      cert-manager.io/cluster-issuer: lets-encrypt-http-issuer
      kubernetes.io/ingress.class: "nginx"
  tls:
    enabled: true
    secretName: "harbor-ingress-tls-secret"
# The persistence is enabled by default
persistence:
  enabled: true
  persistentVolumeClaim:
    registry:
      size: 5Gi
    database:
      size: 1Gi
    redis:
      size: 1Gi
chartmuseum:
  enabled: false
clair:
  enabled: false
trivy:
  enabled: false
notary:
  enabled: false
After configuring the correct values for Harbor, press the 'Install' button.
If you misconfigured anything, you can just click on the Harbor button again and change the values. After installing the helm chart into the cluster, wait until all Harbor pods and certificates are Ready:
kubectl get po -n loft-apps
NAME                                           READY   STATUS    RESTARTS   AGE
harbor-harbor-core-654897cfb8-r9fkx            1/1     Running   0          89m
harbor-harbor-database-0                       1/1     Running   0          113m
harbor-harbor-jobservice-54fbc699ff-qz2dw      1/1     Running   0          89m
harbor-harbor-portal-6f7f6d5469-98nlb          1/1     Running   0          113m
harbor-harbor-redis-0                          1/1     Running   0          113m
harbor-harbor-registry-857587647c-f2x58        2/2     Running   0          89m

kubectl get certificates -n loft-apps
NAME                               READY   SECRET                             AGE
harbor-ingress-tls-secret          True    harbor-ingress-tls-secret          47s
Now, Harbor should be up and running under your configured URL:
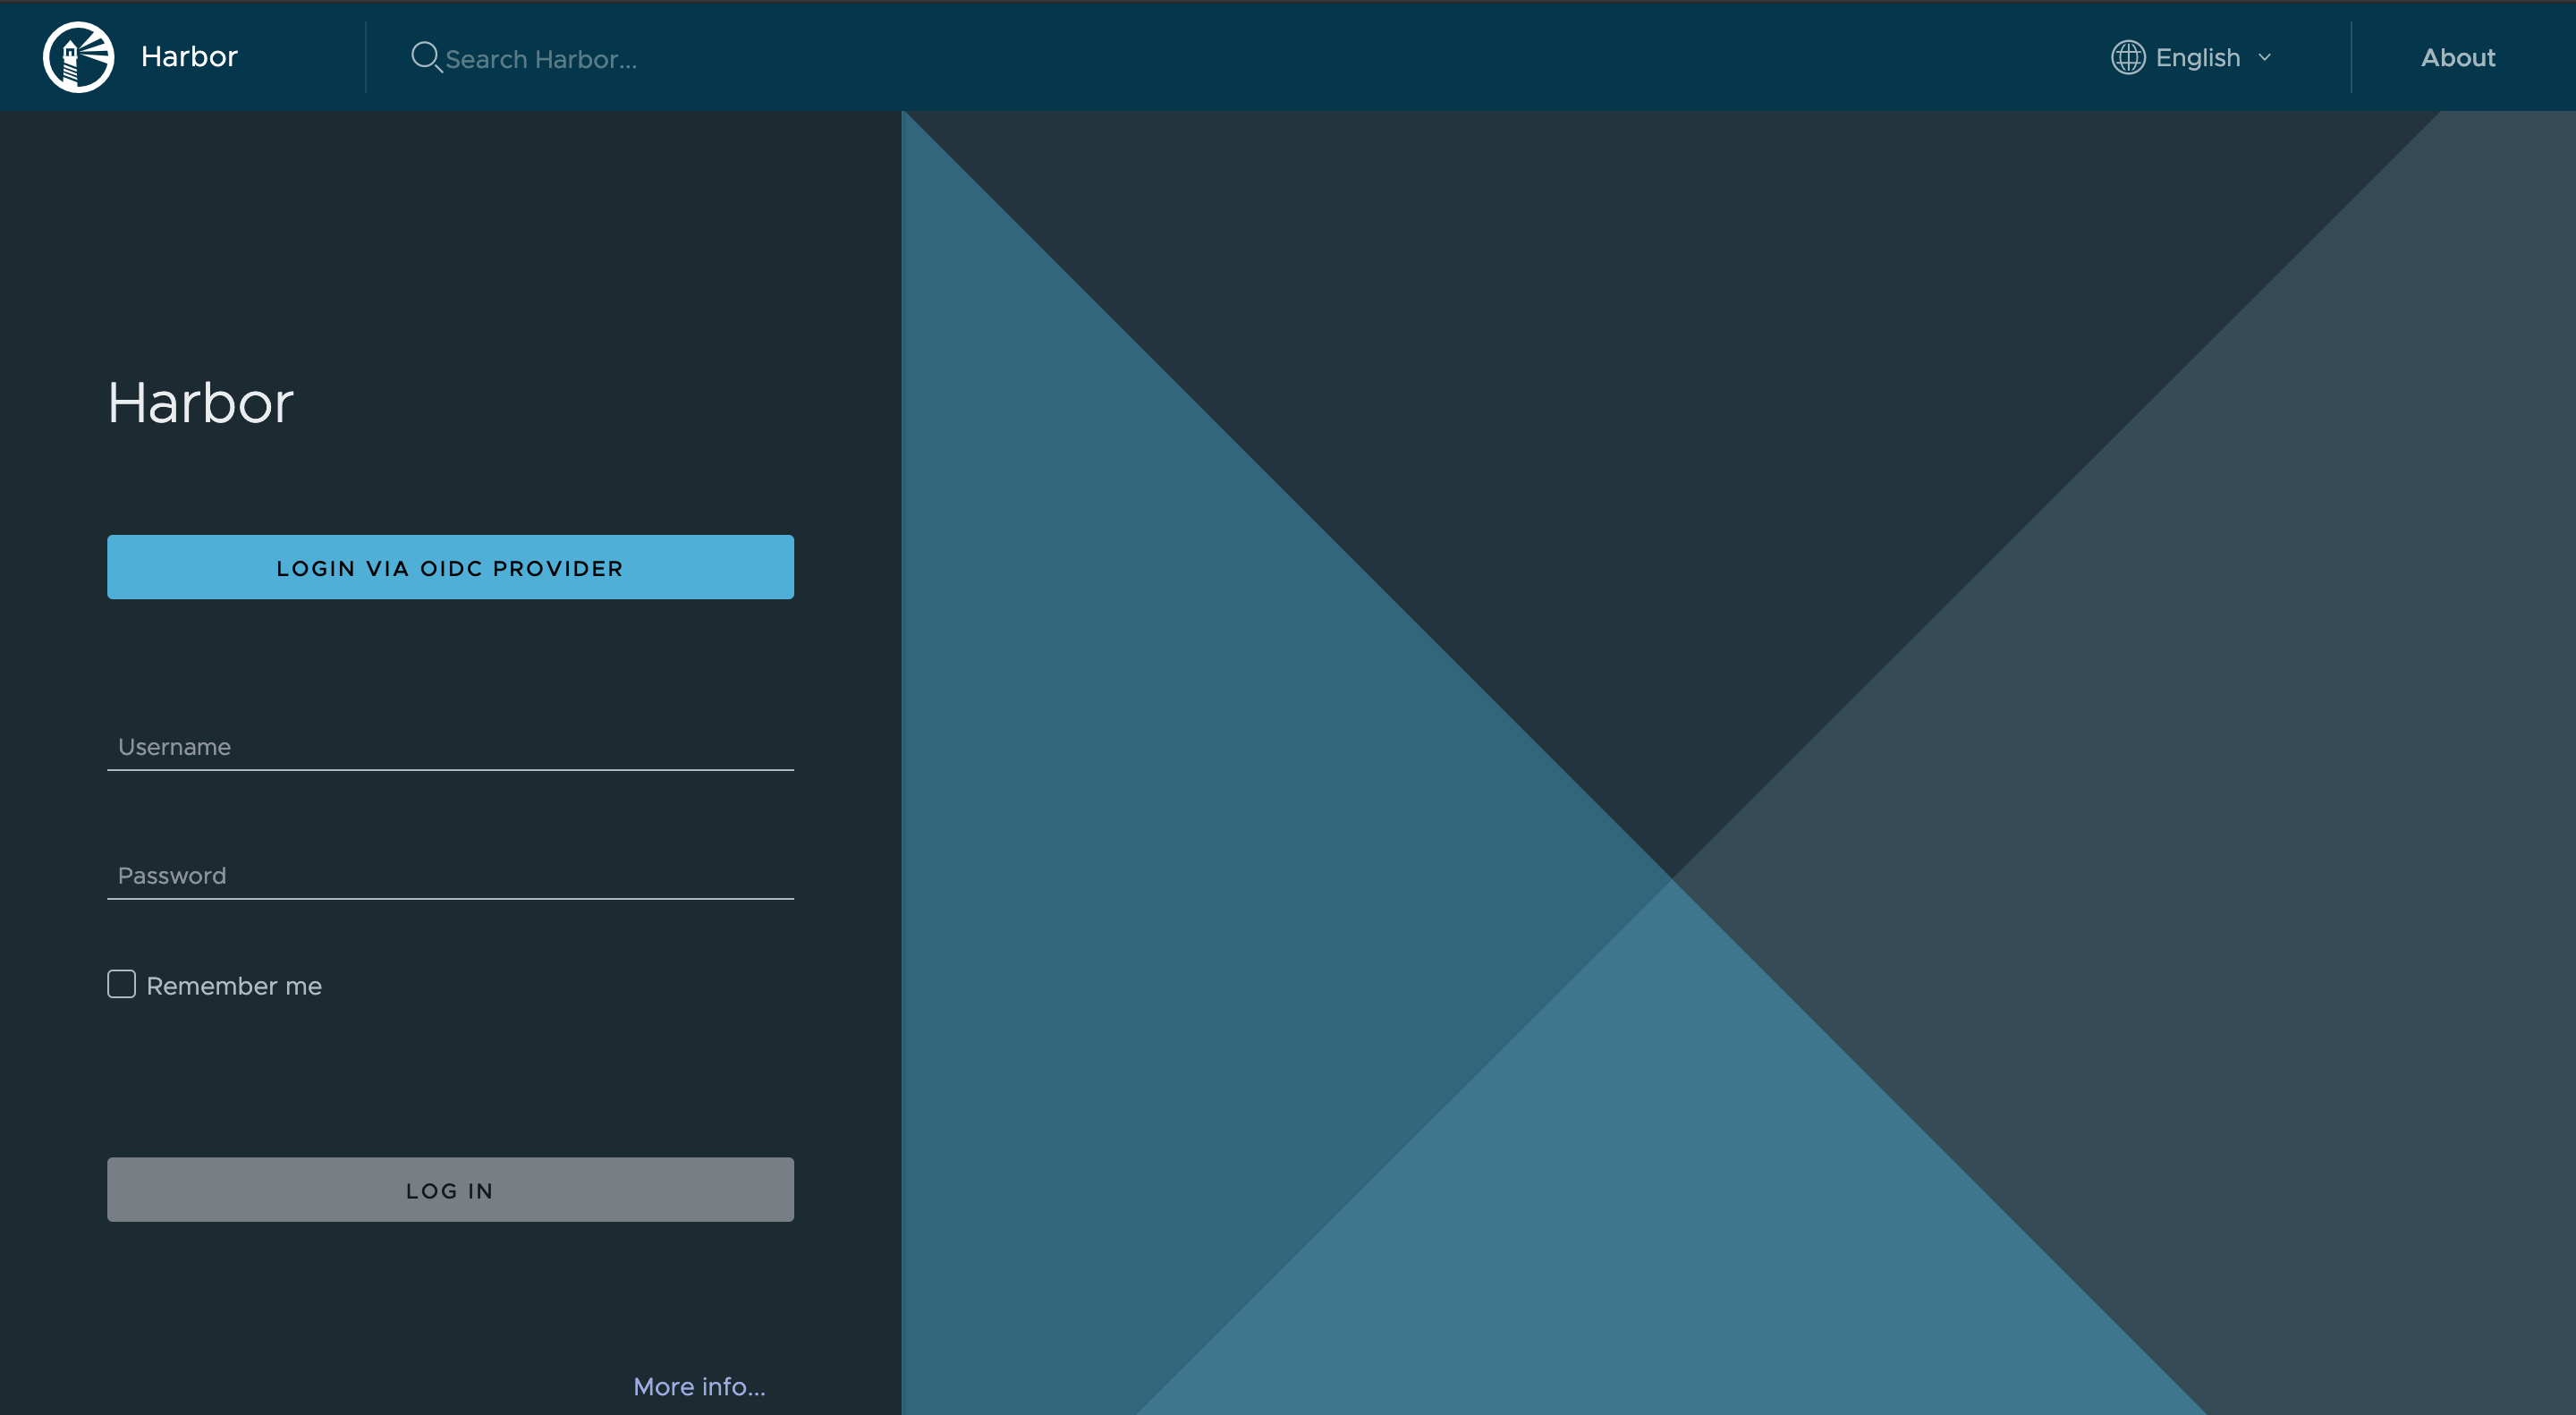
Congratulations, you now have a fully working Harbor instance! See the next chapter to learn how to configure Harbor to handle authentication through Loft.
Harbor Login via Loft
In order to let your Loft users log in to the Harbor instance with their Loft user, you can configure Loft as the OIDC provider for Harbor. To configure Loft as an OIDC provider, you can edit the Loft config in the Loft UI:
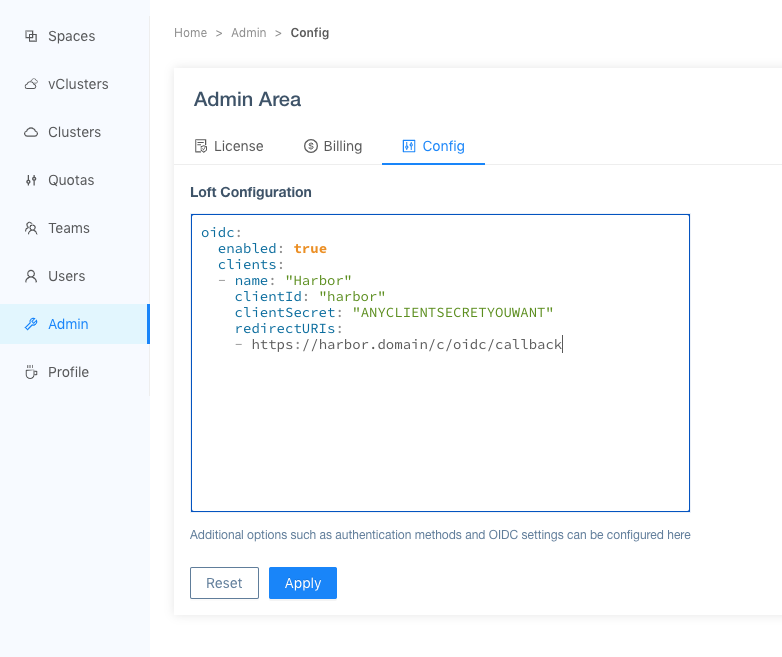
Use the following values to allow Harbor to connect to Loft:
oidc:
  enabled: true
  clients:
  - name: "Harbor"
    clientId: "harbor"
    clientSecret: "ANYCLIENTSECRETYOUWANT"
    redirectURIs:
    - https://harbor.domain/c/oidc/callback
After you have changed the Loft config, head over to Harbor and change the AuthMode in Administration -> Configuration to OIDC:
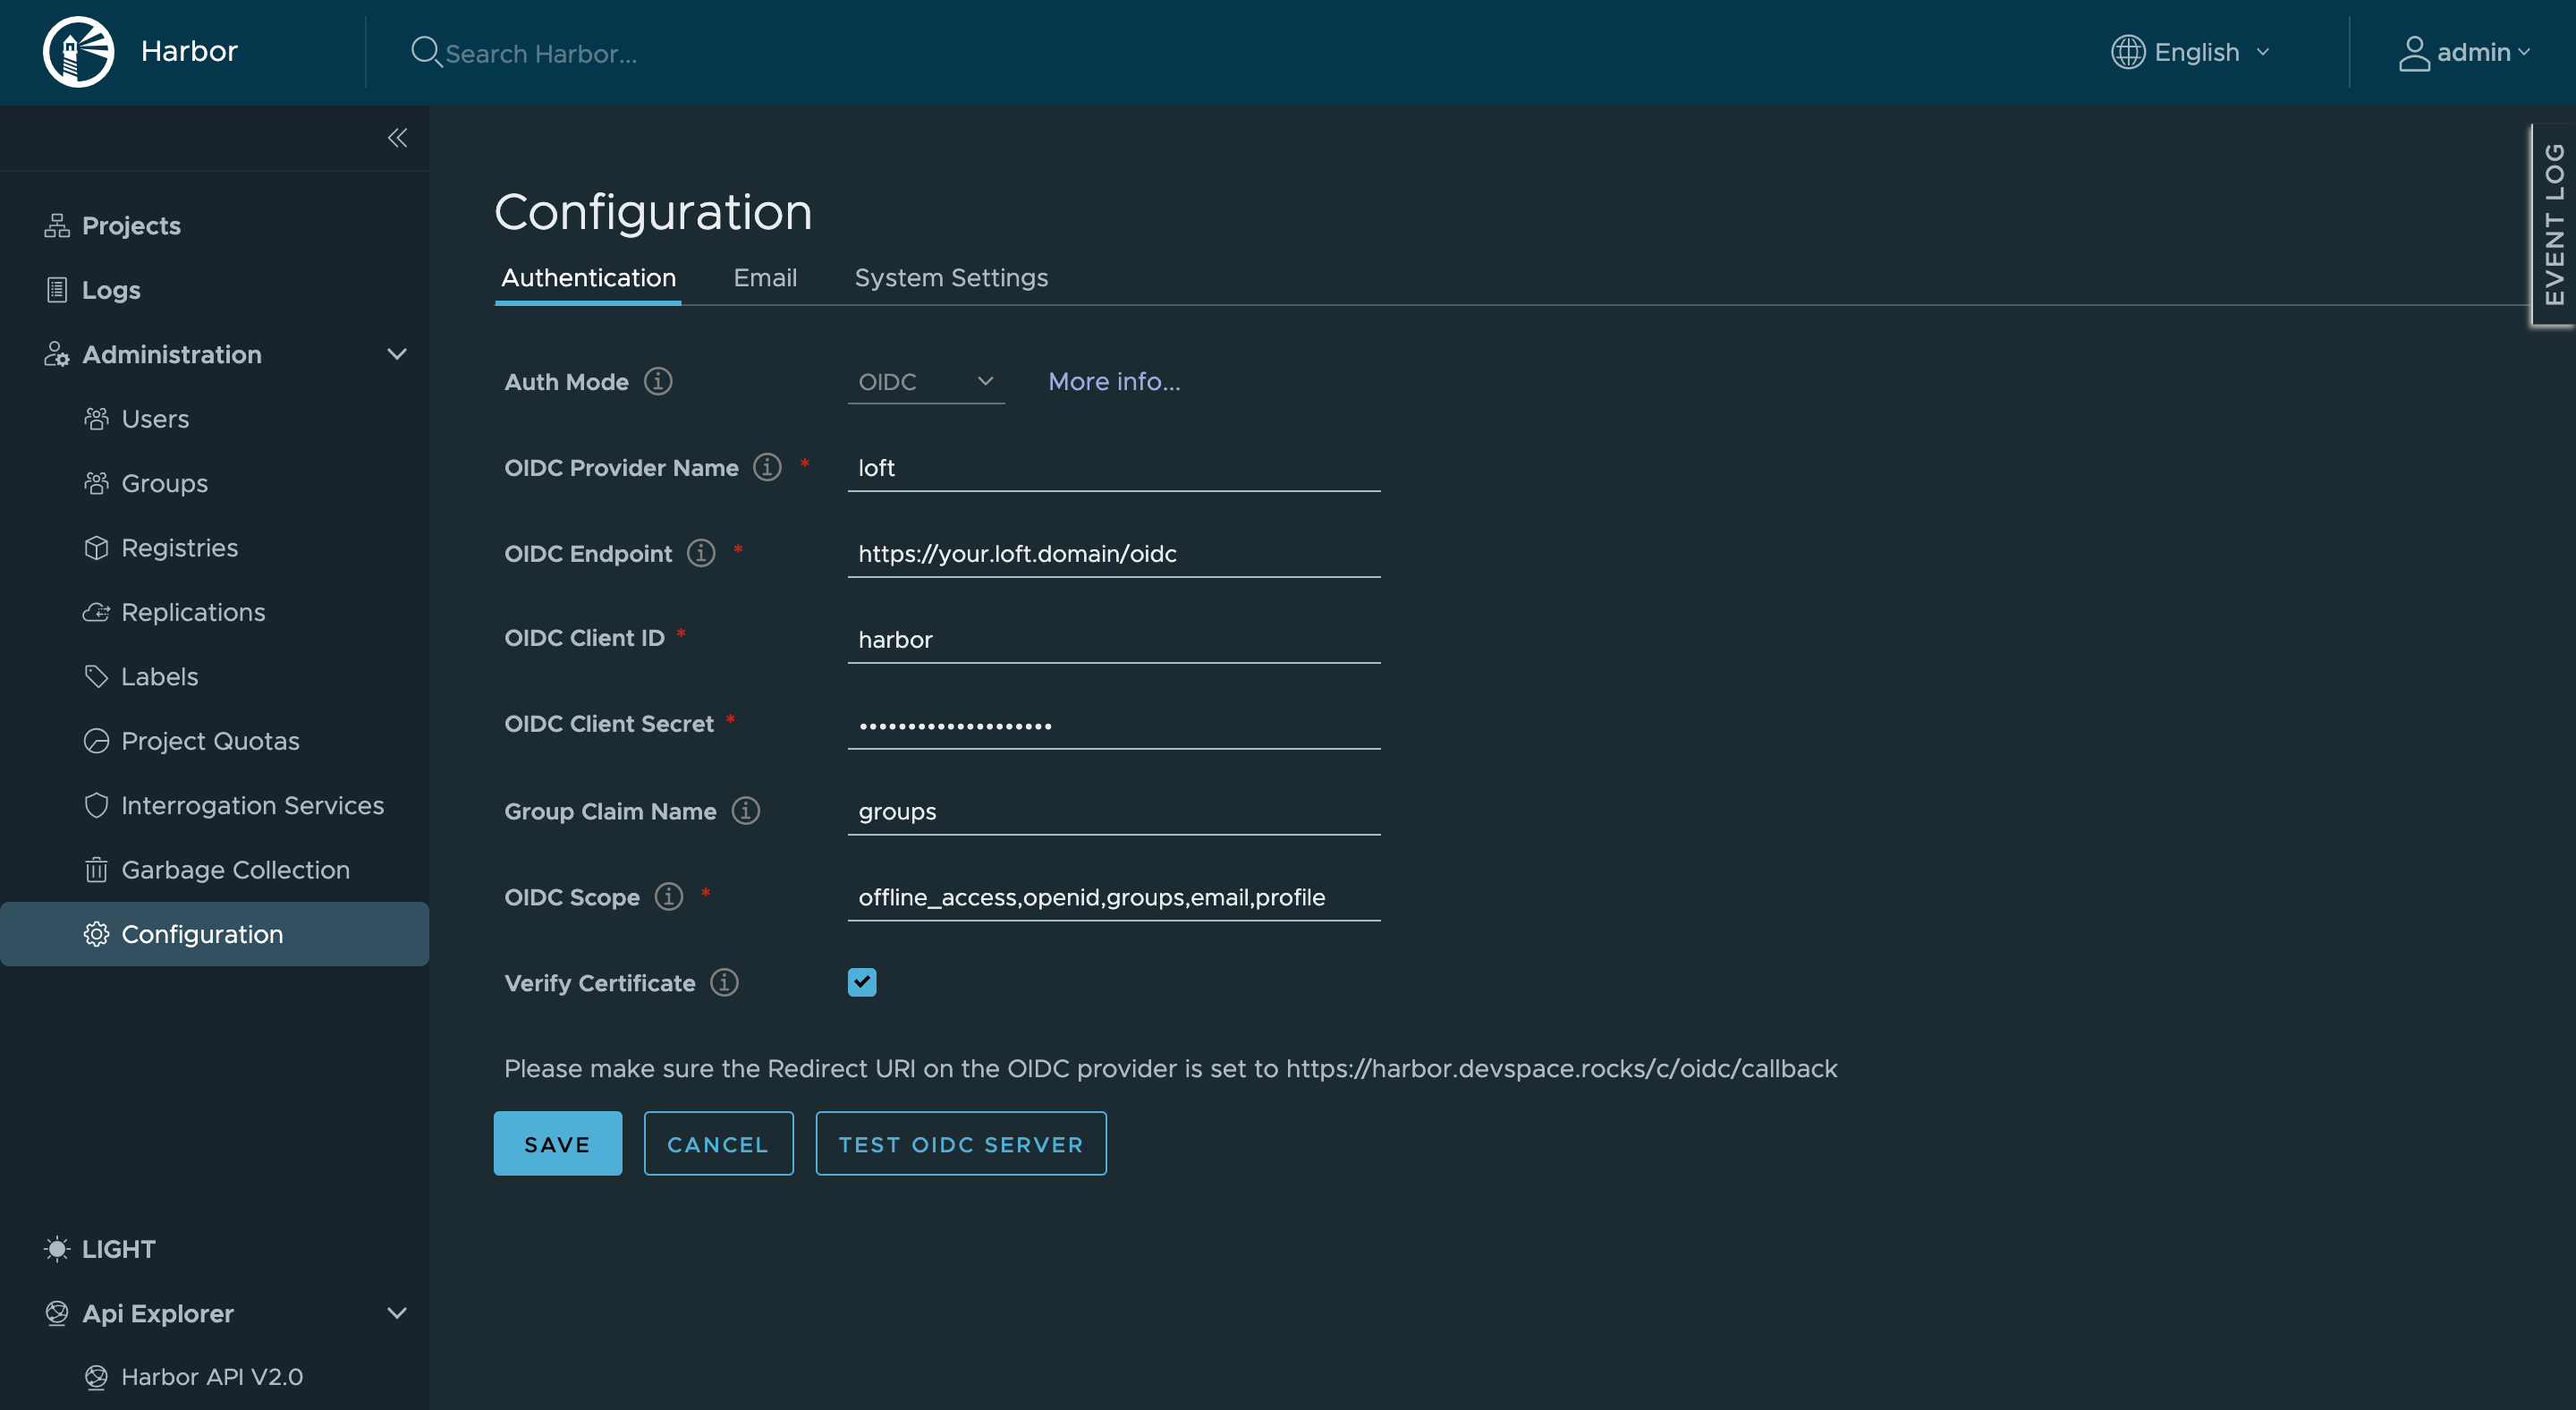
Make sure the field OIDC Endpoint is set to your Loft instance URL with the path /oidc. Furthermore, make sure you use the same client id & secret in the harbor configuration as in the loft-config configmap. After you have configured Harbor with the Loft OIDC options, press 'Save' and you should now be able to log in via Loft to your Harbor instance.
One note regarding Loft teams: Loft teams are passed to Harbor as groups with the prefix loft:team:. If you have configured Loft to use an external OIDC provider itself to log in users, groups will also be forwarded from your external OIDC provider to Harbor.